Laser Cut Raspberry PI 7″ Display Stand

Author: @
License: CC BY-SA
File formats: pdf,svg
Download type: zip
Size:6.02 KB

The file 'Laser Cut Raspberry PI 7″ Display Stand' is (pdf,svg) file type, size is 6.02 KB.

Summary

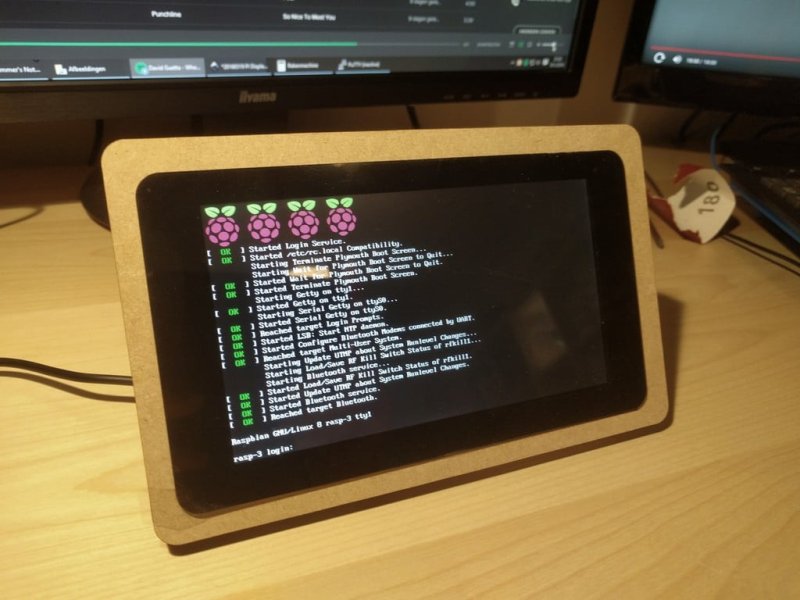
This is an easy to build stand for the 7" Raspberry Pi DSI screen. It is meant to be lasercut on 4mm material (MDF for example). It holds the screen at a 30 degree angle.

Cutting instructions:

  • Use the supplied PDF or SVG to lasercut
  • Part 1 is (File with PT1) is needed 2 times
  • Part 2 is needed only one time

Needed parts:

  • Raspberry PI 7" screen (ofcourse)
  • Lasercut parts
  • 4x M3x16 screws
  • Wood glue

Instructions

Step 1, make sure you get all the parts

Get the parts lasercut (PT1x2) and sand if needed. See needed lasercut parts below

Step 2: Glue the two parts PT1 together

Glue the two parts PT1 together, making sure the are aligned correctly and let the glue dry.

Step 3: Glue PT2 to the two glued PT1 parts

Glue part PT2 to the two glued toghether earlier and let the glue dry

Step 4: Screw screen to backplate

Use the four M3 screws to screw the screen to the backplate

Step 5: Glue the stands to the backplate

Glue the two stands to the backplate aligning them with the notches

20160319_PI_Display_stand_PT1.pdf
20160319_PI_Display_stand_PT1.svg
20160319_PI_Display_stand_PT2.pdf
20160319_PI_Display_stand_PT2.svg

Tags