Author: Donald L. Merand for Explo
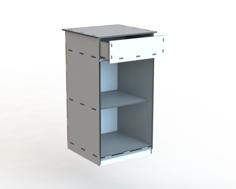
It is a fume extractor of the type that you might purchase for many dollars. We use these at Explo all the time - for soldering projects, next to 3d printers, anywhere we need some fumes managed but don't have a fume hood.
There are many other designs that nominally accomplish the same thing as this, but most of what's on Thingiverse currently seems to be short on the details of how you actually wire it together. Additionally, none seem to be changeable from battery to plug-in and back. The 3d-printed ones also seem less likely to stand up to the rigors of a classroom full of small children.
Our design should be quite durable, and quite versatile, without being overly expensive, especially if you're making more than one. See the "BOM" section below for details.
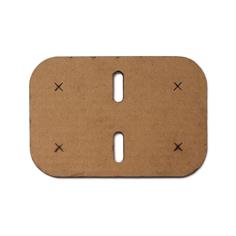
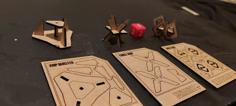
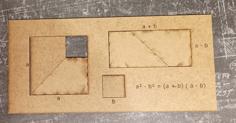
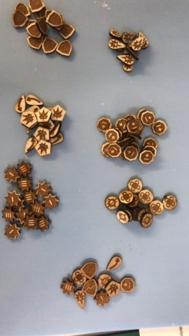
This box is designed to be laser-cut, though with a bit of effort (post-processing and/or adjusting model thickness at the joints) you could very likely 3d-print it as well.
The PDF drawings that are attached to this repository are designed for 4.5mm thick material. If you have a different material thickness, you'll need to use the Box Builder Template template that I designed in OnShape, and adjust the MaterialThickness parameter. From there, you'll have to use Illustrator/Inkscape to re-generate the PDF - use the attached PDF as a reference.
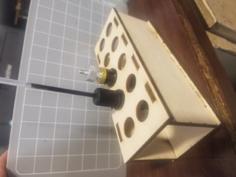
If you want to use a different fan size, you'll need to adjust both the Box Builder Template and the Fume Fan Lid Template to the desired dimensions, then re-create the PDF for laser-cutting as above. It's all parametric, so you can just adjust template variables and re-export new drawings to reflect what you want.
After you've got your PDF, you cut it with your lasers! That part's fun.
To assemble the fans, you'll need to do some soldering. For my fans, I've used JST connectors to keep everything modular. By using JST cables, I can plug the assembly into a battery OR a wall wart as needs dictate. And if the fan were to malfunction for some reason, it would be easy to replace that one part without having to mess with any of the rest of the assembly. Please refer to the pictures for how each connection is attached to a JST cable, and then plugged together. Here's a Video Demo of how it looks when it's all plugged together (outside of the box).
| Name | QTY | Units | URL | $ |
|---|---|---|---|---|
| 12V 120mm Computer Fan | 1 | Fan | http://www.amazon.com/Gdstime-3000rpm-Hydraumatic-Bearing-Brushless/dp/B00N1Y4D32 | $12.99 |
| Carbon Filter | 1 | Pack of 5 | http://www.amazon.com/Carbon-Filter-Activated-Xytronic-Absorber/dp/B005C5HUI8 | $11.68 |
| Power Switch | 1 | Pack of 10 | http://www.amazon.com/uxcell-250V-Solder-Rocker-Switch/dp/B008LT3O14 | $5.36 |
| Power Jack | 1 | Pack of 50 | http://www.amazon.com/50PCS-5-5mmx2-1mm-3Pins-Mounting-Female/dp/B00MJVIFS2 | $7.44 |
| 12V Power Supply | 1 | Wall Wart | http://www.amazon.com/12VDC-Regulated-Switching-Power-Supply/dp/B0099PFYNU | $5.00 |
| JST Connectors | 1 | Pack of 10 each M/F | http://www.amazon.com/RGBZONE-20Pairs-2-Pin-Connector-Female/dp/B013WTV270 | $6.09 |
| 3S 12V LiPo Battery (optional) | 1 | Battery | http://www.amazon.com/Turnigy-2200mAh-20C-Lipo-Pack/dp/B0072AEY5I | $15.65 |
| Total Cost (No Optional Parts - First Fan): | $42.47 | |||
| Total Cost (w/ JST - First Fan): | $48.56 | |||
| Total Cost (w/ JST + Battery - First Fan): | $64.21 | |||
| Total Cost (Subsequent ~10 Fans - No Battery) Each: | $12.99 | |||
| Total Cost (Subsequent ~10 Fans - With Battery) Each: | $28.64 | |||
| Note: Carbon filters will need to be replaced every few months of use |
| Fume_Fan_Box_-_v2.ai | 90.8KB | |
| Fume_Fan_Box_-_v2.pdf | 95.0KB | |
| Fume_Fan_Lid_-_Holes.ai | 96.7KB | |
| Fume_Fan_v2_-_2.6mm_Acrylic.pdf | 94.6KB | |
| Fume_Fan_v2_-_Cell_Structure_-_2.6mm_Acrylic.pdf | 201.4KB |