Details of XLNC Rev 2.
If you are looking for the original XLNC - Rev 1, click here https://www.thingiverse.com/thing:1855391
Follow project updates on https://crunchysann.com/
Assembly videos in change-log below or click on any video to jump to the youtube playlist:
Basic final specs as pictured.
- Machine footprint: 5'-5'-2.2'(L-W-H) (You can simply use shorter tubing to make a smaller, much more rigid machine)
- Very large Build Volume when 3D printing: 32in-40in-12in(L-W-H) or 800mm X 800mm X 305mm
- Very large Area when Milling: 32in-40in-Tool length (~4" +)
- Motion: 1.25in ID (38.3mm)OD. Electrical conduit with user adjustable roller bearings
- Use these SS tubes instead if you want to expand your machine cutting/ printing area past the specs above and for smoother finish on prints. Direct swap with no additional modifications. 1.5" OD 304 stainless steel rails. https://www.speedymetals.com/pc-4485-8276-1-12-od-x-065-wall-tube-304-stainless-steel-annealed.aspx
- Materials supported: Cutting medium to soft grade aluminum and other softer materials
- Intended usage CNC milling, Laser etching/cutting. 3D printing multiple objects simultaneously
Design Features:
- Gantry on Z axis: The Gantry goes up and down on this design.
- Steel re-enforced belts: Use 9 -10mm wide T5 - 5mm pitch (best) or GT3 spec belts and pulleys (MXL belts will fail very early ~ 10hrs use).
- Stackable: Many of these machines can be stacked on top of one another
- Support for toolset expansion: The gantry is made to support Wood routers, Dremels, heavy spindles, 3D printing filament Extruders (1 and up using mounting brackets), and is intended to support future robotic arm addition for hybrid 3D printing and finish milling operations.
- Enclosure friendly: Since all movements are constrained within the machine's footprint, a full enclosure can be made for it.
- Stiffer XY gantry: Future tests will be performed to get some actual numbers as to how accurately this particular design can cut hard materials. Since 3D printed parts are not well suited for FEA simulations, do not expect such testing to occur.
- Adjustable Belt and Bearings: Belt tension is achieve using off the shelf products you can source at your local hardware store.
INSTRUCTIONS:
Download the following items:
- "Rev 2.ZIP": This contains all mechanical STL and SolidWorks Part files for this machine. This is all you need in case you plan to use your own motion controllers (electronics) other than what is listed on this page.
- "BOM.XLS": Bill of Materials (Mechanical BOM is posted with McMaster Part numbers where appropriate).
- "XLNC PANEL BETA 1.ZIP": This is the XLNC plugin for Repetier Host (Extract and see installation instructions.docx file for install instructions)
- "HSMWorks_3_Axis_Repetier_Rev5.js": Custom post-processor for SolidWorks HSMWorks (currently limited to 3 Axis X,Y,Z).
- If using Vectric Aspire, download the Vectric Post for XLNC (Pending Upload).
Watch assembly instructions
- Build your own enclosure or the one that will be uploaded
Update 1/14/2018: - Part 1 video added
Update 1/15/2018: - Part 2 video added
Update 1/16/2018: - Part 3 video added
Update 1/16/2018: - Part 4 video added
Update 1/16/2018: - Part 5 video added (updated video)
Update 1/17/2018:
- New set of files uploaded (Includes fix for Z-axis roller couplers and new belt anchors)
Update 1/20/2018: - Part 6 video added
Update 1/28/2018: - Part 6B video added
Update 1/30/2018: - Part 7 video added
Update 1/31/2018:
- Rev 2.ZIP updated: Added Wire guide chain anchors for X / Y axis
Update 2/9/2018:
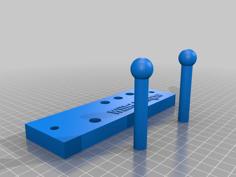
- Rev 2.ZIP updated: Added Bed pipe holders
Update 2/23/2018:
- Rev 2.ZIP updated: Added revised Bed pipe holders motors have been wired. adjusting repetier firmware
- XLNC panel plugin status: Adjusting for execution on AMDx64 processors.
Update 3/11/2018:
- Added 3D models for Diamond hot-end mount
- Upgraded bed mounting brackets for stronger parts
- Fixed panel compatibility with AMDx64 processors
- Packaging XLNC Panel public Beta 1.
- Parts Zip file updated.
Update 3/13/2018:
- Snowed in sooooooo ¯_(ツ)_/¯
- Shortened diamond hot-end spacer length
- Updated REV2.ZIP file with latest models.
- HSMWorks BETA post-processor added (3-Axis initially), generates Repetier and Marlin compatible G-code --Install HSMWorks (or free version) in solidworks and load this custom G-code (maybe video will follow once XLNC panel is released).
Update 3/17/2018:
Update 4/1/2018:
- Uploaded rudimentary mechanical BOM: QTY is for each piece (Not Packs). McMaster part numbers are added where appropriate, but feel free to source parts elsewhere.
- Uploaded Solidworks source files and Mechanical assembly in MainFrame.Zip file.
Update 4/22/2018:
- Uploaded XLNC Panel Beta 1 -- See File named XLNC PANEL BETA 1.ZIP
--Description: Built-in user interface for users of Repetier Host and Repetier/Marlin firmware to streamline usage of their printers as CNC mills or Laser cutters.
-- Currently Limited to 3 Axes but plans for 4 Axes may happen.
Installation instructions: - extract or unzip XLNC PANEL BETA 1.ZIP and read the installation instruction doc file
Update 4/25/2018:
- Added basic wiring diagram explaining how to connect RADDS board to multiple GRBL shields, see file named "High level wiring diagram.pptx".
Update 5/9/2018:
Update 5/27/2018:
- Calibration completed
- Uploaded new Mixing extruder mount. Allows usage of Bstruder bowden style filament drive (https://www.thingiverse.com/thing:711401) with the diamond hotend. Instructions: Download zip file Rev2.zip..print the parts inside Rev2.zip/New Parts/Diamond Extruder Mount. Assembly is very simple (see instructions and screw dimensions on thing 711401)
Update 6/5/2018:
- Well, the MXL belts broke (they weren't adequate either way) -- time for 9mm wide HTD steel fiber reinforced belts and pulleys (5mm pitch)
- Pending update to XLNC Panel app to allow external gcode file execution
- Started planning camera based tool offset alignment ad-don.
Update 6/25/2018
Update 6/30/2018
- Testing new frame coupling design, see thing https://www.thingiverse.com/thing:2984817
- The idea is to get a strong grip on electrical conduit without cracking the plastic pieces. --
- This requires new Z axis motor mount for NEMA 17/23
- Added bed leveling clamps for use on Glass bed when using as 3D printer.
Update 7/20/2018
- re-enabling work in progress indicator due to upcoming upgrades to the z axis
- apparently underestimated the thursts/forces applied to lower bearings and cheaping out on these leads to failed bearings on the z axis.
- remodeling z axis frame supports so they can be attached to thing 2984817
- searching for heavy duty drop in replacement lower thrust bearings
- upgraded grbl shields to tb6560 boards for the time being (highly recommend 4 nema 23 motors for z axis and heavy duty drivers.)
Update 8/4/2018
- Testing new Z axis mounts and drive nut mount
- All printed parts can now be assembled without worrying about breaking plastic parts
- All X,Y,Z Motor drivers upgraded to DM542T (RADDS board remains the motion controller)
- Planing a new site to host projects and updates...Look forward to XLNC REV 3 (hopefully the last one :)
Update 2/20/2019

