Youtube Demo link: https://youtu.be/9ZrCs1jOEnQ
Youtube build info: https://youtu.be/SRAIySsEU2E
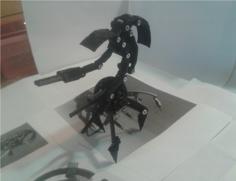
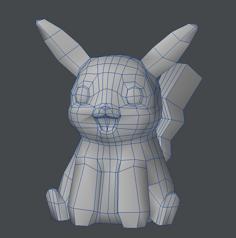
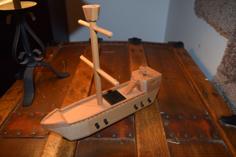
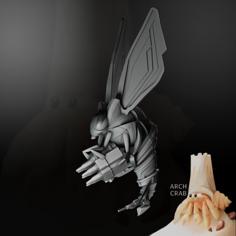
This is a remote controlled Vincent from the 1979 movie "The Black Hole". It's roughly based on an unreleased toy by Mego. One Ad in a Marx UK says the toy is 12 inches tall while another ad says it's over 20 inches tall. The version shown in the video ad appears to be the 20 inch version. My version is about 12.5 inches tall.
It has a motor in each foot for steering. It also has a motor that rotates the head. A third motor extends and retracts the two "lazer" weapons. The lazers are just leds.
I've also added a heartbeat display on the front. The display is made from two Adafruit 8X8 led matrix displays. I also added sound effects for the lazer and it plays Vincent sound bites from the movie. The displays and dfpalyer are driven by individual Picaxe 08M2 micro controllers.
The power supply is 3 AA batteries or 4.5 Volts. The batteries are in battery compartments in the feet. There are 4 compartments but only 3 are used. One is left empty. The batteries are wired in series. The motors and electronics are all driven from the same supply voltage. The dfpalyer sound module, led displays, and micro controllers will not tolerate 6 Volts so don't use 4 batteries. I initially designed it with four compartments to have the option of 6 volts but later decided to add the led displays and sound effects.
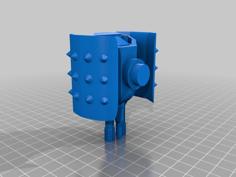
The lazer weapons are extended and retracted by a dual shaft yellow tt motor. I used slip clutches between the motor and the levers that move the lazers in and out. The slip clutches are made from an inner wheel and outer drum with O rings providing contact between the two. This is an inexact method. You can use 1 or 2 O rings to provide more or less friction.The ideal is to allow the motor to keep turning and not stall when it reaches the end of it's stroke. The O rings for the tires and slip clutches are from a Harbor Freight O ring kit. The wheels are number 214 in the kit with an ID of 24.7 , OD of 31.7, and section of 3.5MM. The wheel O rings are glued on with super glue. The slip clutch O rings are number 115 with an ID of 17.8, OD of 22.6, and section of 2.4mm .
This is not an easy build because of the electronics but the toy can be built without the heartbeat display or sound effects. The TX RX are available on AlieExpress and are replacement parts for a RC excavator. I paid under 20 USD but the first one had a bad receiver and I had to order another one so it's a crap shoot. The Adafruit displays seem to be out of stock right now.
I used 2 Picaxe 08M2 micro controllers. One each for the display and sound effects. The display has the 2 8X8 matrices soldered side by side to a small piece of pcb. The picaxe board is made from a PICAXE-08 Prototyping Board that has the bottom part sawed off. The 4 wires from the Picaxe(VCC, GND, SDA, SCL) board are then connected to the display boards with lengths of wire. If you saw off the board like I did you need to run 2 jumper wires on the bottom of the board to for VCC and GND. I made a custom PCB for the Picaxe dfplayer. The Picaxe mcus and "PICAXE-08 Prototyping Board Kit" are available from the Robotshop or Sparkfun. If your new to the Picaxe the "PICAXE-08M USB Starter Pack" would be a good option since it contains the programming cable. The display and dfplayer could be driven with Arduinos. If there is any interest I could show how to do that.
To wire the leds you need a 220 Ohm resistor for each led. You choose the led color.
The switch in the link is a 3 position switch which is the only one I could find with the hole spacing I wanted. If you can find a 2 position switch of this size it will work.
The RC transmitter and receiver are from AlieExpress: search for "15CH 2.4G Radio Receiver Parts DC 3V Transmitter 3.6-8.4V Receiver Board for Huina 350/550 50m Wireless Remote Control Diy parts"
The screw used are all 3MM of various lengths. I just buy an assortment like the one in the Amazon link and refill as needed. A few longer screws are needed for mounting the motors. I think I used 30MM. You will also need 4 3mm nylon filled nuts.
I designed the DFlayer pcb so it could be made on my 3018 cnc with isolation routing so it has big traces and 1 jumper wire on the top layer.
The schematic and pcb design can be opened in the Easyeda editor here:
https://easyeda.com/editor#project_id=d9d8039410114744a24b90352b48757b
I have added a zip file containing the Picaxe programs and the schematic/pcb file that can be loaded into Easyeda.
I printed mine on a Bamboo Labs A1. Some of the prints require a lot of supports. On the mid_body I used supports in the cavities where the lazers and arms go. They weren't too bad to remove but you mileage may vary. I used supports so the bridges wouldn't hang down and interfere with the arms and lazers moving in and out. there are some sacrificial bridges you need to trim out.
The leg_extension parts have to be glued to the foot_bottom parts. I used Weld 16 glue but super glue might work. I didn't glue the foot_bottom parts to the bottom_body. The screws through the tie_bar seem to hold it together. You could use E6000 to glue them if you want. The ears are glued to the head with super glue. The eyes seem to just snap in place but you can glue them.
The hat is held to the head with magnets. The back_shell is also held in place by magnets although on mine it fits snugly without them.
This is a big project and I'm sure I have left out some details so leave a comment if you need any additional info.
Picaxe 08M2: https://www.robotshop.com/products/picaxe-08m2-microcontroller-chip
PICAXE-08 Prototyping Board Kit: https://www.robotshop.com/products/picaxe-08-prototyping-board-kit
PICAXE-08M USB Starter Pack: https://www.robotshop.com/products/picaxe-08m-starter-pack-usb
2 ball bearings for castors: 3/8 inch or 9.5 MM
1.5mm X 6mm magnets
| arm_tensioner_left.stl | 20.1KB | |
| arm_tensioner_right.stl | 20.1KB | |
| back_shell.stl | 346.1KB | |
| battery_cover_X4.stl | 11.1KB | |
| bottom_body.stl | 778.2KB | |
| dfplayer_board_plate.stl | 86.3KB | |
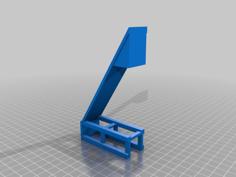
| display_stand_X2.stl | 191.7KB | |
| ear_X2.stl | 12.2KB | |
| eyes.stl | 73.8KB | |
| foot_bottom_left.stl | 592.8KB | |
| foot_bottom_right.stl | 592.8KB | |
| foot_plate_left.stl | 149.1KB | |
| foot_plate_right.stl | 149.1KB | |
| front_arm_mirror_X2.stl | 44.1KB | |
| front_arm_X2.stl | 44.1KB | |
| hat.stl | 942.2KB | |
| head.stl | 437.7KB | |
| head_ring_gear_half.stl | 225.9KB | |
| head_ring_gear_other_half.stl | 224.5KB | |
| heartbeat_screen.stl | 154.2KB | |
| lazer_back_X2.stl | 38.5KB | |
| lazer_cap_X2.stl | 255.3KB | |
| lazer_drive_arm_X2.stl | 15.1KB | |
| lazer_front_X2.stl | 14.3KB | |
| lazer_motor_mount.stl | 85.6KB | |
| lazer_motor_mount_cap_X2.stl | 34.8KB | |
| left_side_arm_rod_X2.stl | 55.2KB | |
| leg_extension_left.stl | 41.1KB | |
| leg_extension_right.stl | 41.5KB | |
| mid_body.stl | 398.4KB | |
| rx_board_plate.stl | 114.6KB | |
| side_gripper_X2.stl | 24.3KB | |
| side_grip_half_X2.stl | 46.8KB | |
| side_grip_other_half_X2.stl | 29.4KB | |
| slip_clutch_inner_X2.stl | 487.8KB | |
| slip_clutch_outer_X2.stl | 76.4KB | |
| spacer_X2.stl | 57.9KB | |
| Spur_Gear_12_teeth.stl | 130.9KB | |
| tie_bar.stl | 22.9KB | |
| top_body.stl | 541.0KB | |
| wheel_X2.stl | 767.7KB | |
| zip_files.zip | 1.9MB |