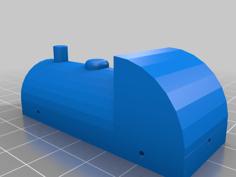
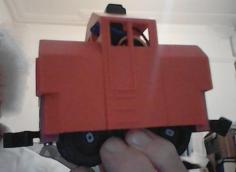
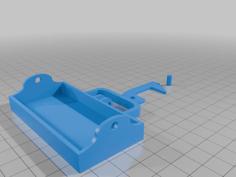
This steam-outline battery engine uses a similar mechanical layout to some of my other engines. The external design is heavily influenced by the Hornby clockwork tank engines intended for 2-foot radius 0-gauge tinplate track. The idea is that children can play with the trains without the risk of them damaging an antique engine, or an exploding spring damaging a modern child unused to clockwork machines. It is also designed to operate operate around tight curves such as those found on wooden railways. Hence it will also operate on Plarail. The wheels have flanges and treads so it will run on conventional 0-gauge track, e.g. the fully printable OS Railway found on Thingiverse, vintage BigBig Train track, vintage Hornby and Lionel tinplate track, also modern Lionel/Disney supermarket train sets.
This engine is 30mm shorter than the Hornby so it can be printed on a 100mm bed. The wheelbase is about 8mm less so it can travel around the 9-inch radius curves of a wooden railway.
As with some industrial locomotives the couplers swing from a pin in one of several slots.
You may wish to rotate some parts for printing so as to minimize supports.
The motors are cheap yellow geared motors with an output shaft on each side. The nominal voltage is 6V but they run well enough on 3V. You will not find these motors on a Mars rover.
As yet there are no holes for switches. You can mount a small slide switch in the driver's door but this is ugly and requires two 2mm holes to be drilled to suit your switch. You can do the same on the fireman's side so the engine can go forwards, backwards and stop, Alternatively you could fit a 3-position centre-off double pole toggle switch to the back of the coal bunker. It's not very realistic but is easier to operate. Lastly you could fit wi-fi or other remote control. Eg, https://www.thingiverse.com/thing:2575667
Unfortunately the loco has just failed the Toddler Test because she finds the slide switch hard to use when the train is on the track. Hence the "work in progress" flag. Also the boiler is 1mm too long so assembly is more fiddly than it should be.
Post-Printing
Wheels - print ONE of your preferred type. Test fit this to a motor. It should be tight but not permanent fit. If too tight or too loose then adjust your printer scaling to fit. Once you are happy then print the remaining three wheels.
Motors - buy two "TT motors", the ones with a yellow gearbox. You must get the version with two output shafts. If available get the one with wires already soldered in place. If you find a choice of output speed, get the higher one (i.e. lowest reduction). When assembled you will find that the unused centre mount fouls the middle of wooden railway. It can be cut off.
Couplers - rather than guessing what you need I am leaving it to you to search my other models for couplers to suit your system. Eg. Rotating magnet for Brio etc.; Knuckle coupler for Atlas, big Linonel etc.; OS Railway; BigBigTrain; adapter for a small screw hook for Hornby (high) or Plarail (low). For hauling Hornby rolling stock use the buffer beam as the hook adapter. Choose and print suitable couplers for each end, you can have more than one at each end and the ends can be different!
Screws. All screws are M3 machine screws. A 40mm (minimum) screw at each end serves as a pivot for the couplers and also secures the cab at one end or the smokebox at the other (or a little shorter if buffer beams are used). One or more 15mm screws locate each motor at the correct height relative to the frame, including the four that hold the cylinders. A 6mm screw on each side loosely secures the piston rod to the wheel crank.
Electrics. The electrics can be as simple as a battery carrier (2 x AA) in series with a switch and the two motors connected in parallel (motors not in series). This will drive the engine at a sedate pace in one direction.
Alternatively a 3.7V lithium cell could drive a DC-DC converter board feeding a reversing switch. This will drive the engine about twice as fast in either direction. The loco will now run fast enough to keep up with other models on an outdoor track but it might appear to be a bit too fast for a wooden railway!
There is room to include a USB charge controller board so the battery can be recharged in situ.
After that you could add a variable speed controller or even radio control, see other OS railway models to learn how it might be done.
At any stage you could add LEDs in the headlight holes provided.
Printed parts:
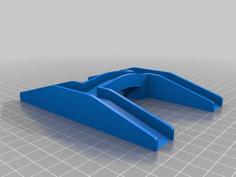
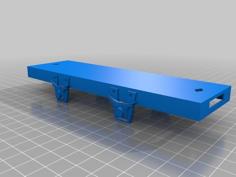
1 off main beam
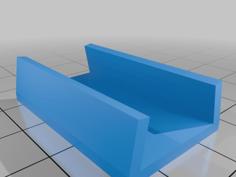
1 off smoke box
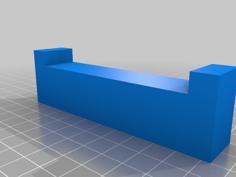
1 off cab
2 off buffer beams (not needed for US prototypes unless hauling European rolling stock)
2 off grooved wheels
1 off grooved wheel with left hand crank pin
1 off grooved wheel with right hand crank pin
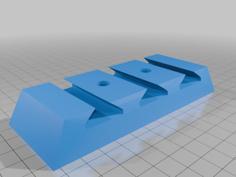
1 off cylinder, left
1 off cylinder, right
2 off piston rod
1 off rear lower coupler (could be rotating magnet, Atlas/Lionel, OS railway, BigBigTrain, Plarail or absent).
1 off front lower coupler (could be any of the above, or absent).
Bought parts
2 off TT motors (the cheap ones with a yellow gearbox), get the pre-wired ones if possible.
2 off M3 x 35 (or experiment) machine screws to secure coupler, buffer beam and sliding top element
4 off R14 x 2 O-rings
6 off M3 x 15 machine screws to secure the cylinders and motors
2 off M3 x 6mm machine screws to secure the piston rods
2 off miniature cup hooks (not needed for US prototypes unless hauling European rolling stock)
coupler parts if necessary
Electrics (minimum)
1 off 2xAA battery holder
2 off AA batteries
1 off slide switch, small to fit in driver's door
2 off M2 x 10mm machine screws for each switch
wire, solder, tape etc.
| boiler2.stl | 252.3KB | |
| buffer_beam_gap_0.5.stl | 113.0KB | |
| buffer_beam_gap_0.stl | 113.0KB | |
| left_cylinder.stl | 41.0KB | |
| right_cylinder.stl | 41.0KB | |
| rod.stl | 19.2KB | |
| tank_engine_cab.stl | 124.6KB | |
| VMbeam_2_more_battery.stl | 337.0KB | |
| YM_wheel_D28_F2.5.stl | 306.1KB | |
| YM_wheel_D28_F2.5_R.stl | 416.8KB | |
| YM_wheel__LH_crank.stl | 485.9KB | |
| YM_wheel__RH_crank.stl | 131.9KB |