Thermostat Holder Replacement (HM-CC-RT-DN, HmIP-eTRV-2 And Similar) 3D Printer Model
The file 'Thermostat Holder Replacement (HM-CC-RT-DN, HmIP-eTRV-2 And Similar) 3D Printer Model' is (stl,pdf) file type, size is 16.1MB.
The file 'Thermostat Holder Replacement (HM-CC-RT-DN, HmIP-eTRV-2 And Similar) 3D Printer Model' is (stl,pdf) file type, size is 16.1MB.
English version below.
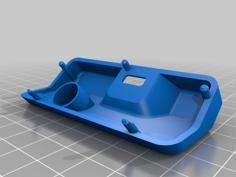
Dies ist ein Ersatz für das Teil, das den Thermostaten mit dem Heizungsventil verbindet. Ich habe es für den Homematic HM-CC-RT-DN gemacht, aber offenbar findet dieses Teil auch in der HM-IP-Version und in den Aktoren einiger anderer Hersteller Verwendung. Getestet ist es jedoch nur mit meinen HM-Aktoren.
Das Plastik des Originalteils wird mit der Zeit sehr brüchig und die Haltelaschen der Überwurfmutter brechen. Es gibt ein Ersatzteil-Set, aber das ist relativ teuer, wenn man bedenkt, dass man ein komplettes Gehäuse mitsamt Motor des HM-Thermostaten kaufen muss, nur um dieses kleine Plastikteil zu ersetzen.
Es gibt bereits ein ähnliches Teil auf Thingiverse, aber das passte bei mir sehr schlecht, also habe ich meine eigene Version von Grund auf neu geplant und modelliert.Nach einigen Testläufen und viel hilfreichem Input von Tommi_nrw, habe ich nun wohl die allermeisten Fehlerchen beseitigt und einiges an Erfahrung gesammelt, welche Herausforderungen einen erwarten, wenn man versucht ein brauchbares Teil zu produzieren, das ebenso gut funktioniert wie das Original. Tom hat mir sogar zwei professionell gedruckte Teile meines Modells überlassen, sodass ich die Toleranzen und Eigenschaften weiter optimieren konnte. Also nochmal ein ganz herzliches "Dankeschön" an dieser Stelle.
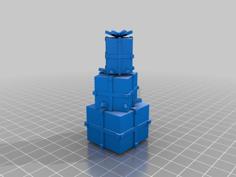
Das Teil sollte am besten wie gegeben aufrecht stehend gedruckt werden. Allerdings sind die Schichtbindung und Temperaturresistenz die klaren Flaschenhälse.
Mit PETG war die Schichtbindung perfekt, aber das Teil wurde an der heißen Heizung dann doch zu weich.
Karbonverstärktes Polyamid ist stark und hitzebeständig, aber relativ rau und ich befürchte, dass das zentrale Zahnrad mit der Zeit kaputtgeschmirgelt wird.
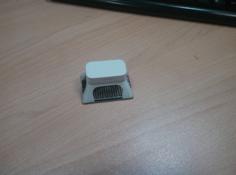
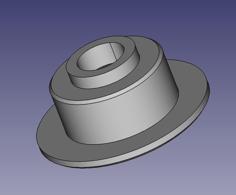
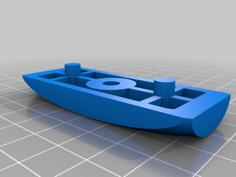
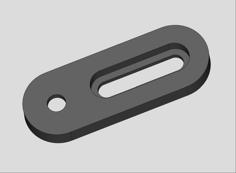
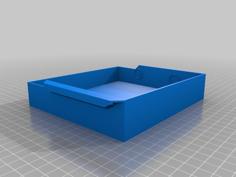
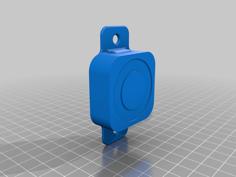
Nach ein paar Versuchen bin ich jetzt bei "PolyMax Tough PC-Filament" hängen geblieben. Gut getrocknet und bei relativ hohen Temperaturen verdruckt, erfüllt es die Anforderungen recht gut. Beim Aufbringen der Überwurfmutter können die Laschen zwar gelegentlich abbrechen, aber wenn man die Laschen vorher mit einem kleinen Brenner etwas erhitzt, entspannt man das Material und macht es außerdem flexibel genug, um die Mutter aufzudrücken. Der von mir ebenfalls hier vorgestellte Applikator kann helfen. Einfach die Mutter mit dem Gewinde nach unten hineinlegen, alles auf einen Tisch legen, das gedruckte Teil erwärmen und unverzüglich beherzt in die Mutter drücken.
Ich habe zu dem Ablauf eine bebilderte Anleitung als PDF beigefügt.
Die beste Lösung ist sicherlich, das Teil professionell drucken zu lassen.
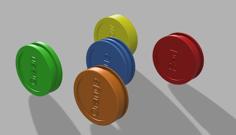
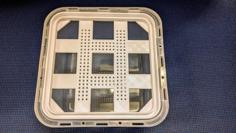
Die Version 4 ist nun das vorläufige Endergebnis mit vielen kleinen Optimierungen. Druckdienste haben ein Problem mit den dünnen Wänden neben den kleinen Löchern im Modell. Diese Löcher werden meistens nicht benötigt, daher habe ich eine Version 4a mit und 4b ohne Löcher hochgeladen.
Bitte hinterlasst gerne einen Kommentar und lasst mich wissen, wo es Probleme gibt. Im Augenblick würde ich das Projekt als beendet ansehen, aber wenn es noch was zu verbessern gibt, will ich das gerne versuchen.
Ich hoffe, ich konnte euch helfen.
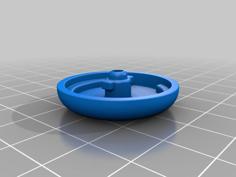
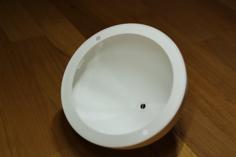
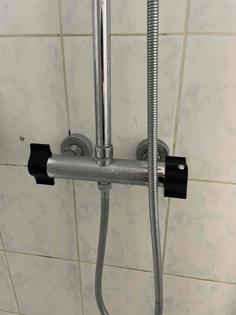
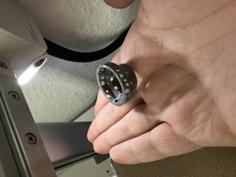
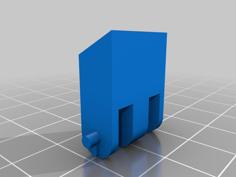
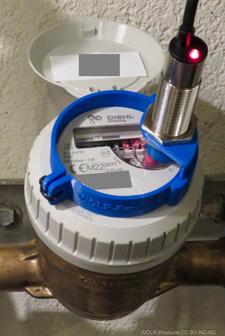
This is a replacement for the coupler that connects the thermostat to the radiator. It is designed for the Homematic HM-CC-RT-DN, but this part is apparently also used in the HM-IP-version of the device and by some other brands. I did not test this with anything else but my Homematic-thermostat.
The original part becomes incredibly brittle over time and the retaining tabs break off. There is a replacement kit, but it is costly and includes a lot more parts than necessary.
There already is a version of this part on Thingiverse, however: it did not work very well for me so I decided to remodel the whole thing from scratch.
After some testing and a lot of helpful input from, and discussions with Tommi_nrw, I was able to remove some flaws and learned about the difficulties, printing a useful part that works like the original. Tom even provided me with two professionally printed parts to further optimize tolerances and features. So I'd like to thank Tom for his help very much.
You actually should best print this part in the given upright orientation. Layerbinding and heat resistance are the bottlenecks, though.
PETG has an excellent layerbinding, but becomes too soft, when heated by the radiator.
PA-CF is strong and heat-resistant but abrasive and might damage the cogwheels over time.
After some testing, I found "PolyMax Tough PC-Filament" to work best. The tabs might break, sometimes, but you can heat the tabs up a little(!) with a small burner. That releases the tension and softens the material so it becomes flexible enough to apply the tube nut. Also use the applicator I provided as a help. Put the nut (thread down) in the applicator and place it on a table. Heat the part up and quickly push down.
I also added a PDF-file that illustrates the workflow.
The best solution might be to have the part printed professionally with some heat-resisting material.
Version 4 of the part is now the result of a lot of small optimizations that copy the aspects of the original as exactly as it is possible for me. Printing services seem to have problems with the thin wall at two of the four holes on the brim, and often even reject printing it. The holes seem to be obsolete for most devices this part is used in, so I uploaded a version 4a with, and a version 4b without those holes.
Please drop a comment and let me know if you run into problems. I call this project "done" for now, but might get back to it if there are still flaws.
I hope this will help you.
| applicator.stl | 6.3MB | |
| ThermostatV41a.stl | 13.7MB | |
| ThermostatV41b.stl | 14.1MB | |
| Workflow_de.pdf | 1.3MB | |
| Workflow_eng.pdf | 1.4MB |