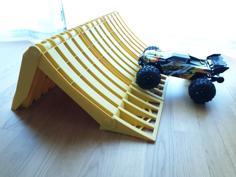
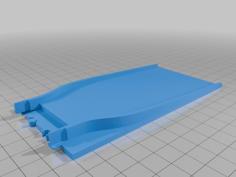
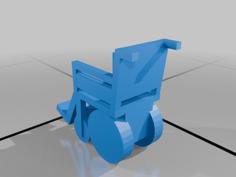
The way to roll: Portable, foldable wheelchair ramp
Introduction
In our school project, we focused on creating an innovative solution to improve accessibility: a wheelchair ramp that is both easy to build and affordable. This project aligns with our commitment to inclusivity and practical engineering. We focused on several key features:
- Cheap
- Portable
- Printable
- Adjustable (obstacle heights)
Technical Details
- Width:
300 mm - 800 mm (adjustable) - Length:
1430 mm - Maximum Height
50 mm - 250 mm - Weight:
8100 g - Printing Time:
~175 h - Building Time:
~2 h - Print Material:
PLA/ASA - Maximum load capacity:
Tested 200 kg
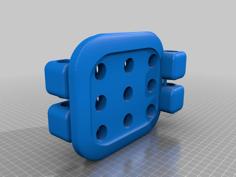
Designed in Fusion 360 by AutoDesk (https://www.autodesk.com/products/fusion-360/personal)
Material List
| Size | Quantity | Type | Usage | price (CHF) |
|---|
| 4x45 | 12 pcs. | countersunk Screw | To screw printed part to wood | 2.95 |
| 4x35 | 12 pcs. | countersunk Screw | To screw printed part to wood | 2.90 |
| 4x35 | 4 pcs. | countersunk Screw | To attach the handle | 1.00 |
| 4x30 | 8 pcs. | countersunk Screw | For the folding system | 1.80 |
| M8x35 | 2 pcs. | countersunk Screw | For the folding system | 5.00 |
| M8 lock | 2 pcs. | nut | For the folding system | 1.20 |
| M6 | 32 pcs. | washers | For every screw except handle and M8 | 8.25 |
| 608 ZZ | 12 pcs. | ball bearing | For the folding system | 5.90 |
| 255mm M20 | 4 pcs. | PVC pipe | For the folding system | 7.30 for 2m |
| 140mm M20 | 1 pcs. | PVC pipe | For the handle | - |
| 200x150 | 8 pcs. | rubber mat | For the endings | 6.45 |
| 150x150 | 2 pcs. | rubber mat | To prevent slipping off on the edge | - |
| 180x150 | 2 pcs. | metal sheet | To add strength on the edge | 9.60 |
| 1000x150x21 | 2 pcs. | screen printing plate | For bottom component of main ramp | 40.0 |
| 200x150x21 | 2 pcs. | screen printing plate | For top component of main ramp | - |
| Tesa Tape | 1 pc. | double sided tape | To attach metal sheet to components | 11.50 |
| UHU Power | 1 pc. | All-purpose adhesive | To attach rubber mat to PVC tubes | 4.65 |
| 330g | 1 roll | PLA 3D Print material | For the small components | 7.10 |
| 1700g | 1 roll | ASA 3D Print material | For the big components | 44.00 |
| | | | Total |
| | | | 159.60 |
Print Settings
These settings are essential for the big component to be stable enough to support the weight needed.
Item Settings
- Layer Height:
0.20 mm - Initial Layer Height:
0.20 mm - Wall Line Count:
5 - Top/Bottom Pattern:
Line - Infill Density:
40 % - Infill Pattern:
Cubic
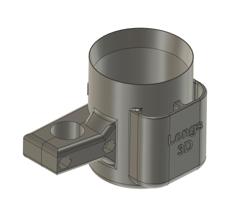
Parts to print
| Part | Quantity | Material |
|---|
| Main connector | 2 | ASA |
| Handle Left | 1 | PLA |
| Handle Right | 1 | PLA |
| Folding Limb 1 | 4 | PLA |
| Folding Limb 2 Left | 2 | PLA |
| Folding Limb 2 Right | 2 | PLA |
| Ball bearing holder | 6 | PLA |
| Lock mechanism 1 | 2 | PLA |
| Lock mechanism 2 | 2 | PLA |
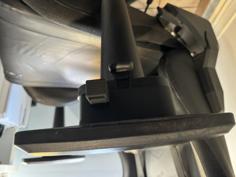
Building Steps
Main Part
- Cut all components to the correct size
- Print all necessary 3D printed parts.
- Screw the main connector part to the big (bottom) and small (top) screen printing plate. Note: Use washers!!
- Then attach the metal sheet to the main connector.
- After this glue the rubber mat to the metal sheet.
- Nail the rubber mat to the endings of the screen printing plate to ensure a smoother way up the ramp and prevent sliding off.
Do this for both sides!
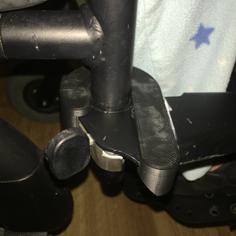
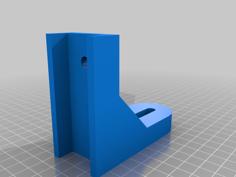
Folding System
- After the Main part was built. Put in the ball bearing into the folding Limb 2 Part and screw them with the M8 toghether.
- Glue the PVC Tubes into the folding limbs.
- Screw the folding limbs onto the main ramps with the ball bearing holders and the ball bearings. Note: Use washers!!
- After this screw the lock mechanism onto the ramp itself. Do this with the ball bearing holders and the ball bearings again. Note: Use washers!!
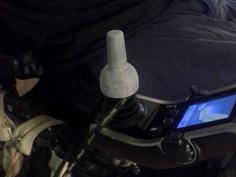
- Glue the short PVC Tubes into the handels and screw it onto the ramp.
After this the ramp now has the folding system attached and can be folded together.