Squeeze Fan Ruggedized 2.0 Pieces 3D Printer Model
The file 'Squeeze Fan Ruggedized 2.0 Pieces 3D Printer Model' is (stl) file type, size is 8.6MB.
The file 'Squeeze Fan Ruggedized 2.0 Pieces 3D Printer Model' is (stl) file type, size is 8.6MB.
The original versions of these pieces didn't work too well for me, so I fixed them, then instead of just telling people what to do in the comments, I posted what I did so they didn't have to do as much work.
I kept the original names of the pieces only adding a 2.0 to the end so the confusion would be minimal.
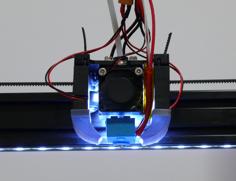
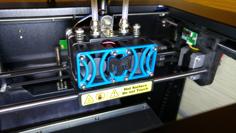
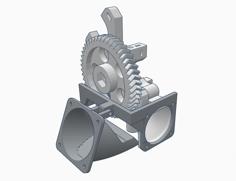
The crank is extended some just in the already long part {As you can see in the tinkercad photo}. I did this because the crank kept popping out of the handle when I went too fast.
The axle gear is gear is just scaled to 104% of the original size. I did this because the gear was a bit too small and the fan blade kept wobbling, hitting the edges of the XL cover thing, and throwing off the rhythm needed to operate it correctly. All in all, it makes the fan more stable. {I did glue the fan onto the axle so it wouldn't slide off.}
The pins are merely scaled up to 109.3% it's original size, then just the length is changed to be 18mm again so they won't “overprotrude” from the case. I did this because the cover kept coming apart when I went too fast, so now the pins hold the cover together more firmly. The pins will be hard to put in the case but the whole point of them is to hold the cover together really firmly. I printed the case in PETG so I'm not sure if these pins will break a cover made of PLA.
I thought that the changes I made were a little too much to need to have everyone else do, so I saved my changes and posted them so other people would be able to get the best results with minimal effort.
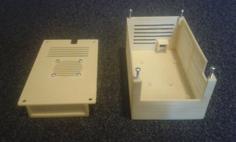
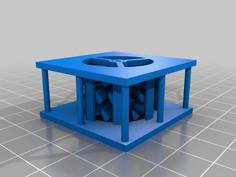
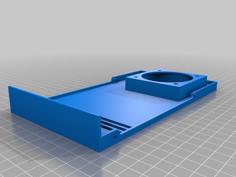
In the photos are side by side comparisons to the old and the new. Since I have no phone or good camera, I cannot provide real life pictures so I greatly encourage you if you download this to post a make on the original squeeze fan ruggedized so other people can see what it looks like and how it holds up.
It has been brought to my attention that the pins may be too tight depending on your printer's tolerances, so keep this in mind if you're going to print them.
Make sure to oil the joints, it makes it so much better.
| 10._Pins_6x_high_infill_2.0.stl | 25.9KB | |
| 2a._Axle_Gear_XL_100_infill_print_with_brim_2.0.stl | 55.5KB | |
| 6a._Crank_XL_100_infill_2.0.stl | 30.9MB |