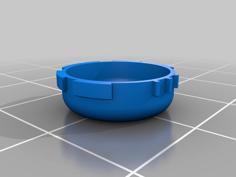
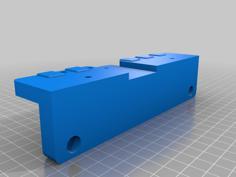
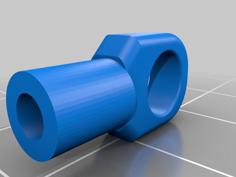
Sony Aibo ERS-210/220 Robot Dog 18650 Replacement Battery Case 3D Printer Model
The file 'Sony Aibo ERS-210/220 Robot Dog 18650 Replacement Battery Case 3D Printer Model' is (stl) file type, size is 964.2KB.
The file 'Sony Aibo ERS-210/220 Robot Dog 18650 Replacement Battery Case 3D Printer Model' is (stl) file type, size is 964.2KB.
WARNING: Battery recells are complicated projects that require prior experience with soldering, dissasembly, and general electronics knowledge. Unlike other vintage electronics, the Sony Aibo still has support from repair companies that can do the work for you. The extra cost of paying a professional is worth the risk of possibly injurying yourself or your robot. DIY at your own risk!
USE V3 FILES, just leaving V1 and V2 up for archival's sake but they're basically unusable compared to V3.
UPDATE 3/25/24: Design Has Been Finalized! After taking a break for a month or two, I've come back to it and finally figured out the kinks with the design. With different battery contacts and a further beefend shell, this design shouldn't need any more tweaking. Enjoy and happy building!
Got myself a Sony Aibo ERS-210, which has been on my bucketlist for years. It's an original model that came straight from japan, complete with it's box and accessories. long story short It's everything I love about vintage electronics, from their retro-futuristic design to their continued community support despite the fact they came out more than 2 decades ago. This is crucial, as they suffer from failing clutches in their head servos, and now long-dead batteries.
I've already repaired my dog's servos thanks to the new clutches sold by aiboclinic.net, but I've decided not to pay for a recell and do the job myself instead. On Youtube I ran into a video by Mjltech, (linked in parts list,) Who does an amazing job at showing a simple way to do the recell without having to spot weld cells. This allows new cells to simply be swapped in when these replacement batteries inevitably go bad in another 20 years. Only issue was the 3D printed case he used in the video was only available by someone in a Discord server, who you'd have to personally contact. In the end I just decided made my own shell instead, though in my design I utilize the much more common 18650 cell instead of 18500s, which just makes part sourcing cheaper and easier.
Original Instructional Youtube video by Mjltech: (Has links in his video's description for most of the parts needed:) https://www.youtube.com/watch?v=57fNUA6dnIE&list=PLsII4W3vmfx0ux1DgQOxo76QH0Dmu_Z2Y&index=1&t=61s
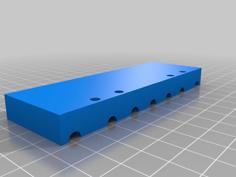
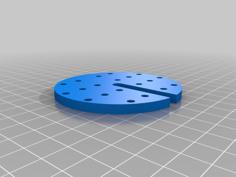
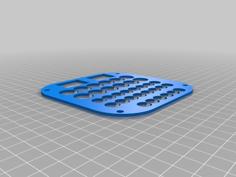
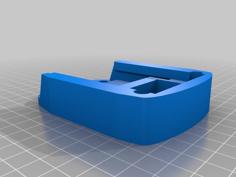
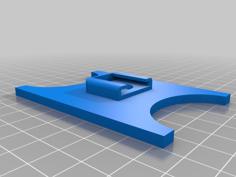
Lay either part in your slicer with the outer face flat on the buildplate. I'd use a brim so the corners don't warp, specifically at least 8mm. Both parts need a little support material on parts like the connector end, which is off the buildplate by only half a millimeter. I wouldn't recommend using supports in the screw holes or the latch divots, as they'll end up being very difficult to remove. The top half's screw holes by the curved end does need supports however.
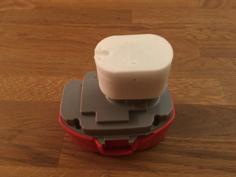
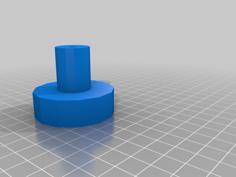
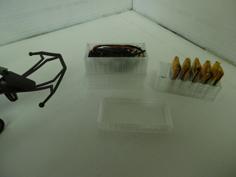
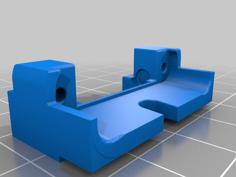
The actual assembly of the battery is mostly identical to the video, so follow that as a guideline and simultaniously check these instructions. reprogram the battery management board like he shows in the video before doing any assembly. Use the spring ends where the negative end of the battery connects, and the nub ends where the positive end of the battery connects. I added slots where each contact slides into. As they come the battery contacts are too tall, so you need to cut the top end off of each and just solder straight to the back of the metal, (Check the third photo for exactly what I mean.) If you properly melt the solder long enough the connection will be just as solid without a hole to go through. Follow my wiring diagram, and route the wires through the divit in the center of the bottom shell so they can fit under the batteries. Secure them with Kapton or Scotch tape. SOLDER EVERYTHING BEFORE INSERTING BATTERIES. Install the batteries in the same order as the video- Bottom one first than the top one, with the positive contact being the last part of the battery entering the circuit. Further securing isn't necessary, but if you're worried about the batteries falling out use some hot glue to keep them in place. Screws should be self-explanatory, longer ones go into the flat side and the shorter ones go into the curved side. After that, pop it into your charger and if you did everything right it should start charging normally!
Hopefully this helps out anyone who wanted to get their dog going themselves, and didn't want to spend a ton. Happy printing!
| Aibo_Battery_Shell_Bottom.stl | 423.8KB | |
| Aibo_Battery_Shell_Bottom_V3_FINAL.stl | 258.6KB | |
| Aibo_Battery_Shell_Top.stl | 763.6KB | |
| Aibo_Battery_Shell_Top_V3_FINAL.stl | 757.1KB | |
| Aibo_Battery_Shell_V2_Bottom.stl | 450.0KB | |
| Aibo_Battery_Shell_V2_Top.stl | 763.6KB |