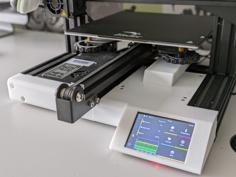
This gantry support eliminates wobble of the weak frame. It is designed for and tested on the Creality Ender-3 V3 KE. But users told me that the support also fits the SE model perfectly.
In any case, use of this accessory is entirely for your own responsibility.
The design history of this part can be found in the chapter 'How I Designed This'.
Description
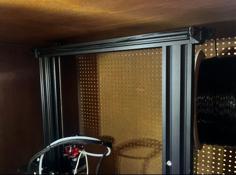
The gantry wobbles due to the high speed bedslinger together with the heavy filament reel on top of the torsionally weak plastic gantry bridge. That wobbling is dampened with this support. The starting point was to keep the filament reel on top, no loss of warranty(!) and simple installation. The resulting design has the following properties:
- Nothing needs to be disassembled, unscrewed, modified, glued or drilled on the printer. It is plug and play. This all is in contrast to other SE/KE gantry supports. Assembly is clip and clamp (without damage), and can be done without tilting the printer.
- Both metric and inch fasteners can be used. (Print the metric ór inch clamping pieces for this.)
- The only tools needed are two 13 mm or 1/2" wrenches and the 4 mm allen key from the Ender toolkit.
- Assembly takes only ~15 minutes.
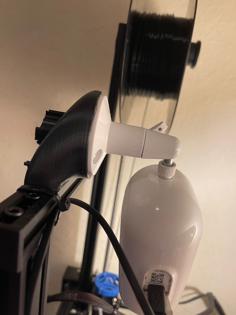
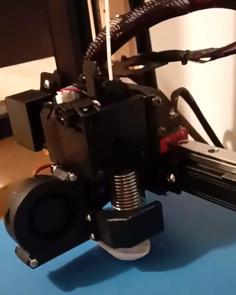
- The design has a slim, clean and professional appearance. Even more so with the use of heat shrink tubing around the threaded rods (see photo 1).
- Extra:
- Because the support is inherently stiff and rests on the stable top of the printer housing, which keeps the reaction forces 'inside' the printer (closed loop), the print quality-reducing vibration of the gantry legs has virtually disappeared and the vulnerability of the gantry has gone. The stiffness is now even so big that the printer can be tilted via the gantry. The high weight of the filament at the top of the gantry is no longer a disadvantage but the wobbling of the filament itself still retains a little bit because of the torsionally weak plastic gantry bridge.
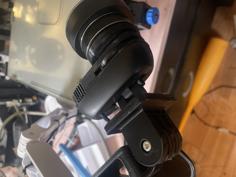
So... I would like to recommend the 90° spool adapter. This reduces wobbling even more significantly. For the accountability see the measurement report. - Costs: ~ € 5,00.
The M8 rods are sufficient, but some people like to use M10. That's why you also find, as a bonus, a ZIP file with M10 STLs to download, and a link to M10 models in the chapter 'How I Designed This'.
The BOM (Bill Of Material):
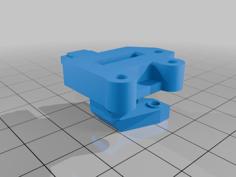
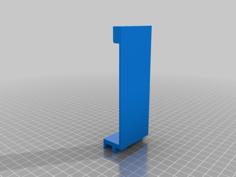
- 1x Printed buttress base and the inch or metric clamping piece LEFT;
- 1x Printed buttress base and the inch or metric clamping piece RIGHT;
- Optional: 2x Printed nut cover. The (unaesthetic) nuts can optionally be covered with this nut cover (see 9th picture).
- Recommended (see the first picture): 2x heat shrink tubing ø8 mm, L = 373 mm (Order suggestion);
- 2x (for protection and extra friction) rubber plate trapezium 10x24x15 mm, 0.6+0.2 mm thick. I cut it out of an old bicycle inner tube. Maybe some layers of paper. or something like that, will also work.
Fasteners: zinc plated steel but, similar to the printer fasteners, stainless steel looks cosmetic better:
- 2x threaded rod M8 or 5/16", L = 423 mm (I started with M6 but that wasn't stiff enough);
- 2x cap nut M8 or 5/16";
- 4x (or in case of no use of the cap nuts - 6x) nut M8 DIN 934 or 5/16";
- 4x washer M8 or 5/16";
- 2x (inhex) screw M5 x ≥20 DIN 912 or #10-24 x ≥20 mm;
- 2x nut M5 DIN 934 or #10-24.
Print Settings:
- Slicer: Orca Slicer
- Printer brand: Creality
- Printer: Ender-3 V3 KE(/SE)
- Resolution: 0.2
- Infill: ≥20%
- Wall thickness 1.2 mm (three 0.4 walls)
- Brim: NO
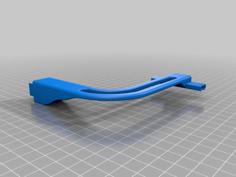
- Support: ON - Tree (see pictures)
- Support overhang/treshold angle: ≥30º relative to the print bed. One maker had good results with 10º, which provides less support and is therefore easier to remove.
- Filament: PLA (stronger) or PETG (more durable but also a little more flexible)
NOTE: If the buttress base does not fit correctly around the height of the housing, this can be corrected in the slicer via non-uniform scaling.