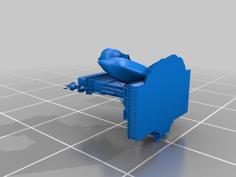
Shelf Extension Kit 3D Printer Model
The file 'Shelf Extension Kit 3D Printer Model' is (stl) file type, size is 265.5KB.
The file 'Shelf Extension Kit 3D Printer Model' is (stl) file type, size is 265.5KB.
This is extension kit, which can be used to modify plastic shelfs from hardware store with help of standard waste water pipes of 40mm diameter.
Once I have find out that I need some shelfs above my working table. With my tight budget I need some cheap decision, which could be fast disasembled. I have to redesign the construction for my needs.
My working table was pretty wide in depth, so I could just put the shelfs on it.
First, I didn't want to have the lower shelf on the level of my table, because I can use table surface to store things on lower level and I could use it to store some my things higher.
Second, I wanted to make two higher shelfs wider to store more things above the working surface of my table.
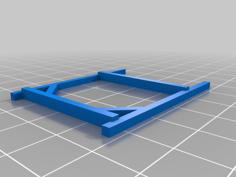
I have designed additional support for this two shelfs (pic. 2) with help of waste water pipes. The nice thing of this pipes, they can be connected with vertical supports of the shelfs (see picture 7). This makes the construction stable. But check it before bying, this shelfs from the hardware store and waste pipes are pretty much the same, but may be not always.
I have designed some kit to connect the waste water pipes and shelf support pipes together to stable construction.
I did print this in PETG, because I was not sure how hot it can be in my room during sunny day. PETG is more stable against higher temperature.
The pipes are fit into details pretty tightly, I didn't use any screws to fix them for ensurance, but this can be an option.
So try to print some fractions of this details first to estimate how tight it connected with pipes. Thermal shrinkage of different filament can vary. Scale it if necessary.
Shelf is heavy duty thing which keep some heavy things just above your head, so take it seriously, this is your responsibility to make the construction safe. I have no guaranty ;) I have printed it with 55% infill to make it more solid. If you are not sure about high tight are the junctions, think about drilling the holes throug details and fix everything with screws. Check the construction regulary. Do not give it in use to kids or somebody else when you are not sure they can assemble and use it with responsibility.
When assembly you will need to cut 4 pieces of waste pipes with their wide end on one side (930 mm) and 4 pieces of waste pipe - 350mm with their wide end removed. Check the sizes, the shelf can vary in size. Also, you can file little bit the plastic at the wide end of waste pipe to make it more narrow, and to let it be inserted little bit deeper to the shelf from the down side. See picture 8. The construction will looks better, but this is not necessary since the pipe stabilised by inserted support from the above the shelf.
When assembling, think about the order of connections before you begin.
Do not forget to use rings and paired caps to fix 2 shelf stands together. This is important to stabilise the construction. Actually you are assembling to joint shelf stand. They coupled by BetweeLegs and TwoCaps details in the basis and on the top of the shelf stand respectively, by the standard rings from shelf kit on the level of shelf one below top and by printed Rings detail on the level of first shelf. Pairs of high support for the front shelf stand are stabilised by short diagonal 350 mm pipes joint by Junction45 details. See pictures. Good Luck.
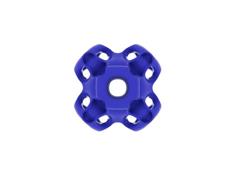
| BetweenLeg.stl | 228.9KB | |
| Junction45.1.stl | 172.6KB | |
| Junction45.stl | 120.1KB | |
| LegNormal.stl | 129.8KB | |
| LegWaste.stl | 104.9KB | |
| Rings.stl | 35.0KB | |
| TwoCaps.stl | 79.4KB |