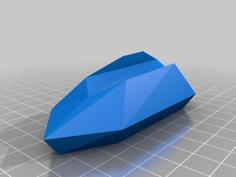
Scope Mount Leveling Kit 3D Printer Model
The file 'Scope Mount Leveling Kit 3D Printer Model' is (stl) file type, size is 4.3MB.
The file 'Scope Mount Leveling Kit 3D Printer Model' is (stl) file type, size is 4.3MB.
https://youtu.be/zrxXmQ-A-z8?si=aIFrOfEiOIPCqKT2
Includes stands for AR-15 (mAG_STAND), AR-10 (ar10stand), and hunting rifles (parts beginning with "rifle"). The bolts and locknuts interchange between models
This mag stand and parts combine to make a rifle leveling stand for the purpose of mounting a scope. This is a more budget friendly and space saving alternative to buying an adjustable rifle stand (they range from $80-$700 and take up a lot of space).
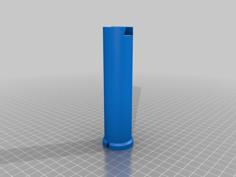
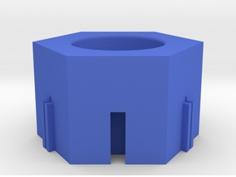
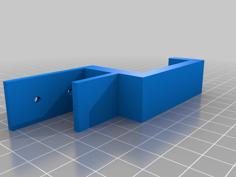
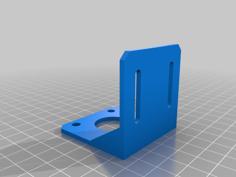
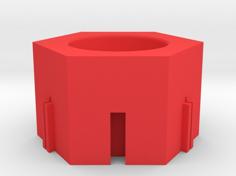
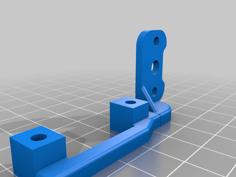
The mag stand goes into the mag well and locks into the mag release to support the rifle. The stand was intentionally made to fit loose for the purpose of leveling. You can insert 4 bolts with locknuts for the purpose of leveling the rifle from side to side if your table is not level. The jack, screw, and locknut go together to form a threaded jack stand, these are used under the handguard and buffer tube to level the rifle front to back. If you are not able to successfully print threaded parts you can use the sliding jacks, either thread a bolt through the 4mm hole or install a M3 heat set insert, you can shim the base with metal feeler gauges if you need side to side adjustment without the bolts.
Parts needed:
1 mag stand
4 bolts
6 locknuts
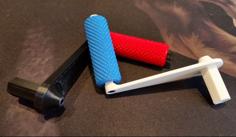
2 jacks
2 jack screws
2 levels (available in a scope mount kit or buy bullseye levels)
Instructions -
1) check that your rifle is not loaded before anything else.
2) place the mag stand into your magazine well and lock it in place
3) put the mag stand on a table
4) place your screw jacks under the handguard and buffer tube and adjust them until they are touching.
5) install your barrel mounted level if available. otherwise place 1 bullseye level on the upper receiver and 1 bullseye level on top of the handguard, as close to the muzzle as possible
6) adjust the screws in the mag stand as well as the screw jacks until the bullseye levels are centered
7) remove the level on the upper receiver and install your scope mount
8) place your scope in the mount and evenly tighten your screws, leave them just loose enough to move the scope.
9) place a bullseye level on top on the windage adjustment cap of the scope.
10) verify that the rifle is still level by checking the bullseye level on the handguard, adjust the stands if necessary, then adjust the scope until it is level.
11) torque the scope mount screws to the scope manufacturer specs
12) pick up the rifle and verify that your eye relief is properly adjusted by holding it as you would when shooting. if it is not set properly you can either remove the entire scope mount and move it forward or back on the picatinny rail and should not need to re level it (double check though). if that doesn't work then you will need to pick a mounting location, loosen the scope mount screws, and move the scope forward or backward as needed then retighten the screws while verifying it is still level
1/30/2024 - The jack design was altered slightly. The holes how have 0.45mm clearance and the holes now go all the way through. These will need tapped with a M12x1.5 tap or thread chaser in order for your screws to pass through easily without locking up or stripping. The locknuts and threaded holes in the mag stand are also M12x1.5 and also need tapped. The bolts and screws all turned out fine, out of the 12 bolts I printed only 2 needed to be ran through a M12x1.5 die. You can find the tap and die set on Amazon for about $12, or each part individually for about $9, so in my opinion just get the set and run all of the parts just to make the movement as smooth as possible.
2/6/2024 - updated the design of the part called "riflelock". the previous design was not sturdy enough and had a tendency to warp or break when clamping in a rifle stock. I also added a part called a nutcap for the rifle stand. print these in tpu and put them over the threads of the bolts for the riflelock, these add more grip to prevent the rifle from moving and will add 5mm per cap to your bolt reach if you are working on something with a very thin stock
| 116jack_2.stl | 2.1MB | |
| 116screw.stl | 1.9MB | |
| 116slide.stl | 18.1KB | |
| 116slidebase.stl | 32.1KB | |
| 69riflejack.stl | 2.1MB | |
| 69riflescrew.stl | 1.2MB | |
| 87jack_2.stl | 1.6MB | |
| 87screw.stl | 1.5MB | |
| 87slide.stl | 13.7KB | |
| 87slidebase.stl | 28.2KB | |
| 89riflejack.stl | 2.5MB | |
| 89riflescrew.stl | 1.5MB | |
| ar10stand.stl | 706.1KB | |
| bolt.stl | 503.3KB | |
| locknut.stl | 96.0KB | |
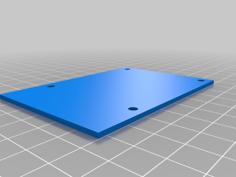
| mAG_STAND.stl | 706.6KB | |
| nutcap.stl | 16.7KB | |
| riflelock.stl | 43.5KB | |
| riflenuts.stl | 309.2KB |