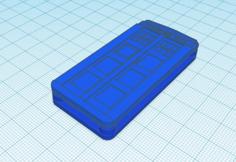
RaspberryPERK (Pi Emergency And Recovery Kit) 3D Printer Model
The file 'RaspberryPERK (Pi Emergency And Recovery Kit) 3D Printer Model' is (stl) file type, size is 2.0MB.
The file 'RaspberryPERK (Pi Emergency And Recovery Kit) 3D Printer Model' is (stl) file type, size is 2.0MB.
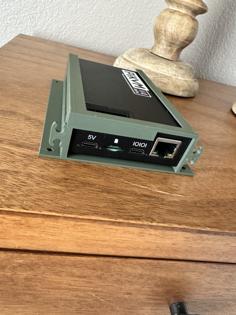
This is my Emergency- and Recovery-kit based on a Pi 4 and the official 7" touchscreen.
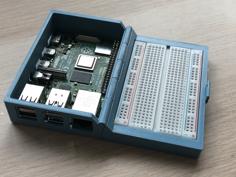
The case is designed and 3D-printed by myself, though i got some inspirations of r/cyberDeck and back7.co
Because the price of the pelican cases is very high, I chose my own approach. In the end, the price difference is not noticeable.
The kit features many interfaces which can be swapped for other demands. This modularity is an important aspect for me.
Link to the reddit post: https://www.reddit.com/r/raspberry_pi/comments/g8dlft/raspberry_pi_emergency_and_recoverykit/
The currently used interfaces, which are accessable on the front panel are:
USB3.0
3.5 mm jack
Ethernet
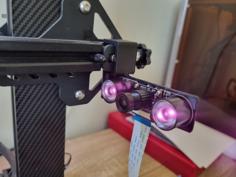
Camera
SD/microSD reader
Full size HDMI port
4 mechanical flip switches for turning on display, fans; switching between battery/external power; and one GPIO switch for software-based use
2 USB-C ports for charging the battery or direct external power
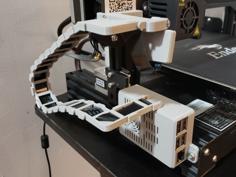
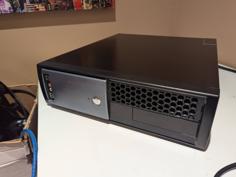
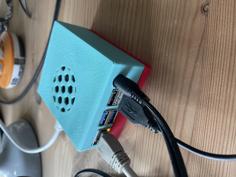
Additionally and as already mentioned, I’m using active cooling which can be turned off/on.
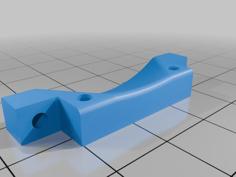
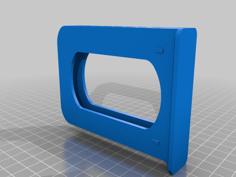
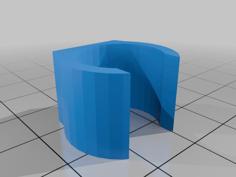
Also I build a holder for the power supply.
On the back is a little hatch for "easy" access to the GPIO and SD card. Unfortunately these can not not be accessed as easy as intended.
The used keyboard is the cheapest I’ve found on amazon and does its job.
The kits panels are separated into multiple parts, because my 3D printer has a relatively small bed.
This is the reason, why there are so many screws.
The little bumps on the front-panel in the top left and right corners are cases for magnets which should hold together the keyboard-cover and the frontpanel. But this system is also not as good as I expected it to be, which is why in addition the panels are secured with zip ties.
Here are amazon links to many of the parts I used. Unfortunately theyre from the german Amazon site:
Wide variety of M3, M4 and M5 screws and nuts
https://www.amazon.de/gp/product/B00B22V8NI/ref=ppx_yo_dt_b_asin_title_o04_s00?ie=UTF8&psc=1
https://www.amazon.de/gp/product/B075TYHG5S/ref=ppx_yo_dt_b_asin_title_o02_s00?ie=UTF8&psc=1
Magnets for hatch and keyboard
https://www.amazon.de/gp/product/B0748FGZFY/ref=ppx_yo_dt_b_asin_title_o06_s00?ie=UTF8&psc=1
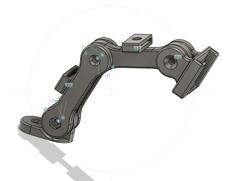
Hinges
https://www.amazon.de/gp/product/B014P4SZ5S/ref=ppx_yo_dt_b_asin_title_o07_s00?ie=UTF8&psc=1
Keyboard
https://www.amazon.de/gp/product/B0741CNWMT/ref=ppx_yo_dt_b_asin_title_o03_s00?ie=UTF8&psc=1
USB and 3.5 mm jack
https://www.amazon.de/gp/product/B07952DGVP/ref=ppx_yo_dt_b_asin_title_o04_s00?ie=UTF8&psc=1
Switches
https://www.amazon.de/gp/product/B07QGBT7F3/ref=ppx_yo_dt_b_asin_title_o04_s01?ie=UTF8&psc=1
Case fan
https://www.amazon.de/gp/product/B00NEMGCIA/ref=ppx_yo_dt_b_asin_title_o04_s01?ie=UTF8&psc=1
Powerbank (no more available, also one huge problem for the future, if it fails)
https://www.amazon.de/gp/product/B07KXNGFBD/ref=ppx_yo_dt_b_asin_title_o04_s02?ie=UTF8&psc=1
USB-C for power
https://www.amazon.de/gp/product/B01MS2DPUX/ref=ppx_yo_dt_b_asin_title_o04_s03?ie=UTF8&psc=1
Ethernet
https://www.amazon.de/gp/product/B00V4PQFIG/ref=ppx_yo_dt_b_asin_title_o05_s00?ie=UTF8&psc=1
SD reader
https://www.amazon.de/gp/product/B01EFPX9XA/ref=ppx_yo_dt_b_asin_title_o06_s00?ie=UTF8&psc=1
HDMI adapter
https://www.amazon.de/gp/product/B07VXPD83L/ref=ppx_yo_dt_b_asin_title_o06_s00?ie=UTF8&psc=1
SD
https://www.amazon.de/gp/product/B06XWMQ81P/ref=ppx_yo_dt_b_asin_title_o06_s00?ie=UTF8&psc=1
power supply
https://www.amazon.de/gp/product/B07TXFRM5X/ref=ppx_yo_dt_b_asin_title_o06_s00?ie=UTF8&psc=1
Display
https://www.amazon.de/gp/product/B014WKCFR4/ref=ppx_yo_dt_b_asin_title_o06_s01?ie=UTF8&psc=1
RPi cooler
https://www.amazon.de/gp/product/B07ZV6JDNL/ref=ppx_yo_dt_b_asin_title_o06_s01?ie=UTF8&psc=1
This list does not contain all parts I used. Some parts are leftovers from the past.
I would NOT reccomend printing all the parts and trying to fit your own parts inside it.
For this kit, I already see many improvements which can and should be made in a future version. Currently I’m busy with my CS exam, so I wont update this project anytime soon.
I was aware about all problems during design and this was a quite big project. Maybe you can get some inspiration from this design for your own projects.
| Bottom.stl | 91.5KB | |
| Bottom2.stl | 189.0KB | |
| cable_panel_keyboard.stl | 22.5KB | |
| cable_panel_side.stl | 22.5KB | |
| Handle.stl | 68.2KB | |
| Hatch.stl | 89.1KB | |
| HDMI.stl | 34.1KB | |
| keyboard_case_1.stl | 76.6KB | |
| keyboard_case_2.stl | 63.9KB | |
| knob.stl | 78.0KB | |
| Magnetabdeckung.stl | 684.0B | |
| Magnetabdeckung_2.stl | 684.0B | |
| Power_holder.stl | 129.4KB | |
| rpi_pro_pc_v71.stl | 5.6MB | |
| SD_Reader.stl | 14.9KB | |
| side_bottom_1.stl | 45.9KB | |
| side_bottom_2.stl | 44.2KB | |
| side_left.stl | 97.3KB | |
| side_right.stl | 41.7KB | |
| side_top_1.stl | 118.4KB | |
| side_top_2.stl | 53.6KB | |
| Switch_box.stl | 147.8KB | |
| Top_1.stl | 191.9KB | |
| Top_2.stl | 196.2KB | |
| USB-C_pwr.stl | 90.7KB |