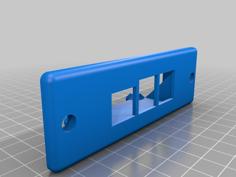
RASPBERRI PI 3 B+ MINIMAL FRAME WITH ACTIVE COOLING 3D Printer Model
The file 'RASPBERRI PI 3 B+ MINIMAL FRAME WITH ACTIVE COOLING 3D Printer Model' is (stl) file type, size is 537.4KB.
The file 'RASPBERRI PI 3 B+ MINIMAL FRAME WITH ACTIVE COOLING 3D Printer Model' is (stl) file type, size is 537.4KB.
RASPBERRI PI 3 B+ MINIMAL FRAME WITH ACTIVE COOLING
BEFORE YOU START PRINTING
To be able to use 3 mm screws you need to refit the mounting holes on your PI. These are 2,75 mm in diameter, so you will need to enlarge them a little bit. Use a round file or a 3 mm drill with great care.
This said, there is no copper lines you could damage around the mounting holes, BUT remember: you widen the holes at your own risk.
I've done this to my PI 3 B+ boards, and they work fine!
WHY THIS ACTIVE COOLING?
Well, according to this PI's datasheet (see link below) the operating temperature is 0-50°C. Let's consider this upper limit as a safe working temperature. Most of the 'ridiculous' small heatsinks sold for this PI are not big enough to dissipate the heat produced by Broadcom's BCM2837B0 processor (Cortex-A53), so you can easily reach 45°C!
On the other hand ... have you ever wondered how effective the 'heat transfer' of the thermal adhesive on your heat sink is?
Overheating can become a problem if you place this PI inside a 'closed printer' and/or the ambient temperature you are working in is well above 25°C.
STUFF NEEDED:
The most important thing is - of course - the heat sink. Size: 15x15x15 mm (with thermal adhesive tape). Produced by COTEXER (for Raspberry Pi).
A 40x40x10 mm 5V fan connected to your PI does the 'active cooling'. Use pins 4 and 6 of the 40-pin header to power your fan. Where Pin 4 = +5V / Pin 6 = Ground or negative.
8 x self-locking M3 nuts
4 x screws M3 x 35 mm
4 x screws M3 x 20 mm
4 x 3mm washer rings
2 very small cable ties
Spacers (4x): use PTFE or silicone tube (inner diam = 3mm). Silicone is easier to cut but needs a lot more attention when tightening the M3 nuts as it is a lot softer than PTFE. Length/height = 18/19 mm.
Note: tighten the M3 nuts gently. You don't want to damage your PI.
Datasheet PI 3 B+
https://datasheets.raspberrypi.com/rpi3/raspberry-pi-3-b-plus-product-brief.pdf
Pinout GPIO - See pins 4 and 6
https://www.raspberrypi.com/documentation/computers/raspberry-pi.html#gpio-and-the-40-pin-header
Maximum operating temperature
https://www.brainboxes.com/white-papers/raspberry-pi-overheating
Enjoy!
O.
** Some pictures were taken from COTEXER's page
| BASE_01_PI_3_B+.stl | 396.0KB | |
| BASE_02_PI_3_B+.stl | 370.0KB | |
| FANPLATE_DOME_PI_3_B+.stl | 1.0MB |