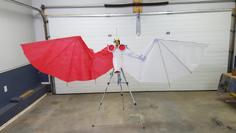
Rasengan Naruto 3D Printer Model
The file 'Rasengan Naruto 3D Printer Model' is (stl) file type, size is 2.4MB.
The file 'Rasengan Naruto 3D Printer Model' is (stl) file type, size is 2.4MB.
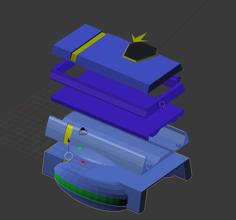
To assemble the device, follow the steps below:
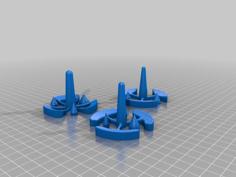
Screw the DC male jack into the small gear, then connect it to the arm. Solder wires to the arm, making sure they are long enough to come out of the other side of the device. Pass the ball bearing before connecting the small gear and arm.
Use super glue to stick the yellow motor to the chassis. Then screw in the jack holder and insert the big gear into the motor shaft.
Insert the female DC jack into the jack holder and solder the wires to the yellow motor pins.
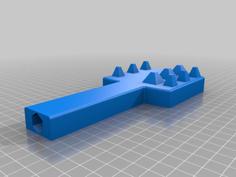
Connect the male/female jack and gears. Cut three pieces of wooden skewer sticks and attach them according to the given image.
solder the 4 led in parralel and connect them them to the coin cell holderTo assemble the device, please follow the steps listed below:
First, screw the DC male jack into the small gear and connect it to the arm. Solder wires to the arm ensuring that they are long enough to come out of the other side of the device. Before connecting the small gear and arm, pass the ball bearing.
Next, use super glue to stick the yellow motor to the chassis. Then, screw in the jack holder and insert the big gear into the motor shaft.
Now, insert the female DC jack into the jack holder and solder the wires to the yellow motor pins.
Connect the male/female jack and gears. Cut three pieces of wooden skewer sticks and attach them as shown in the image provided.
this design is not perfect try to optimise and improve it thankyouTo assemble the device, please follow the steps listed below:
First, screw the DC male jack into the small gear and connect it to the arm. Solder wires to the arm, ensuring that they are long enough to come out of the other side of the device. Before connecting the small gear and arm, pass the ball bearing.
Next, use super glue to attach the yellow motor to the chassis. Then, screw in the jack holder and insert the big gear into the motor shaft.
Now, insert the female DC jack into the jack holder and solder the wires to the yellow motor pins.
Connect the male/female jack and gears. Cut three pieces of wooden skewer sticks and attach them as shown in the image provided.
Please note that this design is not perfect and can be optimized and improved. Thank you.
| rsngn_arm.stl | 132.2KB | |
| rsngn_bearing_holder.stl | 84.5KB | |
| rsngn_B_gear.stl | 1.5MB | |
| rsngn_chassis.stl | 2.4MB | |
| rsngn_clips.stl | 98.7KB | |
| rsngn_design.stl | 583.3KB | |
| rsngn_jack_holder.stl | 135.2KB | |
| rsngn_led_holder.stl | 157.9KB | |
| rsngn_strap_cov.stl | 576.4KB | |
| rsngn_S_gear.stl | 1.3MB |

![[O-SD 005] GAT-02L2 Dagger L 3D Printer Model](https://cdn.3axis.co/assets/78/64/11/10/78641110-eb5c-4468-8b5b-8cb7c601fb00/images/1d7068aa-83d7-4112-bf4e-3c9c45257fd6_thumb.jpg)