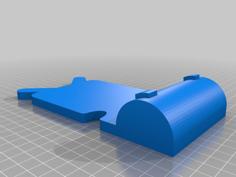
PXL2000 Tripod Mount Adapter 3D Printer Model
The file 'PXL2000 Tripod Mount Adapter 3D Printer Model' is (stl,3mf) file type, size is 39.4KB.
The file 'PXL2000 Tripod Mount Adapter 3D Printer Model' is (stl,3mf) file type, size is 39.4KB.
Version 1.00, designed in ROBLOX STUDIO (exported as .OBJ).
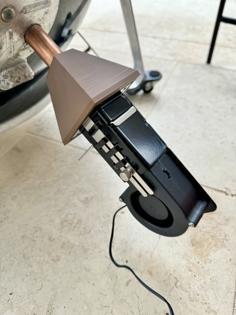
Since I couldn't find one here or on Thingiverse, I have decided to make a 3D printed tripod adapter for the ill-fated Fisher-Price PXL2000 cassette camcorder.
Yes, I am aware that Fisher-Price did make official tripod adapters, but to my knowledge, they were mail-in orders and any that may exist are now rare. This is meant to be an accessible way to allow enthusiasts to use the camera without having to fiddle with the tripod situation.
It's recommended that you print the .3mf file instead of the separate .stl files, as the .3mf has the models pre-configured to ensure the print works well for you.
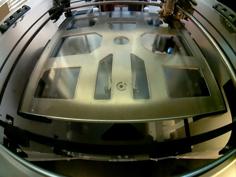
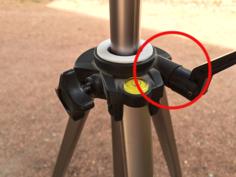
Picture depicts an earlier build of the print, and does not fully represent the end result of the instructions in terms of appearance.
It's best to print this model using PETG or ABS to achieve greater strength and avoid potential damage from use. Avoid abrupt maneuvers with the tripod and make sure the nut at the bottom isn't going anywhere.
HARDWARE REQUIRED:
HOW TO SETUP:
TROUBLESHOOTING:
If something doesn't fit, try reprinting at a larger scale (try increments of 2%) or sand/melt the plastic if it's wide enough.
Please leave a comment on any issues
If you do decide to repost or distribute (including sell) this model/prints of said model, please credit me!
| left.stl | 127.5KB | |
| PXL2000-adapter-mount.3mf | 33.7KB | |
| right.stl | 93.7KB |