Protective And Carrying Case For The Navitek NT Pro/Plus Data Logger 3D Printer Model
The file 'Protective And Carrying Case For The Navitek NT Pro/Plus Data Logger 3D Printer Model' is (blend,stl) file type, size is 1.5MB.
The file 'Protective And Carrying Case For The Navitek NT Pro/Plus Data Logger 3D Printer Model' is (blend,stl) file type, size is 1.5MB.
Protective and carrying case for the Navitek NT Pro/Plus data logger
You have a relatively expensive measuring device such as the Navitek NT Pro/Plus and the like, and there is no way to hang it round your neck with a loop so that you have your hands free. Other measuring devices usually have a loop already attached, but unfortunately the Navitek does not. There is also no simple protective bag or similar - not even from the manufacturer - really not ideal. The thing is relatively robust, but if it falls down - you can bet it will be scrap - and it's too expensive for that.
I think the manufacturer believes that all measurements always take place in a network cabinet - at ground level - the idea that you have to measure at a height of 3 metres on a ladder doesn't occur to any of the office workers ?!? - produced past the customer.
I work in shopfitting - and measurements often have to be taken at a height of 2-3 metres - the device doesn't stand a chance from that height - I'm sure of it. You always have to hold it firmly - the one hand that is always missing..., especially at height.
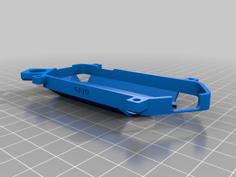
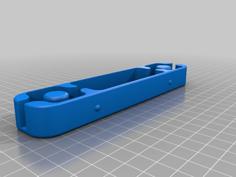
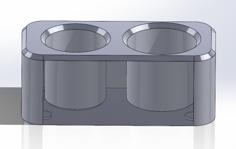
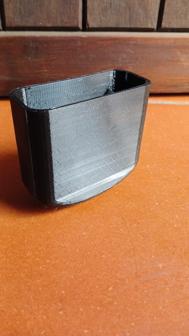
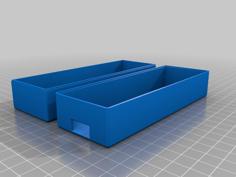
I sat down and designed a hard case for it where you can attach a strap on the right and left with screws so that you can hang the thing around your neck.
Printed in PETG with 30% infill (it should be stable) in 6 hours printing time. The whole thing ‘upright’ of course.
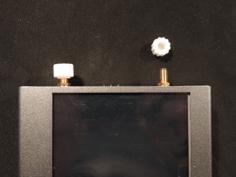
I fitted a couple of M5 bolts (16mm) and a washer from the DIY store on the right and left, screwed the whole thing together with an enclosing nut and drilled a hole through for a key ring - captive and the option of attaching a strap.
Enclosed is the Blender file for you to customise yourself. I wanted to develop the whole thing a little further, but my memory is not sufficient for this - it will have to do as it is.
Material required:
2 pieces: M5x16
2 pieces: cap nut M5
1 metal drill M2.5
2 pieces: Key ring 16mm
2 pieces: M20 washer, 5.5 mm hole
V2.0:
Seen from the front on the left side is the network interface, around it is this thick rubber, which is pressed when pushed in - is not nice, so I bevelled the wall at the relevant point - as far as my memory allowed.
As I had already printed V1, I used a small file on my printed version and adjusted it afterwards - it also works perfectly.
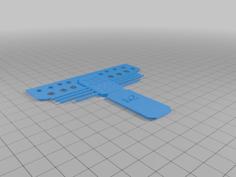
You don't have to print the covers on the right and left where the belt comes on, but you can do it for the look, it even increases the stability due to the printing direction so that it is very unlikely that it can break off upwards.
The ideal printing material for the right and left covers is PETG or PA/nylon, PLA is too unstable and crumbles after a short time on the construction site.
✄ - - - - - - - - - - - - - - - - ✄
Schutz- und Tragetasche für das Navitek NT Pro/Plus Datenmessgerät
Da hat man ein relativ Teures Messgerät wie z.b. das Navitek NT Pro/Plus und Co, und es fehlt ganz konkret eine Möglichkeit das Ding mit einer Schlaufe um den Hals zu hängen um auch mal die Hände frei zu haben. Andere Messgeräte haben meist eine Schlaufe schon mit dran, beim Navitek sucht man das leider vergebens. Es gibt auch keine einfache Schutztasche oder ähnliches - selbst beim Hersteller nicht - echt nicht optimal. Das Ding ist zwar relativ Robust, aber wenn es mal runter fällt - kann man drauf wetten, dann ist es Schrott - und dafür ist es zu Teuer.
Ich glaube der Hersteller glaubt das alle Messungen immer in einem Netzwerk Schrank stattfinden - ebenerdig - auf die Idee zu kommen das man auch mal in 3m Höhe auf einer Leiter messen muss kommt von den Büromenschen wohl keiner ?!? - am Kunden vorbei produziert.
Ich bin im Ladenbau tätig - und da muss oft in 2-3 Höhe gemessen werden - aus der Höhe hat das Gerät keine Chance - da bin ich mir sicher. Man muss es immer fest halten - die eine Hand die einem immer fehlt..., gerade in der Höhe.
Ich habe mich mal hingesetzt und eine Einschubtasche (Hardcase) dafür entworfen wo man Rechts und Links mit Schrauben einen Gurt befestigen kann um so sich das Ding umhängen zu können.
Gedruckt in PETG bei 30% Infill (soll ja Stabil werden) in 6 Stunden Druckzeit. Das ganze natürlich "stehend".
Rechts und Links habe ich aus dem Baumarkt ein paar M5er Schrauben (16mm) und eine U-Scheibe montiert, das ganze mit einer umschließenden Mutter zugeschraubt und dort ein Loch für einen Schlüsselring durchgebohrt - unverlierbar und die Möglichkeit einen Gurt zu befestigen.
Anbei die Blender Datei zum selbst anpassen. Ich wollte noch ein wenig das ganze weiter entwickeln, aber mein Speicher reicht dafür nicht aus - es muss so reichen wie es ist.
Benötigtes Material:
2 Stück: M5x16
2 Stück: Hutmutter M5
1 Metallbohrer M2,5
2 Stück: Schlüsselring 16mm
2 Stück: U-Scheibe M20, 5,5er Loch
V2.0:
Von Vorn gesehen auf der Linken Seite ist die Netzwerk Schnittstelle, drumherum ist dieses dicke Gummi, welches beim Reinschieben gedrückt wird - ist nicht schön, also habe ich an betreffender Stelle die Wand angeschrägt - soweit es mein Speicher zu ließ.
Da ich schon V1 gedruckt hatte, bin ich bei meiner Gedruckten Version kurz mit einer kleinen Feile bei gegangen und habe es nachträglich angepasst - funktioniert auch einwandfrei.
Die Abdeckungen Rechts und Links wo der Gurt dran kommt muss man nicht drucken, kann man aber wegen der Optik tun, es erhöht sogar die Stabilität durch die Druckrichtung so das es sehr unwahrscheinlich ist das es nach oben ausbrechen kann.
Ideales Druckmaterial für die Abdeckungen Rechts und Links ist PETG oder PA/Nylon, PLA ist zu instabil und zerbröselt schon nach kurzer Zeit auf dem Bau.
| Navitek-Blende-Right_and_left.blend | 937.0KB | |
| Navitek-Blende-Right_and_Left.stl | 78.2KB | |
| Navitek_Protection_final.blend | 1.7MB | |
| Navitek_Protection_final.stl | 849.2KB | |
| Navitek_Protection_final_V2.blend | 1.7MB | |
| Navitek_Protection_final_V2.stl | 849.2KB |