Nozzle Viewing Shroud And Blower Fan Mount For Wanhao Duplicator I3 3D Printer Model
The file 'Nozzle Viewing Shroud And Blower Fan Mount For Wanhao Duplicator I3 3D Printer Model' is (stl) file type, size is 1.1MB.
The file 'Nozzle Viewing Shroud And Blower Fan Mount For Wanhao Duplicator I3 3D Printer Model' is (stl) file type, size is 1.1MB.
UPDATE: 10-25-2016: Wanhao i3 PLUS design is here http://www.thingiverse.com/thing:1850770
UPDATE: 10-06-2016: This will not work for the Wanhao i3 PLUS. Should have one designed and proven for that printer next week.
UPDATE: 10-08-2015
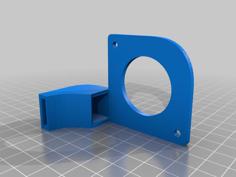
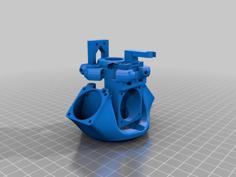
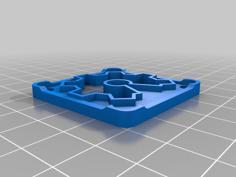
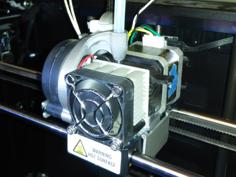
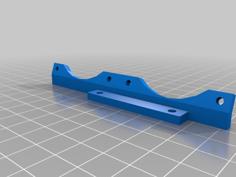
Newest Fan Shroud (ver8) and Fan Guard (ver2) is loaded. This mounts very rigid to the machine. It was designed to use #4 x 3/8" screws to mount to the machine and #6 x 1" long screws to mount the Blower Fan and Grill to the mount and together.
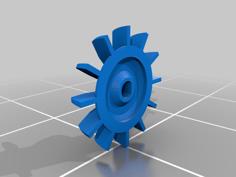
I used 1.010 (101%) scale when I printed. Just print 4 of one of the nozzles also and your all set.
UPDATE: 10-05-2015
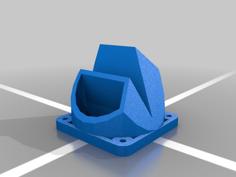
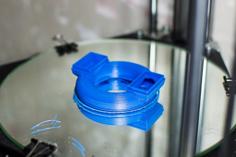
Thanks to everyone and their interest. One of the issues I have dealt with, with the current design, is the shroud letting loose / tilting off of the Fan housing sometimes. I've updated the design so the shroud includes a new mount to the machine. This installs much easier and makes a very solid shroud (2nd photo of new shroud). I've got a couple of alignment issues to work out yet but I hope to have it on the site in the next couple of days. It does use the same Air nozzles and Fan Grille.
ORIGINAL:
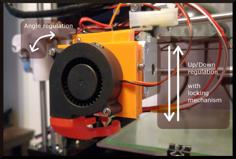
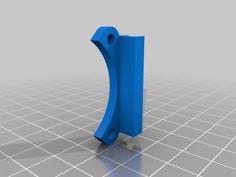
I'm a newbie to 3d printing and just purchased the Wanhao Duplicator i3 recently. I wanted better cooling so I had a better cooler installed on it. This works very well, but I had one major issue with it and all other shrouds, I could not see the nozzle anymore. I couldn't easily watch those first layers go down to see if everything looked good.
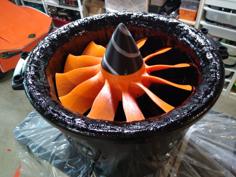
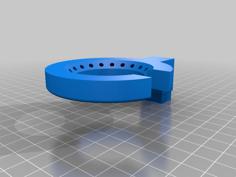
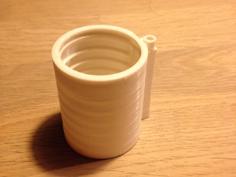
So I designed this to use a low profile shroud ring with 4 additional air nozzles you glue onto it. There are alignment ribs on the air nozzles, and multiple air nozzle designs, #01 is the best in my opinion. You do have to do some fitting of the air nozzles to the shroud before gluing.
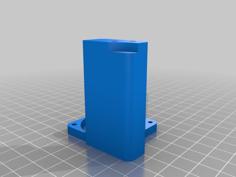
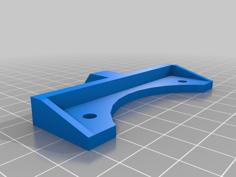
For mounting the bracket to the machine use 2 #4 x 1/2" screws. This is to make sure the angled screw mount will still go through the mount bracket on the machine. The mount holes in the bracket are sized for the screw also.
I did add pads to the shroud and found this to be the better file to print ABS in. That round end really likes to curl up, not much holding it down with all the air openings. I just used supports in the main neck area, which you can remove easily.
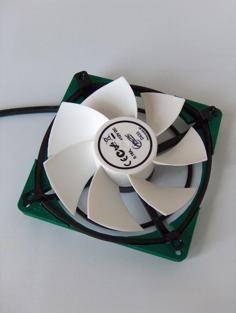
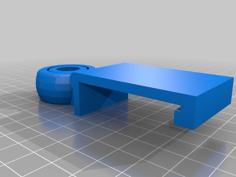
I used this fan.
http://www.amazon.com/gp/product/B00MJU6JR2?psc=1&redirect=true&ref_=oh_aui_detailpage_o02_s00
| Fan_Cover_i3.stl | 448.6KB | |
| Fan_Cover_i3_Ver_02.stl | 523.0KB | |
| Fan_Shroud_Body_ver8.stl | 3.3MB | |
| Fan_Shroud_Body_ver8_with_pads.stl | 3.4MB | |
| Fan_Shroud_Nozzle_01.stl | 125.6KB | |
| Fan_Shroud_Nozzle_02.stl | 90.7KB | |
| Fan_Shroud_Nozzle_03.stl | 90.0KB | |
| Fan_Shroud_Nozzle_Blank.stl | 30.5KB |