Nozzle Brush V1 – Ender3v2 3D Printer Model
The file 'Nozzle Brush V1 – Ender3v2 3D Printer Model' is (stl,txt) file type, size is 126.8KB.
The file 'Nozzle Brush V1 – Ender3v2 3D Printer Model' is (stl,txt) file type, size is 126.8KB.
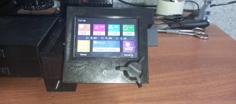
I made this with parts floating about the workshop using a pancake stepper motor. There is another version coming with a small servo. Keep a look out for this.
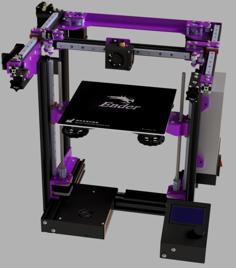
Designed for the Ender3v2 but more than likely fits other variants, however an OEM Creality controller board may not work unless it has a spare driver port.
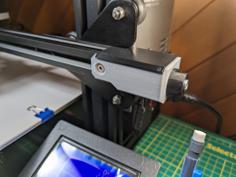
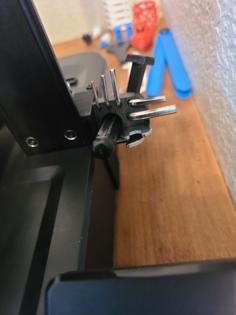
BOM2 printed parts in PLA.Bondtech Pancake stepper with spur gear (extruder type).2x M3x20mm SHCS2x M3x6mm FHCS2x M5x10mm BHCS2x M5 Hammer nutsTMC2209 driverDISCLAIMER - I'll not be held responsible for any damage caused to your printer or electronics. You must be confident and competent to add this.MCU WIRINGI'm using a BTT SKR3 controller board and installed a TMC2209 driver in position E0M and using the SKR3 pin codes. If you want to use another driver position refer to SKR3 pinout here... https://github.com/bigtreetech/SKR-3/blob/master/Hardware%20(SKR%203%20EZ)/BIGTREETECH%20SKR%203%20EZ%20V1.0-PIN.pdfIf you are using another controller board obviously refer to it's manufacturers documentation for its pinout diagram.MOUNTING>Power off printerWith the printer off mount the brush actuator on the right as per photos.Install stepper motor driver.Connect stepper motor to MCU board. Align center of brush with the nozzle and lock it down.NOZZLE POSITION>Power up printer>Home PrinterManually position the nozzle using Mainsail/Fluidd X control so the nozzle is aligned to the left side of the brush and record its X position. Move nozzle to the maximum position and record that. You can refer to your printer.cfg [stepper_x] position_max:, and record that value.Bed slingers Y position is not required as the brush has a fixed position, but record this anyway. Record the Z height homed position.SETTING UP KLIPPERCreate a new cfg file in Klipper and name it "nozzle_brush.cfg" and save.Copy and paste the complete code from the provided file "The CODE.txt" into "nozzle_brush.cfg" and save.Edit "nozzle_brush.cfg" entering pin codes into [manual_stepper] as indicated for your specific control board.Add [include nozzle_brush.cfg] to your printer.cfg file.>Restart FirmwareTESTING THE MOTIONMake sure the brush is at its lowest position first before using these commands.In the console to test the brush motion copy one pair of command lines below at a time and paste them into the console and press enter. The result should be a smooth motion raising and lowering the brush.If the brush direction is wrong, reverse the MOVE values so UP is a negative and DOWN is a positive value. If the acturator clicks, its at either end of its motion. To stop the clicking reduce the "MOVE" value by 0.05 being careful until it stops clicking. The clicking noise is the spur gear jumping and the spur gear rack, so not really a big deal. The plastic teeth will break before the metal spur gear. Again make sure the brush is at its lowest position first before using these commands.1. Home position and move the brush UP… MANUAL_STEPPER STEPPER=brush_actuator ENABLE=1 SET_POSITION=0 MANUAL_STEPPER STEPPER=brush_actuator MOVE=0.75 SPEED={brush_spd} MANUAL_STEPPER STEPPER=brush_actuator ENABLE=02. Home position and move the brush back DOWN… MANUAL_STEPPER STEPPER=brush_actuator ENABLE=1 SET_POSITION=0 MANUAL_STEPPER STEPPER=brush_actuator MOVE=-0.75 SPEED={brush_spd} MANUAL_STEPPER STEPPER=brush_actuator ENABLE=0Record the "MOVE" value once you are happing with the motion. The brush should be at 6-8mm above the bed at its highest point.ENTER THE RECORDED VALUESEdit "nozzle_brush.cfg" entering the recorded values into "CLEAN_NOZZLE" where indicated and save.Make sure the brush is at its lowest position before.For testing purposes I'd recommend adding 10mm to the Z height temporally. Slowly bring this value down to suit.Check all settings again.>Restart Firmware>CLEAN_NOZZLEIf all went well the printer should have homed and then the nozzle should have moved to the left side of the brush, the brush should rise and the nozzle then moves to clean, then finally the nozzle should go back to the bed center.Add "CLEAN_NOZZLE" to your start_print if you want.Works for me.
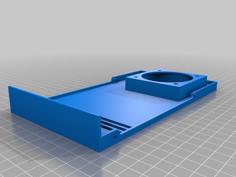
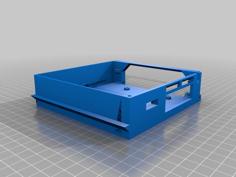
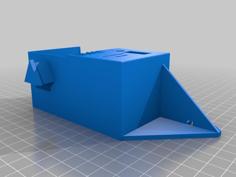
| Mount.stl | 1.1MB | |
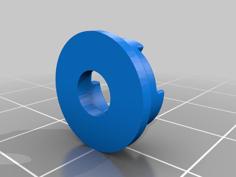
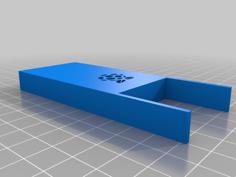
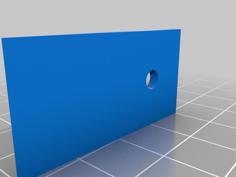
| Rack.stl | 158.7KB | |
| The_CODE.txt | 2.4KB |


![Hand Filament Guide – [Ender 3 Spool Holder] 3D Printer Model](https://cdn.3axis.co/assets/16/58/90/af/165890af-7d67-492e-8766-494fd939150a/images/2ca922a9-3f31-4754-a39e-44eac805f1f5_thumb.jpg)