Custom display base are also available from $5! Contact me to discuss what you want!
Description
The display is based on NFS Underground 2 Career mode garage. Since the original in game garage is fairly plain, I've added more banner/posters to make it looks more lived-in.
There are 2 variants included in this, the one I've built is the turntable edition. The other variant is non-motorised, there is a static version and a simple bearing version.
The display base is separated into multiple parts for easy printing and colour swap. All files are packed into a zip files and arranged in folder as follow:
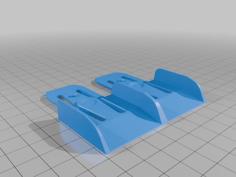
1) Turntable, below are the details the folder and in each subfolders:
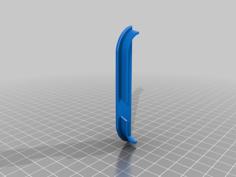
1a) Base:
- Back.STL
- Front.STL
- Side.STL
- BackV2 - Short Bolts Compatible.STL
- FrontV2 - Short Bolts Compatible.STL
1b) Turntable:
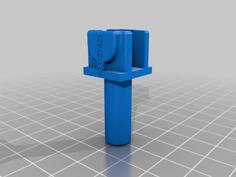
- BaseClip.STL
- GearsHolderV2.STL
- MotorBase.STL
- MotorClip.STL
- MotorLockV2.STL
- Pin.STL
- spur_involute.STL
- SpurClip2.STL
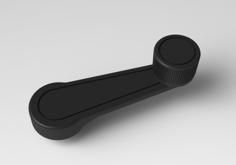
- TurTableKey.STL
- TurTablePlate.STL
- TurTableTop - UDG2.STL
- worm_involute.STL
- WormBearingCap1Side.STL
- WormBearingCapOtherSide.STL
2) Garage Parts:
- Ceiling - LED Variant.STL
- Main Wall.STL
- Roof - LED Variant.STL
- Roof - No LED Variant.STL
- RoofCover - LED Variant.STL
- WallLeft.STL
- WallRight.STL
3) Interior Prop (Optional):
- FakeDoorV2.STL
- GarageBox3.STL
- OilBarrel.STL
- Posters - A4 Size.PDF
- Posters - A6 Size.PDF
- RimRack.STL
- Shelf.STL
- ShelfTopRack.STL
- TyreRack.STL
4) Covers (Optional):
- BaseFront Cover.STL
- BaseSide Cover.STL
- GarageFrontCover.STL
Alternate Build for Non-motorised variant, skip "Turntable" folder and use files in "Non-Motorised":
Files in "Non-Motorised" folder:
- BaseV1 - Bearing.STL
- BaseV1.STL
- TopCover3 - Floor.STL
- TurTableTop - Bearing.STL
- TurTableTop - Static.STL
Additional Parts To Build The Turntable
- DC motor with angled output, commonly for robotics I think, picture: https://www.amazon.in/Robocraze-Single-shaft-BO-Motor/dp/B07DZZZDG5
- 10 number of M2.5x8 screws (Mostly for securing the base)
- 2 number of M2.5x6 screws (To secure the motor holder to the base)
- 8 number of M2.5x8 screws (It is for securing the gears and motor clips)
- Pulse Wave Module for controlling the motor speed.
- A 10cm long LED Dorm Light to dismantle and re-wired as power source for the motor: https://imgur.com/a/y3V403X
Additional Parts To Build The Bearing Variant
- Bearing of 20mm diameter in size with a 10mm diameter center hole
Print Settings
Nozzle size = 0.5 mm (0.4 will be printable and smaller better)
Layer height = 0.2 mm
Filament change layer for colours on "BackWall.STL":
1) Start (Door frame colour, mine is in grey)
2) Layer 5 (Overall wall colour, mine is in white)
3) Layer 61 (Shelf pattern, mine is in black)
Filament change layer for colours on "LeftWall.STL" & "RightWall.STL":
1) Start (Overall wall colour, mine is in white)
2) Layer 9 (Lower half colour, mine is in green)
Filament change layer for colours on "TopCover3 - Floor.STL":
1) Start (Gap lines colour, mine is in black)
2) Layer 6 (Overall floor colour, mine is in grey)
Filament change layer for colours on "Ceiling.STL":
1) Start (Gap lines colour, mine is in black)
2) Layer 11 (Overall ceiling colour, mine is in brown)
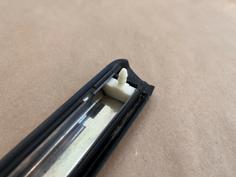
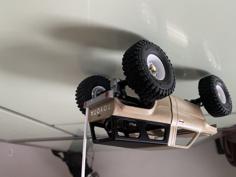
Assembly (Based on my photos build)
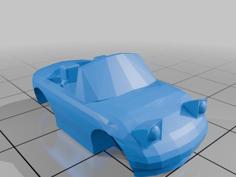
The car is just placed on top of the turntable.
Check out my assembly video to give you a better idea on how the build suppose to go: https://youtu.be/YtJmHuSwCP8
Files used in these steps are found in "Turntable" folder.
Step 1: Base Build
Print the following base and flat base:
- Back.STL
- Front.STL
- Side.STL (x2 required)
Alternate version for easy bolt locking:
- BackV2 - Short Bolts Compatible.STL
- FrontV2 - Short Bolts Compatible.STL
Additional parts:
- 8x M2.5x8 bolts will be required to secure the base.
The back piece is interchangeable with the front if you prefer to have a window at the back too.
Step 2: Turntable Build
Print the following to build the turntable:
- BaseClip.STL
- GearsHolderV2.STL
- MotorBase.STL
- MotorClip.STL
- MotorLockV2.STL
- spur_involute.STL
SpurClip2.STL
- worm_involute.STL
- WormBearingCap1Side.STL
- WormBearingCapOtherSide.STL
Additional parts:
- 2x M2.5x6 bolts
- 2x M2.5x8 bolts
- 8x M2.5x8 screws
- DC motor with angled output, commonly for robotics I think, picture: https://i.imgur.com/XwKjYD5.jpg
- Pulse Wave Module for controlling the motor speed.
First print "MotorBase.STL", this is where the turntable and motors will be secured on it. Print "MotorLockV2.STL" and "GearsHolderV2.STL" next, these are motor holders and turntable gears holder.
Secure the motor holder on to the motor base byt bolting it. Gears holder will need to slide into the gap provided then bolt on to it with "BaseClip.STL".
The gears will fit nicely on the gears holder and slide the motor into the worm gear hole provided then slide the motor into the motor lock.
Lastly, secure the gears using the "WormBearingCap1Side.STL" and "WormBearingCapOtherSide.STL" on the worm gear. Secure "SpurClip2.STL" on the spur gear then lock "MotorClip.STL" to the motor holder.
When everything is secured, put the assembly into the base. It is recommended to glue/tape the motor base to the base built previously.
Step 3: Turntable Top Build
Print the following to complete the turntable:
- TurTableKey.STL (x2 required)
- TurTablePlate.STL
- TurTableTop - UDG2.STL
- Pin.STL
- TopCover3 - Floor.STL
Slide the turntable plate, "TurTablePlate.STL" on to the spur gear then push the pin to secure the position of the turntable plate to the spur gear.
Next, place "TopCover3 - Floor.STL" on the base then slide "TurTableTop - UDG2.STL" in the hexagon holes provided on the "TurTablePlate.STL". Now slide in "TurTableKey.STL" under "TopCover3 - Floor.STL" to lock "TurTableTop - UDG2.STL" to "TurTablePlate.STL".
Step 4: Garage Build
Files are found in "GarageParts" folder
Print the following parts to assemble the garage:
- Main Wall.STL
- WallLeft.STL
- WallRight.STL
Print the following parts to assemble the roof:
There are 2 variants of roof available, No LED variant and LED variant, for LED variant print the following parts:
- Ceiling - LED Variant.STL
- Roof - LED Variant.STL
- RoofCover - LED Variant.STL
For no LED variant print the following parts:
- Roof - No LED Variant.STL
Print the 3 walls listed above then place the main wall at the back of the turntable. Slide both the side walls into the slit provided on the main wall piece. After that, fit the roof on to the walls. If you printed the LED variant, slide the ceiling on to the roof piece then close it with the roof cover.
Step 4: Interior Props & Cover (Optional)
All the interior props are optional, they are made to fill the room with more items and make it feel more lived-in.
There is 2 PDF files that includes all the banner/poster I use for this build, there are more posters in it than I used in my build. The 2 sizes are scaled for different paper size.
The covers are meant to close the hole around the base from gathering dust. Mine has an additional PVC sheet tape on them.
Others
Feel free to send me any feedback on how to improve the design. Suggestion on display base designs are welcomed too.
I can be contacted through Instagram or Twitter too:
Facebook: https://www.facebook.com/groups/1115757609295068
Twitter: https://twitter.com/Giga_Penguin
Instagram: https://www.instagram.com/GigaPenguin3DPrinting/
Custom display base designs are available from $5! Contact me to discuss what you want!