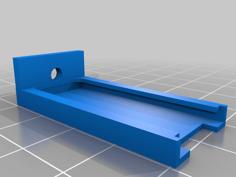
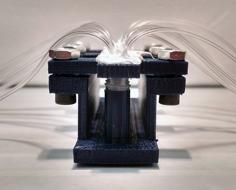
First prototype for a cheap, high-efficiency visible monochromator, using an inexpensive 1000 lines/mm replica transmission grating.
Non-Printed Components ($50-60):
12V, 2A DC Power Supply ($5)
Light Source:
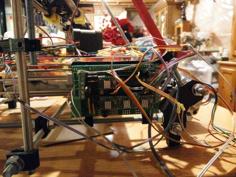
I initially used a simple white 5mm LED as a light source and collimated it using a plano-convex lens, but this didn't give a strong flux for fluorescence measurements. Because of this, I upgraded to a Cree XP-E2 LED and Khatod 1672UN optic (w/ optic holder), powered by a dimmable 1000mA DC LED driver. This produces an intense, relatively broadband beam of visible light with around 4 degrees of divergence, for about $35 including the driver. The monochromator's path length, integrated baffles, and sequential slits work to reduce this divergence further and improve resolution. If you copy this setup, be sure to mount an appropriate heat sink/fan to keep temperatures in check.
The printed light source case will fit the optic, optic holder, LED, LED Driver, 40x40x20mm heat sink, and a fan of the same dimensions. The driver potentiometer can be mounted in the back hole. I ended up connecting the fan to the same 12V power supply going to the LED.
Optical Slit:
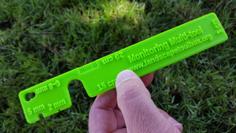
I did experiment with designing the entry slit around a couple of adjustable razor blades but found that the printed "slit cards" worked well enough. I also printed multiple sizes, allowing me to swap out slits to tune the flux/resolution for different applications. Of course, wider slits allow greater flux with the cost of decreased resolution. I found a good balance using a 400µm slit and two 200µm slits.
Lens:
After the grating, the diffraction pattern is shone into an f3.5 meniscus lens that I sourced from an old thrift store slide projector. This focuses the diffraction pattern to improve resolution. Cut the monochromator STL along the post-grating baffle and modify the case to fit whatever lens you have, or remove it completely. While still functional without the lens, it will greatly complicate aligning any kind of exit slit, cuvette, and detectors.
Diffraction Tunnel:
Print tunnel #1, as well as enough 10mm and 20mm tunnel segments to build the best distance for your lens. For my 40mm f3.5 meniscus lens, I used 4x20mm and 1x10mm tunnel to get my diffraction pattern focused on the exit slit.
Case:
After printing, it's a good idea to clean up the baffles with a file and/or sandpaper. To reduce reflections, I'd also recommend painting the interior of the case with matt black paint. Acrylic worked fine for me.
WORK IN PROGRESS:
Still designing the lids.
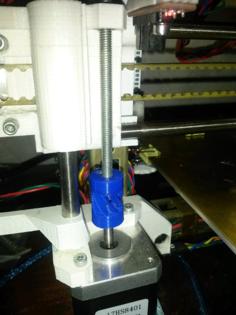
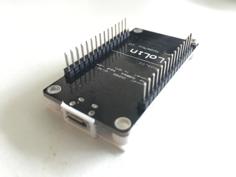
I’m currently working to build up the module for measuring the absorbance/fluorescence of lab samples, powered by an Arduino R3. This module will replace the cuvette slide-assembly and will include an adjustable exit slit (wavelength-selection), cuvette holder, and fluorescence/absorbance detectors. I would also like to add a stepper motor to control the exit slit position, allowing automated measurements and scanning capability across the visible spectrum.
As it stands, this should work as-is to read absorbance/fluorescence using photoresistors mounted into the cuvette holder holes.
| 100um_Slit.stl | 148.5KB | |
| 200_uM_Slit.stl | 167.3KB | |
| 3_mm_Slit.stl | 184.5KB | |
| 400_uM_Slit.stl | 186.0KB | |
| 600_uM_Slit.stl | 204.8KB | |
| 800_uM_Slit.stl | 223.5KB | |
| Diffraction_Tunnel_1.stl | 340.9KB | |
| Diffraction_Tunnel_10mm.stl | 294.9KB | |
| Diffraction_Tunnel_20mm.stl | 306.1KB | |
| Light_Source_Case.stl | 2.1MB | |
| Light_Source_Case_Lid.stl | 783.9KB | |
| Monochromator_V3.stl | 394.6KB | |
| Monochromator_V3_Lid.stl | 977.0KB | |
| Wavelength_Selector_Housing.stl | 74.1KB | |
| Wavelength_Selector_Slide.stl | 283.5KB |