Mason Jar Seed Starter 3D Printer Model
The file 'Mason Jar Seed Starter 3D Printer Model' is (stl) file type, size is 27.2KB.
The file 'Mason Jar Seed Starter 3D Printer Model' is (stl) file type, size is 27.2KB.
I've redesigned the files, but my printer has been busy all weekend printing the Quin doll my granddaughter has requested, so the new files are definitely beta at this point because I haven't been able to test them yet. Hopefully the updated pot portion will print without supports now, and the bottom part will fit without falling through but without being too snug. I'm leaving the original files as well, because I'd still like to do some more testing to see if it's possible to keep the PLA-only wick working with lower water levels. (I'll post new photos once I've regained autonomous control of my printer!)
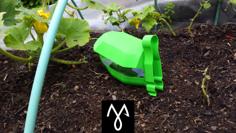
I'm really bad at starting seeds, because I get distracted and forget to water/mist them frequently enough to keep the seedlings alive. I'm hoping this will change that for me. It's probably not a practical tool for avid gardeners with massive quantities of seeds to start, but then again, those sorts of people probably don't forget to water theirs, anyway. :)
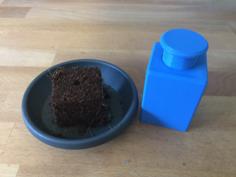
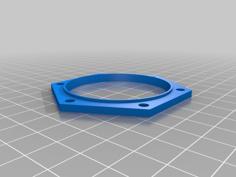
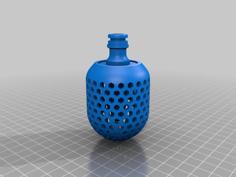
It's sized to fit into a pint-sized widemouth Mason jar, and you can just set it in for easy filling, or screw it down with a ring cap if you prefer.
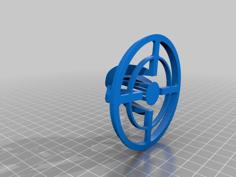
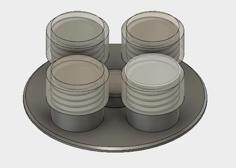
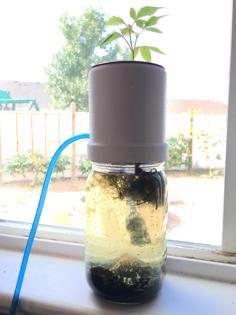
To assemble, drop the pot portion into the top of a Mason jar, fill the jar with water up to the bottom of the pot (to get the wicking action going), then drop the bottom part through the hole in the bottom of the pot before adding soil and seeds. Make sure to press the soil in firmly enough so that it makes solid contact with the top of the wick, so the water will continue to be drawn up even after the level drops below the bottom of the pot.
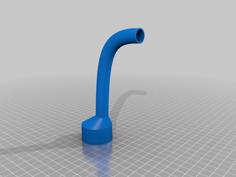
If you're using the string version, before assembly cut 2-4 lengths of string approximately twice the depth of the jar. Fold each length in half and feed it up through the tube in the center of the bottom piece, push it through one of the holes, place the loop around the little hook next to the hole, and pull it snug to keep it in place. (See comments for some recommendations on types of string/yarn to use.)
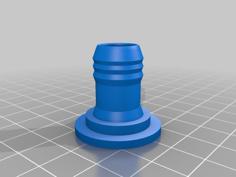
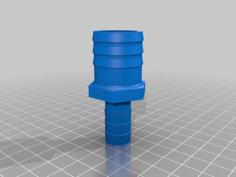
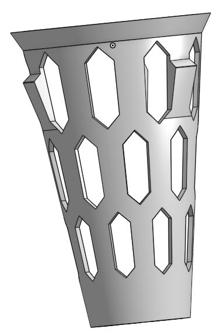
If you're using the soil version, print the wick portion from PLA using a thin (1mm or less) outer shell, fill it, with your planting medium and use a pencil, dowel, etc. to eliminate any air pockets. (It may turn out this part needs to have a few small holes in it to let in enough water, but PLA isn't water-tight so it may be fine without them.)
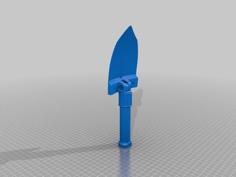
When you're ready to plant the seedlings you can push the bottom piece upward to pop the soil and seedlings out for planting, to keep from disturbing the roots too much.
Use PLA for the soil wick. Other than that, filament type isn't important -- use what you like. Everything should now print without supports, and shouldn't need much (if any) infill.
My thought was that because PLA isn't water-tight, it might be possible to make it work as a wick, using the infill pattern to act as a wick to draw water up from the jar into the soil in the pot, and keep the seeds / seedlings watered. My first experimental sets using 50% and 40% infill stayed damp until the water level got too far below the bottom of the pot, and then stopped wicking, so either I haven't found the ideal infill percentage, or the idea just isn't viable.
To try it for yourself, pick an infill percentage you think will allow large enough pores to overcome surface tension and small enough to minimize gravitational pull (I haven't found the magic size, yet!). You also need to turn off the options for solid infill on the top and bottom layers, so the water can get into the wick part to begin with. If you use Cura, you can find that option in the Expert Settings screen.
| Mason_Jar_Seed_Starter_Original_Set.stl | 43.0KB | |
| Pot_bottom_for_soil_wick.stl | 15.5KB | |
| Pot_bottom_for_string_wick.stl | 48.8KB | |
| Pot_V2_no_support_needed.stl | 23.5KB |