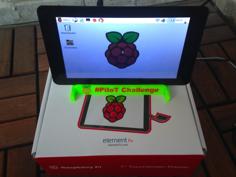
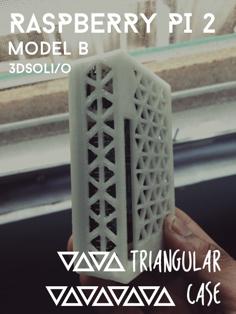
There already is a plethora of raspberry pi cases on Thingiverse and the last thing we need is yet another one ... well - I created one anyway ... because I wanted to and I had a lot of fun doing it :-).
I tried to achieve the following key features:
I tested this design with 0.2mm and 0.1mm layer height. Both work well. I would recommend to use PETG for better heat resistance.
I tested this for the Raspberry Pi 3 Model B+. It may work for models with similar layout as well but since this is the only one I own I can't verify this.
I also made a Raspberry Pi 4 version.
If you have any questions, suggestions or requests don't hesitate to let me know.
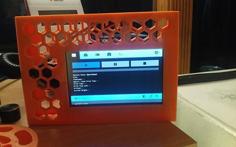
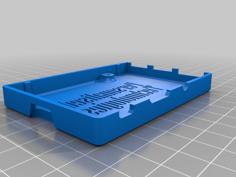
There are several different designs for top and bottom
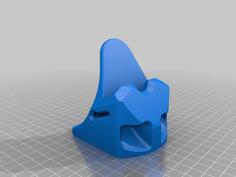
There are three different stands
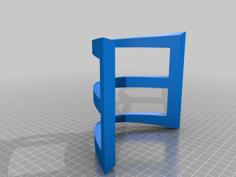
The vertical one also has a version that routs the Rasberry Pi status leds to the front. To achieve this you have to print the file "Stand_Vertical_LED_Guide.stl" twice using a transparent filament and slide it into the according holes of file "Stand_Vertical_LED.stl". It's difficult to explain - just have a look at the pictures.
I don't have a multi material printer but learned that you can create a multi material print pretty easily without special hardware (as long as the multi material part does not span over to may layers - otherwise it gets a pita). By multi material I don't mean switching filament at certain layers (which would not have worked in my case because I wanted the top and bottom layers to be on the print surface) but a true multi color print (as seen in the pictures). Here is a short instruction of how it works:
I used Prusa Slicer for this but I guess it would work with the original Slic3r in a similar way
Whenever your printer reaches the M600 command it will pause outside the print area and prompt you to switch filament (supposedly your printer supports the M600 G-code command).
This all probably sounds more complicated then it is. Once you understood how it works it's actually pretty straight forward.
There are quite a few different versions of STL files. There are different designs and for each design there are different options with regards to slots for camera and display cables and an access slot to the pins. To help you pick the right files I used the following naming scheme:
If you are unsure which file to pick just open it in your slicer and see what it looks like.
| Bottom_Base_SM.stl | 330.1KB | |
| Bottom_Hex_MM2_Color1.stl | 429.1KB | |
| Bottom_Hex_MM2_Color2.stl | 91.5KB | |
| Bottom_Hex_SM.stl | 383.4KB | |
| Bottom_Slots_SM.stl | 467.2KB | |
| Stand_Flat.stl | 1.6MB | |
| Stand_Horizontal.stl | 977.6KB | |
| Stand_Horizontal_H20.stl | 953.0KB | |
| Stand_Vertical.stl | 960.1KB | |
| Stand_Vertical_H20.stl | 947.2KB | |
| Stand_Vertical_LED.stl | 965.5KB | |
| Stand_Vertical_LED_Guide.stl | 1.1KB | |
| Top_Base_SM.stl | 369.1KB | |
| Top_Base_SM_Cam_Disp.stl | 384.4KB | |
| Top_Base_SM_Cam_Disp_Pins.stl | 392.4KB | |
| Top_Base_SM_No_Side_Slots.stl | 247.2KB | |
| Top_Base_SM_No_Side_Slots_Cam_Disp.stl | 262.5KB | |
| Top_Base_SM_No_Side_Slots_Cam_Disp_Pins.stl | 270.5KB | |
| Top_Base_SM_No_Side_Slots_Pins.stl | 255.3KB | |
| Top_Base_SM_Pins.stl | 377.1KB | |
| Top_H20_Slots_SM.stl | 657.6KB | |
| Top_H20_Slots_SM_Cam_Disp.stl | 665.2KB | |
| Top_H20_Slots_SM_Cam_Disp_Pins.stl | 673.2KB | |
| Top_H20_Slots_SM_Fan40.stl | 635.3KB | |
| Top_H20_Slots_SM_Fan40_Cam_Disp.stl | 643.0KB | |
| Top_H20_Slots_SM_Fan40_Cam_Disp_Pins.stl | 651.0KB | |
| Top_H20_Slots_SM_Fan40_Pins.stl | 643.3KB | |
| Top_H20_Slots_SM_Pins.stl | 665.6KB | |
| Top_Hex_MM2_Color1.stl | 442.8KB | |
| Top_Hex_MM2_Color1_Cam_Disp.stl | 454.5KB | |
| Top_Hex_MM2_Color1_Cam_Disp_Pins.stl | 462.5KB | |
| Top_Hex_MM2_Color1_pins.stl | 450.8KB | |
| Top_Hex_MM2_Color2.stl | 68.1KB | |
| Top_Hex_MM2_Color2_Cam.stl | 68.2KB | |
| Top_Hex_SM.stl | 408.8KB | |
| Top_Hex_SM_Cam_Disp.stl | 420.3KB | |
| Top_Hex_SM_Cam_Disp_Pins.stl | 428.3KB | |
| Top_Hex_SM_Pins.stl | 416.8KB | |
| Top_Logo_MM2_Color1.stl | 796.9KB | |
| Top_Logo_MM2_Color1_Cam_Disp.stl | 802.1KB | |
| Top_Logo_MM2_Color1_Cam_Disp_Pins.stl | 810.1KB | |
| Top_Logo_MM2_Color1_Pins.stl | 804.9KB | |
| Top_Logo_MM2_Color2.stl | 538.4KB | |
| Top_Logo_MM2_Color2_Cam.stl | 531.1KB | |
| Top_Logo_MM3_Color1.stl | 800.4KB | |
| Top_Logo_MM3_Color1_Cam_Disp.stl | 805.6KB | |
| Top_Logo_MM3_Color1_Cam_Disp_Pins.stl | 813.7KB | |
| Top_Logo_MM3_Color1_Pins.stl | 808.4KB | |
| Top_Logo_MM3_Color2.stl | 306.7KB | |
| Top_Logo_MM3_Color3.stl | 342.7KB | |
| Top_Logo_MM3_Color3_Cam.stl | 331.9KB | |
| Top_Logo_SM.stl | 914.2KB | |
| Top_Logo_SM_Cam_Disp.stl | 917.6KB | |
| Top_Logo_SM_Cam_Disp_Pins.stl | 925.6KB | |
| Top_Logo_SM_Pins.stl | 922.2KB | |
| Top_Slots_SM.stl | 468.1KB | |
| Top_Slots_SM_Cam_Disp.stl | 475.8KB | |
| Top_Slots_SM_Cam_Disp_Pins.stl | 483.8KB | |
| Top_Slots_SM_Pins.stl | 476.2KB |