Makita Trimmer High Aspect Jig 3D Printer Model
The file 'Makita Trimmer High Aspect Jig 3D Printer Model' is (stl) file type, size is 532.7KB.
The file 'Makita Trimmer High Aspect Jig 3D Printer Model' is (stl) file type, size is 532.7KB.
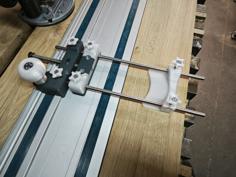
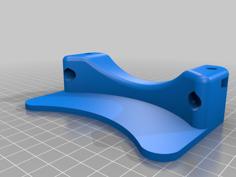
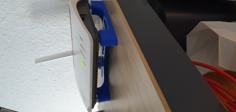
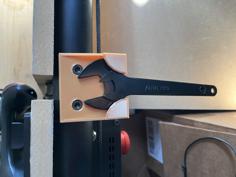
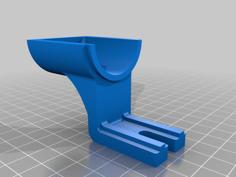
This is a Jig for the Makita DRT50 (wireless) and Makita RT0700C (wired) Wood Trimmer which allows to trim wood with extreme angles. It requires the angular trimmer shoe (shown in the photos) that comes shipped with the Makita DRT50ZJX2 set for example. You can also buy the Makita angular shoe separately (Makita part no. 198987-9).
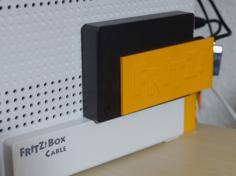
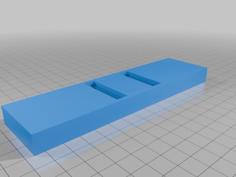
The stock Makita accessories would only allow to trim angles down to 45°. In the photos you see an example wood piece which I trimmed with an angle of only 18° (in relation to longest wood surface). The trimmed side of the wood piece was 54mm wide as a result. For this to achieve I had to buy an extra long trimmer head. To my surprise I found that the well known / established trimmer head brands only offer heads up to around 35mm length, so I bought a Chinese extra long trimmer head from Amazon instead (the yellow one you see on the photos). I can provide the Amazon link to the set (which contains 72mm, 83mm, 96mm and 109mm heads) if anybody needs it.
Print Settings: transparent (or well, milky) PETG, default settings, no support enabled.
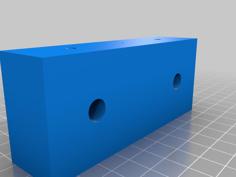
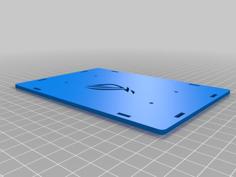
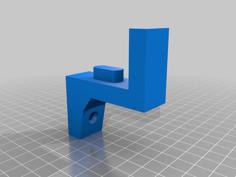
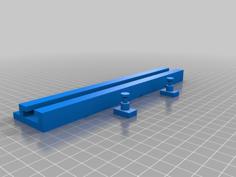
Assembly: remove the black bottom surface plate from the Makita angular shoe by removing the 4 black screws (and put the black plate aside, you don't need it for this jig), then fix the printed jig plate with those 4 black screws to the angular shoe instead. Slide the jig plate into the jig guide and fix the slide to the guide by using (up to) four M5 wing screws and M5 nuts. In the photos I used 4 of them. But less will also do.
CAUTION / DANGER: it is very important to understand that you MUST NOT clamp the wood piece between the jig guide and trimmer head! Doing so would cause a kickback that would throw out either wood piece or trimmer according to rotation of the trimmer head and severe injuries may result! Have a look at the graphical illustration how to use vs. NOT to use this jig!
USAGE TIPS: start by setting up the angular shoe with the desired angle, e.g. by using a digital angle measuring tool. As always when working with a wood trimmer, only remove a limited amount of wood material in each pass. So loosen the wing screws of the jig then slide the jig plate such that only a small piece of the trimmer head is visible in the cutting area of the jig. Tighten the wing screws and start the first trimmer pass by aligning both sides of the jig with two sides of the wood piece and move the jig along the wood piece until no more material is removed. Stop the trimmer, loosen the wing screws and slide the jig guide such that the trimmer head is slightly more visible in the cutting area of the jig. Tighten the wing screws and start the second trimmer pass. Repeat this process to remove more and more wood material. Note that once you reach the point where the trimmer head would cut fully through to the corner of the wood piece you then need to additionally clamp a rail to the wood piece which acts as a stop for the trimmer jig. This is necessary because at this point the jig would no longer align safely on two sides of the wood piece, so without a rail you might then unintentionally shorten the length of the wood piece. You can just use an inexpensive alloy leveling rod (depending on length and thickness between 10 and 40 bucks at hardware stores) and clamp the rail with two one-hand clamps to the wood piece and you are good to go to finalize trimming the wood piece to the corner.
DISCLAIMER: You are using this jig at your own risk! In no event will I (the author) be liable for any risk or damage that may arise out of use or inability to use this jig!
| makita_trimmer_hi_aspect_jig_guide_v2b.stl | 56.4KB | |
| makita_trimmer_hi_aspect_jig_plate_v2b.stl | 1.4MB |