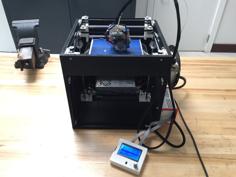
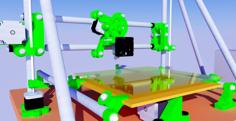
JP-440 Custom RepRap 3D Printer Model
The file 'JP-440 Custom RepRap 3D Printer Model' is (stl,csv,pdf,step) file type, size is 37.6MB.
The file 'JP-440 Custom RepRap 3D Printer Model' is (stl,csv,pdf,step) file type, size is 37.6MB.
I have always dreamed of the idea of additive manufacturing ever since I saw Jurrasic Park 3 (terrible movie) and it's printed velociraptor vocal chambers. I hoped one day I would be able to print parts in my basement.
Fast forward 15 years and I buy my first 3d printer, a CR-10. After no more than a month of owning it I knew I would want another. The thing was, I wanted it to be an involving experience that would teach me a bunch of things along the way. Enter the idea of designing my own 3d printer, from scratch.
For those who intend to follow my project as I did at the size I did, be warned. It will not be cheap. For smaller sizes I don't think the price would drop far enough to justify not buying an off the shelf model. This is really intended for larger format printers and those who want to learn how 3d printers are built and work.
This project is not for the faint of heart and a deep understanding of mechanics, materials and technology goes a long way.
For those who are not looking to reproduce my printer, feel free to browse the parts list to see if there is something useful for your custom setup. If your design is based off of 2020 extrusion I may have some goodies for you.
When I designed this thing I didn't put enough room for the head and so the printable area came out to somewhere around 375x375X375. The height would be higher with the uploaded top bearing mounts because mine is currently using an older version that restricts build volume.
I would expect a build volume of 375x375x400 easily maybe 410 on the z.
In the files is the parts list spreadsheet. It lists all the items I purchased for my printer and the prices I paid along with a link to each item's listing. Briefly, you will need to buy all the electronics; steppers, hotends, endstops, bed heaters, controller, fans, etc. You will also need the framing (bunch of 2020 aluminum) and hardware to assemble.
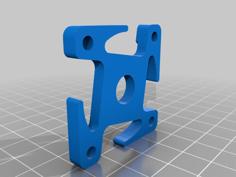
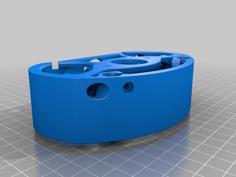
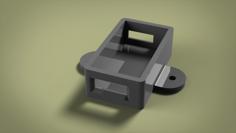
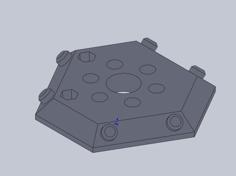
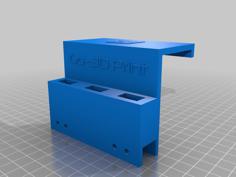
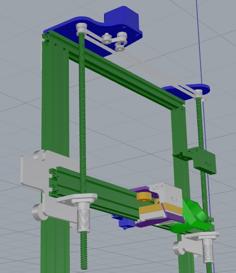
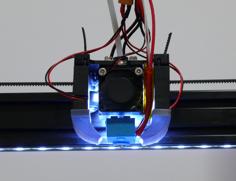
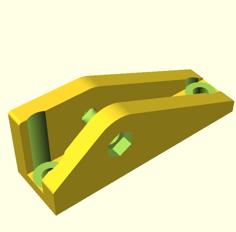
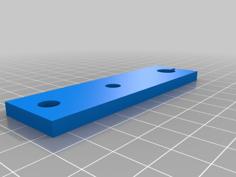
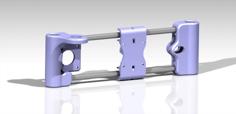
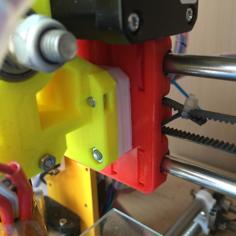
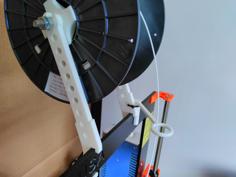
Most of a printer is not printed, but we print where we can. Briefly the printed parts include things like; the head assembly, the filament mounting bracket, x and y axis alignment/structural brackets, all stepper mounts, and the extruder grippers.
My design is inspired by the likes of the CR-10, Anet A8, Prusa i3, and the Tevo Tarantula. It is a Y-bed Z&X-head layout. Dual Z and dual extrusion. From my selected parts,
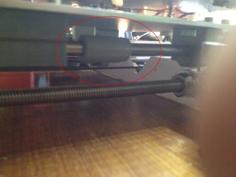
Don't use the second leadscrew nut spot on the X-Axis adapter as it is not in alignment and is a poor design all around. I'm only using the top one and the bottom one is empty just the lead screw going through it. I plan on redesigning that entire adapter part.
Also to come, I plan on creating a mounting adapter for a Dremel 4000 to be mounted to the head for light-duty CNC routing, as well as throwing on a laser module for laser engraving. Should be fun.
| 2020_Cap.stl | 610.7KB | |
| 400mm_x_400mm_x_400mm_JP-440_-_Parts.csv | 5.5KB | |
| Adjustable_Z_Stop.stl | 116.3KB | |
| Bed_Spacer.stl | 85.5KB | |
| bl.pdf | 99.9KB | |
| br.pdf | 102.5KB | |
| Cable_Strain_Releif.stl | 920.9KB | |
| Center_Rail_Spacer.stl | 89.1KB | |
| Extruder_Adapter.stl | 636.7KB | |
| Extruder_Arm.stl | 247.1KB | |
| Extruder_Clamp.stl | 161.5KB | |
| Extuder_Base.stl | 272.4KB | |
| Filament_Mount_Clamp.stl | 936.6KB | |
| fl.pdf | 96.5KB | |
| fr.pdf | 99.0KB | |
| Idler_Bracket.stl | 126.9KB | |
| Idler_Mount.stl | 145.7KB | |
| Level_Adjustment_Knob.stl | 2.9MB | |
| Lower_Rail_Adapter.stl | 70.0KB | |
| Pully_Bushing.stl | 56.3KB | |
| RepRap_JP-440_v231.step | 26.7MB | |
| RepRap_JP-440_v231.stl | 90.4MB | |
| Upper_Rail_Adapter.stl | 195.7KB | |
| X_Axis_Z_Adapter_Right.stl | 336.6KB | |
| X_Endstop_Mount.stl | 61.7KB | |
| X_Stepper_Mount.stl | 155.9KB | |
| Y_Axis_Frame_Spacer.stl | 79.6KB | |
| Y_Axis_Frame_Spacer_1.stl | 257.6KB | |
| Y_Axis_Stepper_Mount.stl | 258.6KB | |
| Y_Endstop_Adjuster.stl | 89.5KB | |
| Y_Endstop_Mount.stl | 56.6KB | |
| Y_Frame_Bracket.stl | 113.9KB |