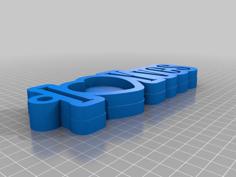
JoJo1 Laser Carrier Anycubic Chiron With Extractor Duct 3D Printer Model
The file 'JoJo1 Laser Carrier Anycubic Chiron With Extractor Duct 3D Printer Model' is (3MF,STEP,STL) file type, size is 1.3MB.
The file 'JoJo1 Laser Carrier Anycubic Chiron With Extractor Duct 3D Printer Model' is (3MF,STEP,STL) file type, size is 1.3MB.
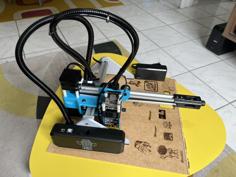
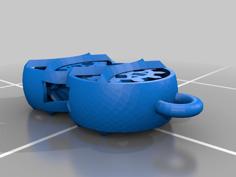
Laser Carrier and Extractor Duct for the Anycubic Chiron
The laser carrier can be removed without the need to disassemble the hot end and it mounts to the left side of the hotend metal shroud. The laser can easily be detached from the carrier leaving the carrier attached to the hotend shroud
The extractor duct fits 150mm diameter tube and sits on the left side of the Chiron frame
Parts for the carrier
5x 4x8mm thread length countersunk bolts
2x 4mm nuts
3x 3x10mm thread length caphead bolts
1x Male to Female flying lead
1x Voltage Divider (these are easy to make out of vero board, lots of info on the net. My laser pwm is 5v max, so use the appropriate resistors for your laser pwm.) more info in links below
Parts for the extractor duct
11x 4x40mm thread length caphead bolts for the duct
11x 4mm nuts
2x frame mounts (look in links)
Hotend Preparation
Remove the hot end shroud, remove the small pcb, unplub the part cooling fan and install a male to female flying lead. Pass the fan lead and the flying lead though the gap where the pcb goes. Reattach the pcb and install the shroud.
Assembly
Fit the voltage divider into the space on top of the carrier, fit the lid and use two 3x10mm bolts to fix in place.
Place the two 4mm nuts into the nut holder, they are a tight fit, so you might need a vice to seat them.
Remove the 3mm bolt and plug protector from the left side of the hotend shroud. Insert the 3x10mm bolt into the laser carrier and then fit to the the hotend shroud but leave loose. Insert the three 4x8mm bolts, orientate the nut holder with the v cut facing up and tighten all bolts. The upper 4mm bolt is used for location only and does not need a nut.
Fit the laser to the carrier using the two upper holes, 4x8mm countersunk bolts connect the voltage divider output to the laser pwm plug and the input to the part cooling fan flying lead. Connect the voltage supply to the laser.
Laser carrier offset from hotend Y axis 58.60 X axis 17.00
Included the hot end shroud model.
Gcode
Start Gcode
G21 ;Set to metric
G90 ;Change to absolute positioning
G28 ;home all axes
G1 Z100 F3000 ;Move to start hight
G1 X20 Y10 F1500 ;Move to start pos
End Gcode
M106 S0 ;Turn off cooling laser
G90 ;Change to absolute positioning mode to prepare for part rermoval
G1 X0 Y400 ;Move the print to max y pos for part rermoval
M84 ;Disable Motors
Links
Voltage Divider https://www.allaboutcircuits.com/tools/voltage-divider-calculator/
MattKi excelant frame mounts https://www.thingiverse.com/thing:3120345/files
LightBurn free 30day demo https://lightburnsoftware.com/
| anycubic_chiron_bed_clip.3MF | 15.3KB | |
| Anycubic_Chiron_Hotend_Shroud.STEP | 342.1KB | |
| Extractor_Duct_Bottom.3MF | 95.4KB | |
| Extractor_Duct_Top.3MF | 57.0KB | |
| JoJoOne_Laser_Carrier.3MF | 74.0KB | |
| Laser_Carrier_Assembly.STL | 3.3MB | |
| Laser_Carrier_Lid.3MF | 25.7KB | |
| Laser_Carrier_Nut_Holder.3MF | 19.0KB |