HO Scale Raspberry Pi Camera Car With Servo Camera Control 3D Printer Model
The file 'HO Scale Raspberry Pi Camera Car With Servo Camera Control 3D Printer Model' is (blend,stl,pdf) file type, size is 1.8MB.
The file 'HO Scale Raspberry Pi Camera Car With Servo Camera Control 3D Printer Model' is (blend,stl,pdf) file type, size is 1.8MB.
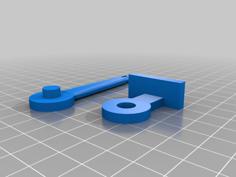
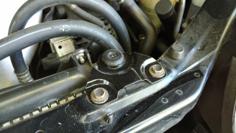
This is the complete design for my HO Scale Raspberry Pi Camera Car. The complete car consists of four main components - the platform, the camera assembly, the power supply box, and the Raspberry Pi mount. The car features a swivel mount for the camera that is linked to a micro servo (SG-90) that can swivel the camera -80 to +80 degrees. It also features power pickup from the rails along with a small LiPo battery, normally kept charged by track power, to keep the Pi running over dirty or otherwise intermittent power situations.
The platform consists of an HO scale flatbed car with holes to attach the rest of the components using small screws. A cutout for a 2-pin male header allows power to go from the underside of the car into the power supply box. Use my HO Scale Power Pickup Truck model (https://www.thingiverse.com/thing:6434797) or off-the-shelf power pickup trucks to pick up power and run the wires down the center channel to the pin header.
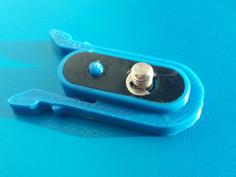
Mount the Raspberry Pi Camera Module (version 1) to the Camera Mount and then insert it into the Camera Base. Insert an SG-90 micro servo into the Camera Base as well, then screw the Camera Base to the Platform. Cut and bend stiff wire linkages to hook the Camera Mount to the servo horn so that the Camera Mount swivels with the servo.
The Power Supply Box consists of three parts, the base, midframe, and cover. This box is designed to hold a bridge rectifier, adjustable buck regulator, LiPo battery, and a pair of battery charger modules. DCC track power (12-15V) comes in from the wheels and goes through the rectifier to convert it to 12-15V DC, then that DC power goes through the buck regulator to produce 5V. The 5V goes into one of the two battery charger modules to charge the LiPo battery. The other module takes power from the battery and outputs 5V DC for the Raspberry Pi Zero.
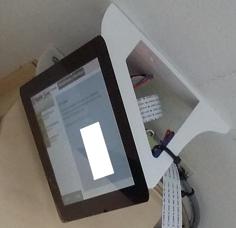
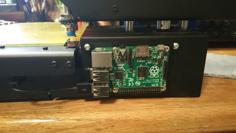
The Raspberry Pi Mount attaches to the Platform with four screws, then the Pi Zero is installed face down with the camera ribbon cable exiting over top of the Power Supply Box towards the camera. Four screws are then used to hold the Pi to the mount.
This is still a work in progress. I want to upload assembly diagrams and an assembly video eventually complete with wiring and software setup to get it working.
| HO_Scale_Raspberry_Pi_Camera_Car.blend | 1.7MB | |
| HO_Scale_Raspberry_Pi_Camera_Car_-_Camera_Base.stl | 22.2KB | |
| HO_Scale_Raspberry_Pi_Camera_Car_-_Camera_Mount.stl | 50.1KB | |
| HO_Scale_Raspberry_Pi_Camera_Car_-_Car_Platform.stl | 133.7KB | |
| HO_Scale_Raspberry_Pi_Camera_Car_-_Power_Supply_Box_Bottom.stl | 34.7KB | |
| HO_Scale_Raspberry_Pi_Camera_Car_-_Power_Supply_Box_Cover.stl | 44.6KB | |
| HO_Scale_Raspberry_Pi_Camera_Car_-_Power_Supply_Box_Midframe.stl | 54.8KB | |
| HO_Scale_Raspberry_Pi_Camera_Car_-_Raspberry_Pi_Mount.stl | 84.9KB | |
| Raspberry_Pi_Camera_Car_Power_Supply.pdf | 1.5MB |