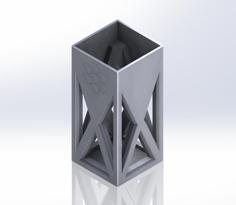
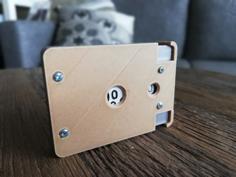
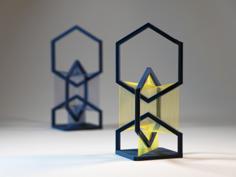
This is a remix of Gimpel's awesome expanding deck box with an unlocking movement. A slight twist of the top makes the six locking mechanisms slide out and release it. While I was building two of these, I made at least small tweaks to every file:
I've spent a lot of time modifying this and making it better. I would love to see makes and remixes, please share!
https://www.youtube.com/shorts/iSprrfB4Hj4
Modification Breakdown
Base
- Expanded width to accommodate Dragon Shield card sleeves (66x91mm).
- Added Cosmetic indents
- Added Locking pieces for Mana symbols.
Top
- Merged the gear into the top as I found it was a point of failure.
- Put a merged "washer" below the gear so the gear aesthetic doesn't catch on the locks while twisting.
- Made it righty-tighty, lefty loosy, as it was the opposite.
- Increased hole size for 3mm bolt
- Added cosmetic indents
- Removed MTG logo to allow for easier first layer printing
Locks
- Included cosmetic indents
- Added angled flanges for smooth opening and closing
Top 2
- Increased hole size for 3mm bolt
Magic Emblems
- Custom design to adhere to the sides of the base
Commander Fronts
- Adjusted size of commander slot to accommodate Dragon Shield card sleeves
- Removed Mana symbols from die holder (It was causing ghosting on the front)
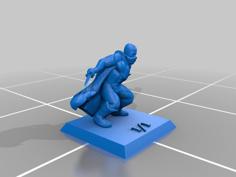
- Created "Wolf" Indented Front
- Created "Skullthulu" Indented Front
*UNTESTED* Base Color plates
- Plates meant to surround the mana symbols on the base to add an additional color.
- These were not printed but should fit
Print Settings
- Layer Height: .12 for all except the emblems. Print at .08 to get enough layers to avoid a hole on the skull emblem.
- Infill: 10%
- Wall Count: 3
- Supports: Only needed for Locks under the horizontal sections. It may seem like you need support on the gear, but you will not be able to see that area very clearly even if you have bad bridging.
Other Materials
- M3 20mm Bolt
- M3 Nut
- M5 Washer
- Optional - Thread locking glue for the nut.
Build Instructions
- Stack in this order: Top 2 > Locks > M5 Washer
- Note that I've found the trenches for top 2 print at different widths, I believe due to FDM printing, not the file itself, but I didn't Check. You should be able to find smooth moving locks for each trench if you try them in a few spots. The smoother the better. You can sand if you like also. Align the locks fully closed to create a hexagon.
- Put the M3 bolt into the top. Lower Top onto the other stack, trying to align the two hexagons and fiddle with it on a table with some pressure until all pieces fit together.
- Put the nut on the bolt
- Glue Emblems on the sides of the base
TinkerCAD Links
Customizing the front Plate
- Open Blank Front
- Rotate Blank front with the design space face up
- Import .SVG of your design
- Scale to fit with a .2 Depth
- Align both to front of Blank
- Merge Objects
- Stand Plate back up for printing