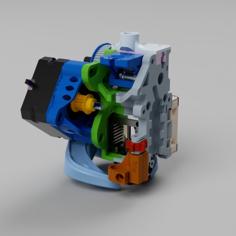
So I got my MMU2 and hooked it up to my Skelestruder. Everything works nicely, except I have a Volcano mounted instead of the stock V6 heat block. The great thing about Skelestruder is it makes debug and clearing issues fast and easy thanks to the quick connects and modular design.
But the slic3r settings are tricky. The main issue to solve for MMU is to reduce stringing. The really fine strings, I call hairs, can build up and cause trouble in a number of places: jam the finda ball, plug the bowden, block the gears, etc. Prusa solution for V6 is to do ramming, which purges the nozzle and and pushes melt zone to bottom. Problem for Volcano is it has much larger melt volume and also much higher heat transfer. For V6 it is easy to overwhelm the heater with high extrusion, but not so much on Volcano.
So I decided to build a mechanical lock that acts to prevent the string from forming in the first place and keep it out of the connecting bowden. With my prototype I finally got my first successful print after weeks of trying.
See it in action. This first version works with direct filament sensor. I plan to add indirect option later.
Update 1/26/19 I updated case to add optional tension screw. Put plate behind spring and push it in with screw to increase tension if needed. I added step in case someone wants to adapt it to stock extruder.
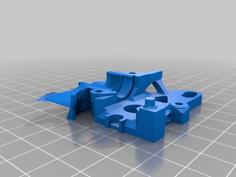
Print parts at 0.15 layer, slowly. I used 'detect bridging perimeters' also. I recommend using your smooth PEI sheet instead of textured for this print, but will work either way.
I've only done PLA so far. PETG might work, but lock will be tricky I suspect.
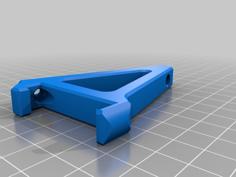
You need to remove support from lock. Best to use needle nose pliers and twist it out. It came out clean the first couple times, but last one was tight and I had to cut it out.
You need some hardware:
2 MR63 bearings
1 brass heat set nut
1 spring from ball point pen (should be <5mm diameter)
1 M3x10mm screw
1 M3x12mm screw
1 M3 hex nut
1 M3 Nyloc nut
Use soldering iron to set brass nut into top of case before starting assembly.
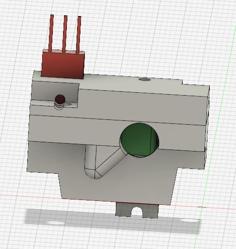
Put one bearing in upper recess of case and hold in place by threading M3x12mm flush. Place other bearing in yoke of lock. Clip sping onto leg of lock. You may need to trim the tab a bit to get it to fit your spring. Insert back of spring into pocket of case and lock into middle. See photo below.
Hook cover in bottom of case and slide up so pin inserts into top hole. Now screw M3x12mm rest of way through cover and attach hex nut, only finger tight! Insert M3x10mm though lock and bearing from the cover side(!). Do not put the Nyloc on the cover side. Now tighten Nyloc on screw until just flush with tip. Screw should feel slightly loose which is good.
Take a piece of filament and insert though hole in case to be axle for lock. I wiped with lithium grease first. Leave some sticking out so you can remove it for any maintenance.
Mount in place of filament cover on Skelestruder. Since this is a few mm taller, you need to recalibrate the MMU for loading distance to the Bondtech gears. As always, this is super simple with Skelestruder by popping open the idler to check the load.
| SP_Hairlock_b5.stl | 1.7MB | |
| SP_hairlock_case_r1.step | 310.7KB | |
| SP_hairlock_case_r1.stl | 606.9KB | |
| SP_Hairlock_cover_b5.stl | 165.5KB | |
| SP_hairlock_plate.stl | 22.3KB |