Updates
2023-12-18
Uploaded V5
I found another measurement from a photo and resized the model I used to match the cutout of the drawer side. Everything in these designs depends on getting the size of this cut out as accurate as possible. I am still just guessing here.
I altered the version 4 design slightly to make a tighter and slightly stronger key that holds everything in place.
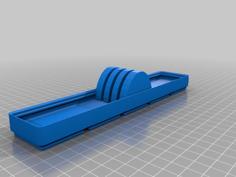
This design works the same as V4. It connects to the drawer front clip with the Phillips screw (or a longer one if possible) and then the key is placed into the drawer side cut out. The unit slides onto the drawer and is then held in place with a M4x12mm screw. To remove the face you just remove that same screw and slide the drawer face off. The V5 key is slightly larger and holds along the bottom and top of the opening.
This is also untested so If you print out the key and test fit it, please let me know if the measurements are wrong so I can make adjustments.
2023-12-13
Uploaded V4
I think I have been over complicating the whole thing. I have a new design that connects to the front drawer clip first and then slides onto the drawer. Once in place one additional screw is used to lock everything in place.
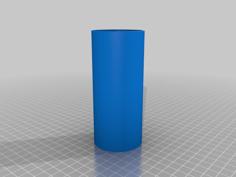
Instead of incorporating the locking portion onto the new clip I decided a small key can be inserted into the drawer wall to fill a portion of the odd cutout. Once it is in place the drawer clip slides over the drawer wall and gets fastened in place using a small screw (nut/bolt.)
To remove the drawer face just unscrew the single bolt and slide the drawer face off.
All three parts are reversible so they can be used on either side of the drawer.
Again, This is an untested part as I am only working from pictures and the measurements may be slightly off.
2023-12-12
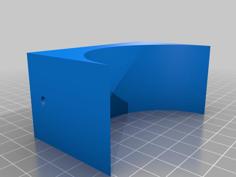
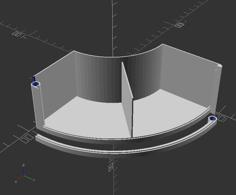
I was playing around with the design and thought I would try and make some parts that were not Left and Right specific. I came up with a 3 component part similar to the original but removing the odd shape in the centre to allow the clip to slide onto the drawer while already assembled and connected to the front drawer face. Once the face is attached to the drawer the two small side blocks fit in and are screwed into place. The small Block is meant to be attached using a smaller M3 bolt.
At least that is the concept. Since I don't have easy access to the drawers I have not printed nor tested these.
If you want to try them out please comment back and let me know if there are any issues. Hole placement and the fitment of the plastic parts may be problematic since I am solely going off drawings to get the proper sizes. I am not sure when I will have an opportunity to test these myself.
Summary:
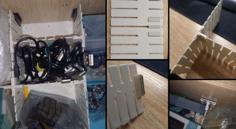
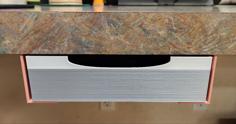
My brother in-law's kitchen drawers all use the Grass Integra drawer system. The fronts of all the drawers are attached using special clips that do not appeared to be made any more.
Two of his drawers have come apart. One has both left and right clips broken and the other has only the right clip gone.
These are the clip in style that has a part that attaches to the drawer and the other part attaches to the front drawer face. The part that attaches to the drawer has broken apart and the internal mechanism ( a spring and possible some kind of lever) is gone.
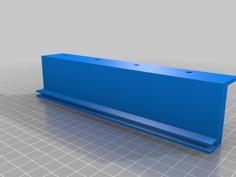
I designed 2 pieces that will replace the drawer portion and allows the existing front drawer part to connect on, in the same way it does to the original part. It also allows the adjustment portion to work in the same way.
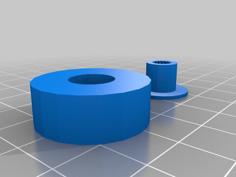
It does require two new screws. The existing M5 adjustment screw might work but it is a little short. I replaced it with a longer one but I only had one with a chamfered head which is not as good as the straight head of the original but does work. You can use one that just reaches to the outside of the inner piece or go longer and add a nut on the end. This screw is really only used as a point where the adjusting cam rides against and allows about a 2mm height adjustment to the front of the drawer. It also helps secure the inner and outer portions of the clip together.
The back screw needs to be a M4 so it will fit through the existing slot in the side of the drawer. It is used to hold the inner and outer pieces together and can be screwed directly into the plastic but is stronger with a nut on the inside. I believe about 12mm in length would work.
The inner clip needs to sit with the protrusion fitting within the odd cutout of the drawer. I had to take several measurements to get the part to fit nicely. I then designed the part a little smaller to be sure it would fit inside the opening. This is the part that actually locks the clip to the drawer and handles the "pull" force applied to the drawer.
I had to travel to and from his house to measure and remeasure So the parts are close, but probably not as exact as they could be if I had the parts at home.
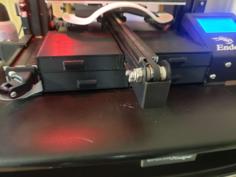
With the new parts in place the front of the drawers are now secure and the height adjustment of the front of the drawer still works as it did previously.
I ran out of White PETG filament so I used black for some of the parts. The black made it way harder to see how the parts fit together. If I was going to print more I would definitely choose white over black.
| Inner_Plate_Left.stl | 88.0KB | |
| Inner_Plate_Right.stl | 88.0KB | |
| Outer_Plate.stl | 51.7KB | |
| V2_Block_untested.stl | 43.6KB | |
| V2_Inner_Plate_untested.stl | 32.7KB | |
| V2_Outer_Plate_untested.stl | 71.0KB | |
| V4_Filler_Tab.stl | 11.2KB | |
| V4_Inner_Plate.stl | 30.0KB | |
| V4_Outer_Plate.stl | 47.9KB | |
| V5_Inner_Plate.stl | 29.8KB | |
| V5_Key.stl | 20.6KB | |
| V5_Outer_Plate.stl | 47.7KB |


![Antique Jewelry Box [Support Free] 3D Printer Model](https://cdn.3axis.co/assets/ef/d3/15/bd/efd315bd-660a-4b52-a05a-d33703032cc3/images/362b85d1-5b4b-4eb9-b5c8-56c234ab8385_thumb.jpg)