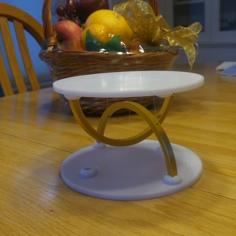
This is a remix of HappyMoon's "Floating Cup Sculpture" (and my remix of it for easier printing and assembly), done with a goblet instead of a coffee cup spilling. It was inspired by a "Make" post by deniorsDesign (https://www.thingiverse.com/make:681665), in which the coffee of the "Floating Cup" was done with a gold silk filament. The gold silk particularly accents the flow of liquid, and I thought it might look interesting falling from a Renaissance style goblet. Other 'silk' type filaments (silver, white, copper) might look nice as well.
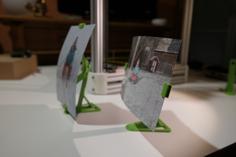
If you use clear or 'natural' filament, try with 0% infill so the infill doesn't show through. I printed the one in the photos with 3 shell layers and 0% infill, but not sure if that was needed now. With 2 layers it would looks more transparent. 3 shells is plenty strong, 2 might be enough. I didn't try sanding or any post-process on any of these.
This sculpture was done at about 80% of the size of the "Floating Cup". It looks nice in the small format and prints faster and uses less plastic of course. You can scale it up or down any amount if you want a different size or effect.
When printing with 'silk' type filaments, go slow (about 30mm/sec or so) to avoid problems and to get the nice silky smooth texture. Be careful when handling the "splash" part and when removing it from the bed after printing, as the flying drips are held by narrow sections and can break off easily.
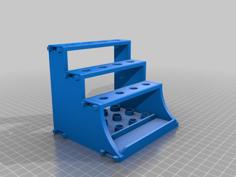
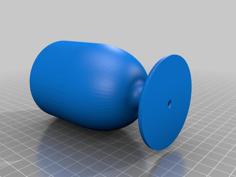
Print the "goblet" and the "stream" parts with 5% infill and 2 perimeter layers to keep their weight minimum. The "stream" needs supports, the other parts do not. Print the "splash" at 85% infill for maximum weight so that the sculpture stands balanced upright. Print the 'Pin_set' at 85% as well. All parts should be printed in the orientations as provided. That prints the nicest looking stream and can be done on printers with bed sizes as small as 150mm x 150mm.
When assembling, try the different trapezoid shaped pin sizes and choose the largest one that inserts into both the splash and the stream. Then coat one end of the pin in 2-part 5 minute clear epoxy and insert into the splash; cover the rest of the pin and the flat area of the splash that is around it with a thin layer of the epoxy and push the stream onto the pin. Make sure the stream leans forward (in the direction of the center of the splash) and not backwards when hardening --prop up under one end of the 'splash' with a small stack of paper to keep the stream leaning in the proper direction. Let it cure. Finally, use the 2-part epoxy to glue the goblet to the top part of the stream, clamp them together if needed and allow the glue to cure undisturbed for a while.
[I also tried to use red PLA for the liquid, trying for it to look like wine. It ended up looking more like blood or ketchup, not really the effect I was looking for, a bit disturbing. But that is useful for a creepy Halloween decoration, so there's another remix using a small skull bowl pouring out the blood. It's at https://www.thingiverse.com/thing:3772304 ]
| goblet.stl | 2.8MB | |
| Pin_set.stl | 3.0KB | |
| splash.stl | 7.4MB | |
| stream_for_goblet.stl | 1.5MB |


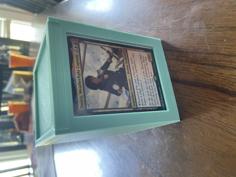

![[MtG] Commander Deckbox – Edh Boulder 3D Printer Model](https://cdn.3axis.co/assets/62/eb/29/3a/62eb293a-b9ba-4fbc-8110-ab8a87dade59/images/bbaaa07b-4261-4e12-a0c8-8076daab86df_thumb.jpg)