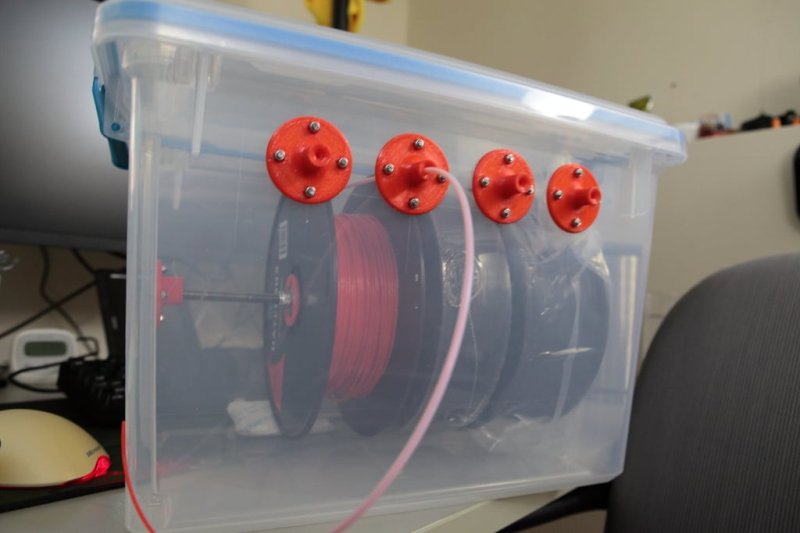
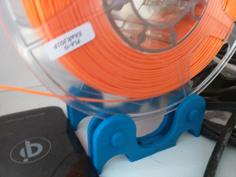
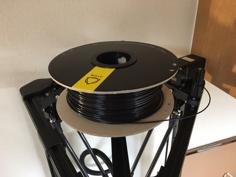
My dry box for 3 - 4 spools of filament. There are many dry box plans out there. This one is mine.
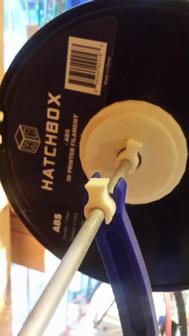
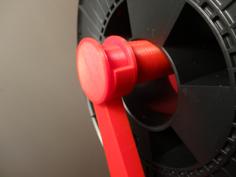
The rod is at a good height for most spools when using a pair of spool hubs on each spool
1 Sterlite 20qt air tight box.
24 3mmx10mm machine screws (3mm x 8mm will work but I like a little bit of thread sticking out of my nylocks)
24 3mm nylock nuts
24 3mm washers
1ft 3mm OD x 2mm ID PTFE tube.
1 12in 5/16 threaded rod
I used 3mm OD x 2mm ID PTFE tube because its what I had on hand.
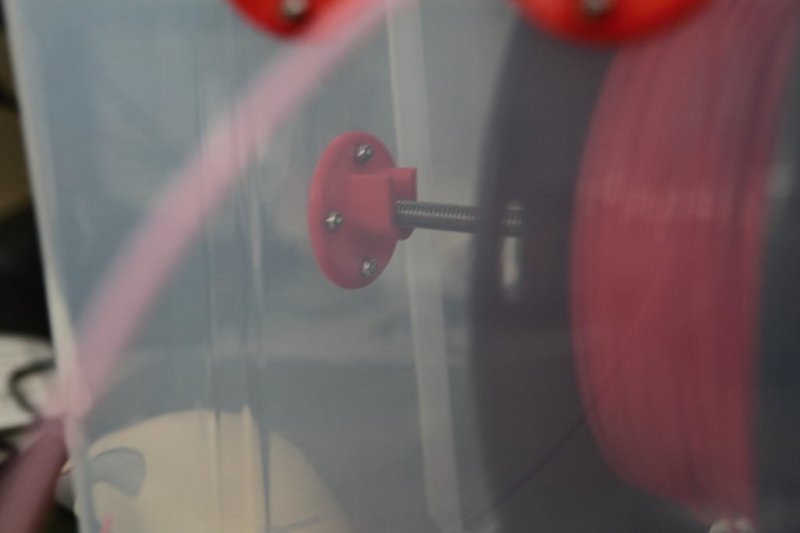
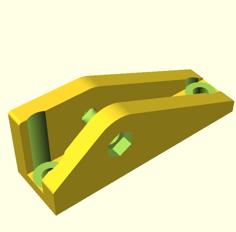
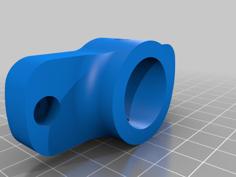
The nut reliefs are too shallow (1mm) on all parts, but they worked for me.
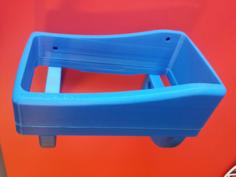
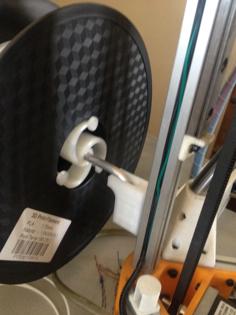
The round base of the rod holder and the U shaped 'extrusion' are perpendicular to each other. The Sterlite box has an angle of like 3 degrees or so on all sides. It's not a big deal.
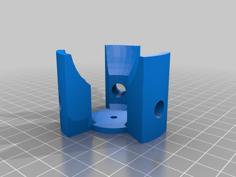
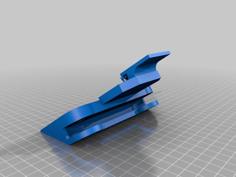
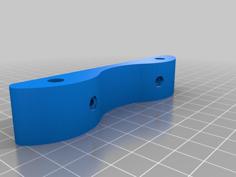
Loaded several versions of the U shaped rod holder.
m3 with reliefs (m4 hole w/ m3 nut relief. This one also has an itty bitty section to center the rod. It makes it special.)
m3 with reliefs dry-ish edition (Same as above but with some added flavor. It makes it extra special. And I couldn't get it to print very well either. .2mm deep relief text on the back.)
8-32 with reliefs (m5 hole w/ 8-32 nut relief)
m5 hole with no reliefs
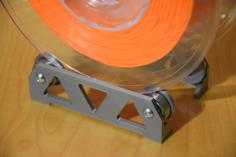
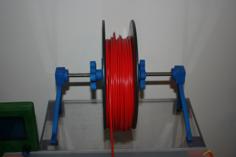
For a size reference, the red filament is Hatchbox PLA, the one in the middle is EasyFil PLA, and the one on the right is Makergeeks ABS.
I haven't had the rod holder pullout of the sterlite box walls using m3 washers, but if they do I'll post a backing plate.
There isn't much to it.
Source a Sterlite 20qt air tight box.
I got mine at Target for $7.
Source your hardware and threaded rod.
I got my threaded rod at Home Depot. Prices vary depending on material. $1.75 or so for Zinc or $6 for the blingy stainless. (Do people still say blingy?)
Cut four holes per side for your bolts to hold the U shaped rod holder. I went 3.75" down from the top of the molded in handle. That will get you down about half way. This number can vary but it's what I went with. Don't go down too much lower or your spools will touch the bottom of the box, but you can go a bit higher. Too high and the rod won't center nicely.
Attach your rod holders.
Place your threaded rod in the holders and push down. There should be a satisfying click when its seated. Ah...
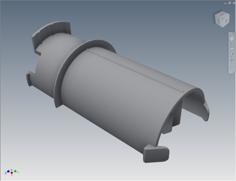
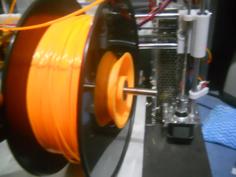
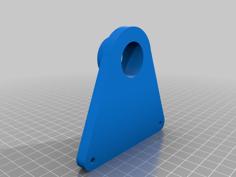
You probably don't want to use my pass throughs. Seriously, who in the world has 3mm OD x 2mm ID PTFE tube? But if you do, I eyeballed the locations for these. They sit just below the radius at the top of the box. The PTFE tube is a tight fit. You may need to ream the hole out with a pin vise and appropriate bit. It is supposed to be a little snug so that the PTFE tube doesn't move around too much while at the same time not deforming or pinching the tube.
I'd suggest you use an alternative pass through that utlizes a pneumatic push fit connector for 4mm OD PTFE tubing. Way better, but as the description noted, I had 3mm OD PTFE tubing so I designed my way around the material on hand. That and I simply couldn't find a source for 3mm OD push fit connectors for a reasonable (Cheap!) amount of money.
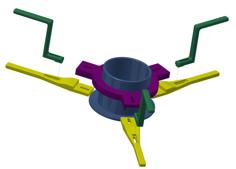
In the images, the discerning eye may notice that I'm using nylock nuts to hold my hubs in place. Yeah don't do that. Use normal jam nuts or suffer in trying to thread a nylock onto a threaded rod. It's doable, but not worth the effort.
Don't wrench down on the nuts against the bearings either. Give it a hair of wiggle room so it can spin nice and smooth with a tiny bit of resistance. If there is play it may lead the spool to spin due to imbalances and lead to a tangled mess.
When adding spools to the rod, make sure that all of the filament comes off the spools in the same orientation.
As for the debate of if you need a dry box or not, well, I got nothing. I like this mostly so my filament doesn't get dusty when I cut stuff out with my Shapeoko.
| BUM_DRY_BOX_6002_Threaded_rod_U_channel.STL |
| BUM_DRY_BOX_6002_Threaded_rod_U_channel_dry_ish.STL |
| BUM_DRY_BOX_6002_Threaded_rod_U_channel_for_8_32_v2.STL |
| BUM_DRY_BOX_6002_Threaded_rod_U_channel_for_m5.STL |
| BUM_DRY_BOX_6003_pass_through_v1.STL |