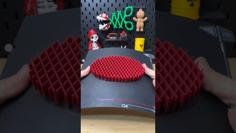
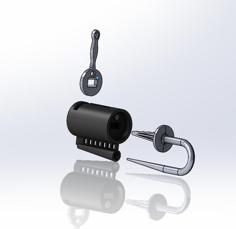
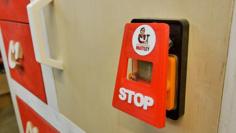
Fidget Keyswitch-style Button 3D Printer Model
The file 'Fidget Keyswitch-style Button 3D Printer Model' is (stl,3mf) file type, size is 139.1KB.
The file 'Fidget Keyswitch-style Button 3D Printer Model' is (stl,3mf) file type, size is 139.1KB.
I print with a 0.4mm nozzle, using Bambu Labs PLA “Tough” filament with 0.20mm standard extrusion. I have found that 2 walls and 15% grid infill is plenty strong enough for this. So, pretty much default settings for most printers will work. Your mileage may vary, but I would expect most standard PLA or PLA+ to be suitable. If your printer can print a decent benchy, it will print this ok too.
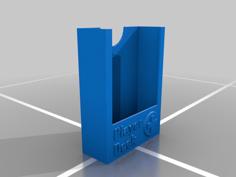
Note : The case is printed standing up, the button(s) on their sides.
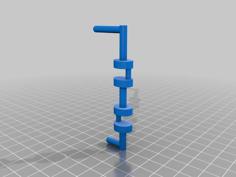
You will need to supply a spring. Specifically, a compression spring around 5mm diameter and between 10mm to 20mm in length. If it has round hooks on the end that is the wrong kind of spring! You need to be able to push it, not pull it. See the picture here of the springs guide.
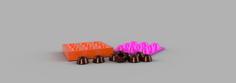
There are three buttons to help you match the spring you manage to scrounge --
1 Small - For 10mm to 12mm long springs. Limited slightly in button travel so you don't get the full tactile experience with this one. Use it only if you have to.
2 Medium - For 12mm to 16mm springs. Better.
3 Large - For 16mm to 20mm (or so). Best! What I designed this for. I got mine from a cheepo eBay spring kit, costing not much.
Most of the time it will work straight away, or even after a bit of pushing in and out, but sometimes it might not here are some things that may help -
The button gets stuck down
It works, but doesn't feel very good
This is intended for your amusement only. No guarantee or warranty is expressed or implied. If you do not wholly accept all risks, do not use this item. There is a slight pinch risk when assembling (although I've never hurt myself, you might find a way), please take some care.
This is free to use for non-commercial purposes (licensed under Creative Commons – Attribution – Non-Commercial – Share Alike). Please contact me if you have commercial uses in mind.
Please press "like" and share any prints and comments! This design is free for non-commercial use, go nuts. However, it did take me a while to design and test, and if you would like to show your appreciation for this effort you can throw the cost of a coffee or so into my paypal using paypal.me/saulysw. I wouldn’t ask, but it pays for the filament, the lights-on, and food for the puppy. Thank you in advance!
| My_Button_v1.0.7-PartBody_10mm_spring.stl | 18.7KB | |
| My_Button_v1.0.7-PartBody_13mm_spring.stl | 18.7KB | |
| My_Button_v1.0.7-PartBody_17mm_spring_button.stl | 18.7KB | |
| My_Button_v1.0.7-PartBody_body.stl | 145.9KB | |
| My_Button_v1.0.8-All_Parts.3mf | 103.6KB |