Epson 5040UB Projector Shell 3D Printer Model
The file 'Epson 5040UB Projector Shell 3D Printer Model' is (skp,stl) file type, size is 3.0MB.
The file 'Epson 5040UB Projector Shell 3D Printer Model' is (skp,stl) file type, size is 3.0MB.
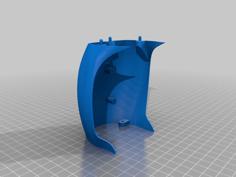
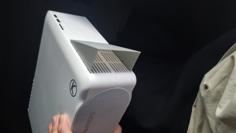
This is an external shell for the Epson 5040UB projector (should also fit the 5040UBe and 6040 models). Similar to a phone case, this allows the projector owner to change the external color of the projector to match a particular room decor if they don't want the standard white color (or if they don't want to spend another $1000 for the black model 6040). I have a home theater room with a dark blue and black color theme, and the white projector definitely stands out (not in a good way), so I decided to design this shell.
It includes holes for the lens, the front vent fans, IR ports, status lights, the rear connector panel, and a door for the side button panel. I also added a number of holes in the sides to help with thermal control and thus far the shell has remained quite cool. Note I have the projector in low power "Eco" mode and hanging from the ceiling, so to be safe if your setup or power mode is different, I recommend monitoring the projector in the first few hours with the shell on to ensure it doesn't overheat.
General instructions:
This case is assembled from 23 separate parts (see exploded view picture) and took about 70 hours total on my Prusa i3 printer and requires almost 2kg of material (note I printed each part one at a time to check printability, so if you print multiple parts at once, the printing time should come down a bit). You'll need a print volume of about 190 x 190 x 190 mm. Most parts can be printed without support, although you will need support for "Front Parts" 1 and 3. I used support for "Side Part 4" mainly for the door hinge features. For the door itself I incorporated a support feature in the STL file (just snap it off). Use some wire or a long screw as the hinge for the door.
I added tabs and slots where needed to help with assembly. The tab fits may be loose or tight depending on your printer, so be sure to have glue and a file handy! I printed in PLA plastic for part dimensional stability.
Assemble the back, top, and sides and then glue together. Then assemble/glue the front parts and match drill this front assembly into the shell and attach with small #4 wood screws. To put it on the projector, you then remove the front assembly with the screws and slide the shell onto the projector from the rear. Then reinstall the front assembly with the screws.
Print in your preferred color, or just paint it.
| 5040_Projector_Enclosure_Thingiverse_Final.skp | 6.1MB | |
| Back_1.stl | 135.9KB | |
| Back_2.stl | 72.2KB | |
| Back_3.stl | 218.0KB | |
| Back_4.stl | 148.9KB | |
| Front_1.stl | 156.5KB | |
| Front_2.stl | 214.6KB | |
| Front_3.stl | 102.3KB | |
| Side_1.stl | 410.4KB | |
| Side_2.stl | 335.8KB | |
| Side_3.stl | 242.8KB | |
| Side_4.stl | 95.9KB | |
| Side_5_door.stl | 20.7KB | |
| Side_6.stl | 338.9KB | |
| Side_7.stl | 409.7KB | |
| Top_1.stl | 109.8KB | |
| Top_2.stl | 231.5KB | |
| Top_3.stl | 119.6KB | |
| Top_4.stl | 120.2KB | |
| Top_5.stl | 157.8KB | |
| Top_6.stl | 82.2KB |