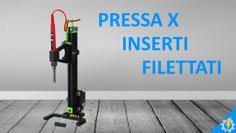
These are some parts to print (and probably lasercut one) to convert a classic Ender 3 v1 to a Heat Insert Press.
A lot of old Ender 3s seem to be dying lately.
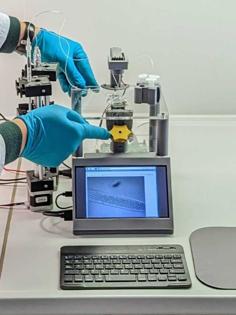
I was going to build the Adafruit heat set insert press.
https://www.thingiverse.com/thing:3613621
But I wanted to use Ender 3 wheels and screws and such - because I have a dead Ender 3 to scavenge parts off of.
Graciously, Adafruit included a STP file with their kit. So I started mofiying it to work with the parts I had... and pretty soon it became a game of modifying a few of the Adafruit parts to fit an Ender 3 frame.
https://www.amazon.com/gp/product/B08R3515SF
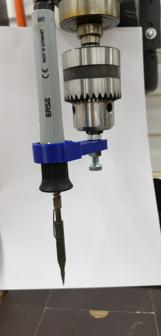
I already had that soldering iron. I bought it specifically for heat inserts. It goes down to 180 degrees - which is a good temp for pressing into PLA. My knock-off Hakko soldering station has a knob marked down to 225. Also this iron has a silicon sleeve on the handle which is nice for mounting it into a 3D printed backet. Grips tight.
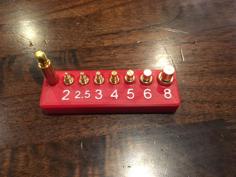
There are 10 or 12 m3 x 8mm screws on the carriage. There are intended to be used with heat press inserts that are ~4,25mm OD.
There are 12 or maybe 16 m4 x 8m screws and m4 t-nuts. Probably more than you can scavenge out of an Ender 3 - but that you might have around anyway.
Otherwise it uses all stock Ender 3 parts and screws.
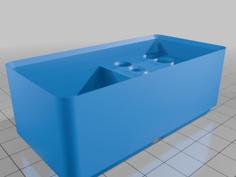
You'll probably want to cut out some plywood for the work surface. There's a template to laser cut it you have the means. I'm using 1/4" plywood and it seems to work fine.
The balast holder is for a counterweight for the soldering iron. I filled it up with m3 nuts and it's alright. I tightened the eccentric nut on the carriage so there's some resistance and that plus the weight of the nuts is enough to make it stay where i put it. It doesn't try to return to its home position every time I let go of it.
The holder didn't have a part to connect a belt to, so I make a little printable hook for that. Attaches to the cup with a m3 x 8mm screw (and insert).
I cut one end off of the belt and thread it through the loop on the soldering iron side, and then through the loop on the cup, and then zip-tied it back to itself so the teeth interlock. I actually used one of the zip-ties that came with an Ender 3. I'm serious about using as much Ender 3 stuff as I could.
I included the STP file so you could adapt it to your particular hardware. For example, I'm not sure what Ender 3 Pro related changes would alter this setup.
| 14mmOD8.25mmID5mmSPACER-STL0.stl | 64.5KB | |
| armADAPTED-3mf.3mf | 70.4KB | |
| BALASTholder-STL0.stl | 1.8MB | |
| balastHOOK-3mf.3mf | 34.5KB | |
| E3toADAFRUITadapter-3mf.3mf | 273.0KB | |
| ENDERfruitASSYpandgSTP.stp | 3.5MB | |
| ironMOUNT1-18.75mm-3mf.3mf | 161.9KB | |
| ironMOUNT2-18.75mm-3mf.3mf | 99.3KB | |
| TABLEcut-STL0.stl | 100.7KB | |
| TOPdoubleIDLERmountA-3mf.3mf | 70.9KB | |
| TOPdoubleIDLERmountA-STL0.stl | 142.9KB | |
| TOPdoubleIDLERmountB-3mf.3mf | 105.9KB |