Ender 5 Plus Linear Rail Kit 3D Printer Model
The file 'Ender 5 Plus Linear Rail Kit 3D Printer Model' is (stl,STL) file type, size is 5.2MB.
The file 'Ender 5 Plus Linear Rail Kit 3D Printer Model' is (stl,STL) file type, size is 5.2MB.
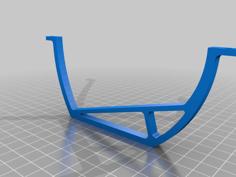
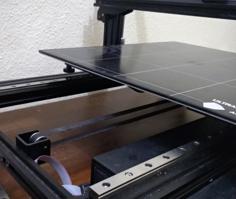
I was looking around for a kit I could download and print that would allow me to install linear rails on my new Ender5 plus, but the only one's I found were for the CoreXY conversion or with Y rails mounted on the side of the frame instead of on top. I wanted to be able to use most of the original hardware but have the rails mounted on top so it created a more even distribution on the rail for the bearings. So kinda similar to the CoreXY, but using the original motors and belt path.
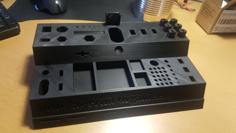
As so I created this monstrosity over the past few weeks...
I'll get a list of all the screws and nuts needed. But this should start it out. Some stock screws can be used
6x - brass embeded nuts - https://smile.amazon.com/gp/product/B087NBYF65
2x M3 brass standoff for hotend
21x - M3 T-Nuts - https://smile.amazon.com/gp/product/B07SDFCTD4
21x - M3 8mm screws - https://smile.amazon.com/gp/product/B08R3GJGWT
3x - MGN12 450mm Linear Rails - https://smile.amazon.com/gp/product/B08JYC1XFK
assorted M3 button screws/nuts/washers/lock nuts - https://smile.amazon.com/gp/product/B08H24W42K
16x F693ZZ Flanged Ball Bearing 3x8x4mm - https://smile.amazon.com/gp/product/B07Z3D32WJ
I'll also create and update with a guide on putting it together, but the pics should fill in some blanks for now
Extra parts needed that I didn't create, but had to modify slightly.
-- Bullseye hot end mount and duct : thing:2759439 --
BB_Stk.BASE.5plus.8.23.21.stl
E3Pro.Bullseye.Duct.stl
ALL_BLT_LEFT_X-48_Y-10_3.29.stl
You can swap the duct out with one that fits the dual fan if that's your jam. I was just making it use as much stock parts as possible.
For printing, obviously,, more infill produced stronger parts, but takes hella lot longer to print. I used 30% for most parts. The pully stl could stand a bit higher since it will have the most strain on it. The bottom motor piece might need a bit more to keep the motor part from flexing too bad. everything else seems pretty solid at 30%
Edit: 9/6/21 - Added Petsfang modified base stl. Also included stls for the single/dual duct and wire strain that came with it. Source same thing page as Bullseye from above
Edit: 01/19/22
| ALL_BLT_LEFT_X-48_Y-10_3.29.stl | 176.2KB | |
| BB_Stk.BASE.5plus.8.23.21.stl | 677.9KB | |
| E3Pro.Bullseye.Duct.stl | 5.0MB | |
| E5P_XY_LRC_BeltGuide.STL | 228.3KB | |
| E5P_XY_LRC_Hotend.stl | 191.7KB | |
| E5P_XY_LRC_LimitSwitch.stl | 181.2KB | |
| E5P_XY_LRC_Lower.stl | 1009.5KB | |
| E5P_XY_LRC_Lower_motor.stl | 1.1MB | |
| E5P_XY_LRC_Pully.stl | 541.3KB | |
| E5P_XY_LRC_StrainRelief.stl | 456.1KB | |
| E5P_XY_LRC_Upper.stl | 445.7KB | |
| E5P_XY_LRC_Upper_motor.stl | 810.6KB | |
| E5P_XY__LRC_CableTie_HotEnd.STL | 52.8KB | |
| LimitSW_TriggerPlate.stl | 169.4KB | |
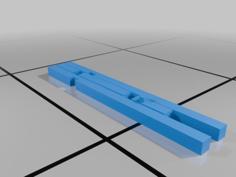
| LinearRailJig_MotorSide.stl | 98.1KB | |
| Petsfang_CR10TEVO_5015_DUCT_V7.5....stl | 1.2MB | |
| Petsfang_CR10TEVO_WIRESTRAIN_V7.5.stl | 463.5KB | |
| Petsfang_E5P_XY_LRC_BASE.stl | 886.0KB | |
| Petsfang_STOCKBASE_DUALFAN_DUCT_9.20.stl | 1.5MB |