Remix from:
https://www.printables.com/model/270718-ender-5-belt-bearing-spacer
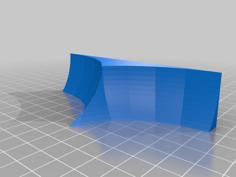
These guide rings will help correct the crooked x axis belt and reduce fraying of the belt. Prolonging the life of the belt.
You will need to print 4 rings total. 2 for each pulley that is on each side of the x gantry.
The left one is easy to access but the right side requires you to completely dismantle the print head and removal of belt.
ALWAYS RE LEVEL YOUR BED AFTER ANY MAINTENANCE ON PRINT HEAD.
You should print these in PETG but PLA will work. PLA may just wear out a bit faster.
Regardless of the material you use, these are thin and get a lot of friction from use. So keep an eye on them and replace them when they are breaking down.
Here is the official Creality video that shows how to remove the belt. This video will show you how to access both pulleys. https://www.youtube.com/watch?v=CM6qJc3GMfg
Printing tip: Use the uploaded Prusa project file (3mf). (BE SURE TO CHANGE FOR YOUR FILAMENT TYPE).
Otherwise, use the STL file and your choice of slicer. Slow the print down (20mm/s first layer, 40mm/s for the rest), and print 6 rings. I suggest 6 because if you loose one, break one, or one turns out bad, you have backups.
*The cause of the misalignment is from the underside of the z axis stepper motor located on the left x gantry. If you look under neath, you will see 3 pulleys that regulate the belt. These are 2mm lower than they should be, pulling the belt down on the left side. There is no true solution to this because the parts are plastic molded to the motor. If they were not plastic molded, a simple 2mm shim would fix this.
The Y axis plate/bed belt has a similar problem but could potentially be fixed easier. The part that holds/guides the belt under the bed is 2mm too high. Dismantling the bed and adding a 2mm washer between the bed chassis and this part would move the part lower and it would hold the belt in alignment with the pulleys.
| Ender3-v3-X-BeltSpacers.stl | 23.5KB | |
| Ender_3-v3_Belt_Spacer6x.3mf | 21.7KB |