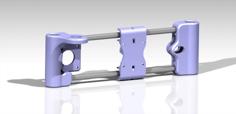
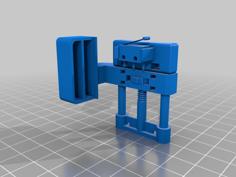
Elegoo Mars Upgrade To 4k 3D Printer Model
The file 'Elegoo Mars Upgrade To 4k 3D Printer Model' is (py,stl) file type, size is 24.1KB.
The file 'Elegoo Mars Upgrade To 4k 3D Printer Model' is (py,stl) file type, size is 24.1KB.
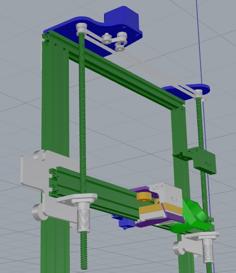
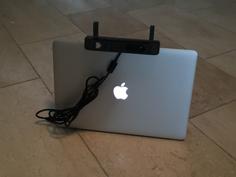
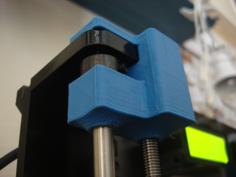
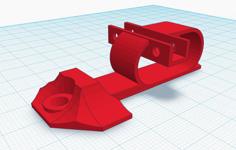
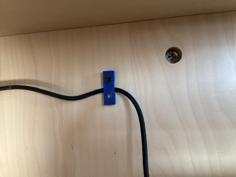
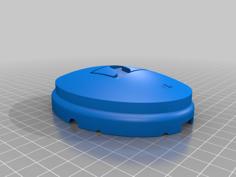
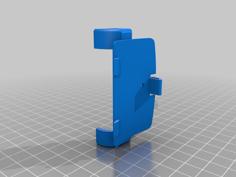
This is the frame that gets you a perfect alignment on your screen and build plate when you swap the original Elegoo Mars screen with a 4K screen from ChituSystems
The kit works great, but I don't see it published anymore.
It used to be on this page but it's gone:
https://www.chitusystems.com/product/elegoo-mars-mars-pro-6-23-4k-monochrome-upgrade-kit/
The original installation video was here, but it's private now:
https://www.youtube.com/watch?v=r5t2Uljmecs
The original kit does NOT come with a metal frame (like the regular 2k Mono upgrade kit they still sell) so I made my own.
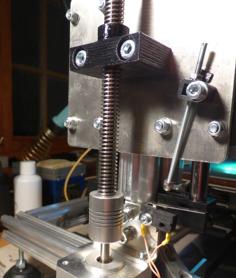
As a tip that worked for me: remove the thick glass that sits between the glass included in the kit and the UV light source. It no longer makes sense to keep it.
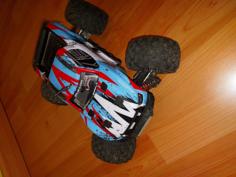
The print quality improved greatly compared to the original screen, not to mention that the curing time gets reduced because this is a mono screen (just like the 2k upgrade kit).
You may need to contact ChituSystems directly to purchase it (if they still sell it at all).
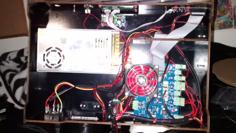
It's essentially the Pengji PJ3D623V1 mono screen with the firmware and cable to connect it to the version C motherboards of the old Elegoo Mars.
I still wonder why they no longer sell it, since it works so good.
For slicing I use PrusaSlicer. The printer profiles are automatically installed from UVtools into PrusaSlicer as described in the tool documentation. I just modified the screen settings and bed size to fill the entire bed.
The flow is the usual one:
Slice in PrusaSlicer, save as sl1
Open UVtools, fix the print to avoid islands, resin traps, etc etc etc
finally save as Chitubox v4, which is compatible with the printer.
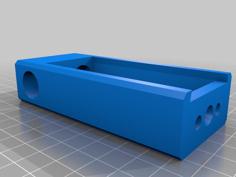
| screen_frame.py | 2.4KB | |
| screen_frame.stl | 127.2KB |