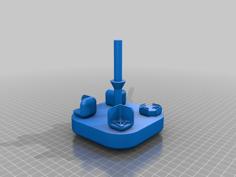
This is a project for NightStarLeaf Tech on Youtube for the EasyThreed K9 Mini 3D printer and comprises brackets allowing the printer to be firmly fixed to a baseboard with and so made more rigid to improve print quality & usability. The items are intended to be printed on the machine itself. The larger model has been split to allow it to be printed in 4 parts & glued together with a suitable glue. A .5mm offset allowance for the mating surfaces has been made for gluing etc. Please smooth the mating surfaces with glass paper or sand paper before gluing.
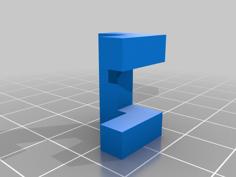
X guide:
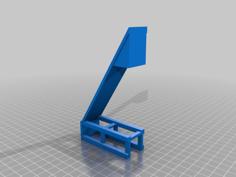
Edit 5-07-24. The X axis guide will not be needed if there is a suitable vertical to mount the Z bracket. The Z bracket (slim version) is enough with the base plate clips and Y bracket to improve quality markedly I believe that the X guide is then not needed. It is fiddly to get lined up correctly and cumbersome and time consuming to make. I would suggest making the spool holder as in my tips & tricks video (NightStarLeaf Tech YouTube) and then using its vertical to mount the Z bracket. In the slimmer form the Z bracket is estimated as just 3hrs to print and it is very effective on stabilisation. The yellow Z bracket (Elegoo PLA) was printed without the X guide and is superior.in quality to anything I made before on the machine. This was using the 5mm stand off of support material on the EasyThreed standard bed surface. The standard bed surface is the best option and is significantly better for adhesion eliminating the warp experienced on the Ender 3 surface.
I have provided the .rsdcox files for each of the models which can be opened in Design Spark Mechanical 3D design software. Please feel free to customise them as needed and to suit your needs.
The baseboard can be made with any sheet material, for example plywood, MDF or particle board. Please ensure that the board is flat in all directions before using it. This can be done with a suitable straight edge. The items can be used in any combination but it is suggested to start with fitting the Z bracket and move on with the other items as required. Please check that the printer is square before fitting the brackets finally. This can be done with a carpenter's or engineer's square. It can be used on the bed to check the X axis is square and on the baseboard to check that the Y axis is square in relation to the base box. Some trial and error is required to fit the brackets correctly. This applies to the X guide particularly and it is suggested this be left unto last to fit. The X carriage should ride up and own inside the channel on the guide without being impeded and without grinding. Check this before fitting in position finally. Do not use the printer if it is not square or appears to grind. Instead remove the guide/bracket and re-position it accordingly before fixing it finally
I have added another version of the Z bracket which is slimmer to save material. It can be modified to suit your needs with Design Spark Mechanical software. The standard offset is 16mm to allow for the bulge on the printer base plate - I have deleted the earlier model which was wasteful of material and also the taper model. (Edit 3-7-24)
The printer does generate more noise after the brackets are fitted. I will be covering how to use squash balls as feet to reduce noise (a technique widely used with 3D printers to reduce noise) and produce cups for these to be used with the printer base on the NightStarLeaf Tech YouTube channel coming up. If you found the files & accompanying video useful please consider liking & subscribing to the channel. Click the bell to be notified when I upload new content.
Channel:
http://www.youtube.com/@NightStarLeafTech-vj3ez
Bracket video:
https://youtu.be/VS57SLl8oFQ
I have posted this design previously under a different thing number. Apologies for any inconvenience this may have caused.
Kind regards & Best wishes.
Happy designing & 3D printing!