DIYbio Centrifuge V 3.0 3D Printer Model
The file 'DIYbio Centrifuge V 3.0 3D Printer Model' is (stl,skp,scad) file type, size is 1.2MB.
The file 'DIYbio Centrifuge V 3.0 3D Printer Model' is (stl,skp,scad) file type, size is 1.2MB.
UPDATES We've enlarged the length/width from 100x100mm to 104x104mm. We had our Eppendorf tubes making contact with the sides under certain circumstances. If you downloaded the files before June 24, 2019 you have the smaller version.
We've added a motorMount_V2 STL file. This has hex spaces for the M3 nuts to fit into. This helps prevent them from coming loose from vibrations and makes tightening the bolts possible without opening the case. If the nuts don't fit in at first, put them as far in as possible, and drive the bolt in as you would if it did fit and it will tighten them all the way down.
Introduction
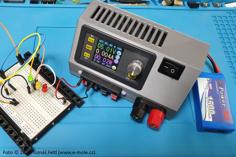
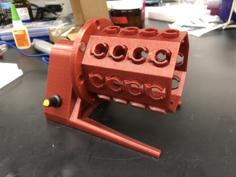
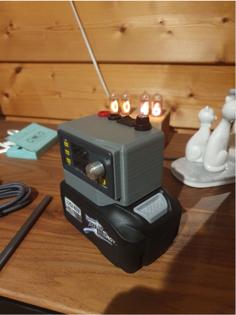
This V3 of our DIYbio micocentrifuge. A video overview can be found here: https://youtu.be/Od_wNhkoEak
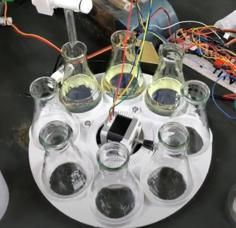
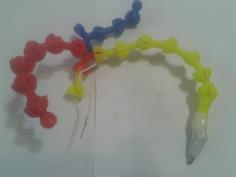
Last photo shows a V3 prototype (left) with V2 (right).
New Features
Additional Features
Incorporates 12V DC motor;
microswitch for auto-cutoff when cover is open;
rocker switch and;
extra space for Arduino Nano;
Description
It uses a 12V DC motor and a simple rocker switch. It also has provisions for adding in a microswitch (16x28mm, no arm) and enough room for adding in a micocontroller (like an Arduino Nano) to add timing and cycle functions.
The original SketchUp 2019 file (.skp) is included, so is the OpenSCAD file for the higher-resolution rotor.
Instructions
Requires friction welding (or glue) to seal the acrylic between the top/bottom of the lid.
The rotor is press fit onto the motor shaft. If it is loose, apply a tiny bit of hot glue.
The hinges use M3x 30mm bolts and nuts. Any M3 bolt can be used to hold the platform onto the case (at the bottom).
Improvements Still Coming
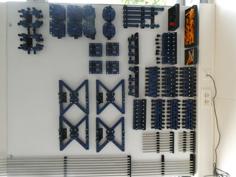
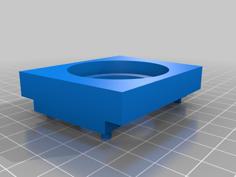
| case.stl | 734.9KB | |
| Centrifuge_V3_SU2019.skp | 1.3MB | |
| containment.stl | 132.8KB | |
| feet.stl | 255.0KB | |
| lid_lower.stl | 417.6KB | |
| lid_upper.stl | 66.0KB | |
| Microswitch_plunger.stl | 132.6KB | |
| MotorMount.stl | 274.5KB | |
| motorMount_V2.stl | 283.2KB | |
| platform.stl | 240.3KB | |
| rotor_HiRes_OPENSCAD.stl | 2.5MB | |
| rotor_lowRes.stl | 365.1KB | |
| v3_rotor.scad | 1.1KB |