Day Of The Week Clock 3D Printer Model
The file 'Day Of The Week Clock 3D Printer Model' is (stl) file type, size is 3.6MB.
The file 'Day Of The Week Clock 3D Printer Model' is (stl) file type, size is 3.6MB.
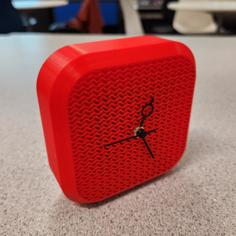
When you're retired, every day is a Saturday :)
While there are lots of ways to keep track of which day it is, Tuesdays, Wednesdays and Thursdays are that gray zone and aren't distinct.
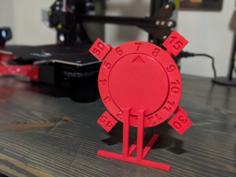
This project makes a day of the week clock to remind people of what day it is, and it may be useful to for a variety of reasons.
The clock is simple and has two operation modes, at it's simplest, if using the buttons to set the initial day, then the clock will advance the day and reboot every night at midnight. However, while this works, it's not the best solution as gradually this will lose time and position synchronisation (though it can be corrected manually if there is a problem).
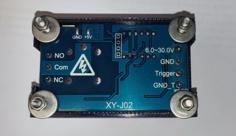
The second operation mode synchronises the clock with internet time servers, and the position of the displayed day. The code makes a web page where you can enter your wifi details, if you do so then the chip keeps the clock right, and turn the display to the correct day of the week "automagically". It does so by detecting the position of a magnet using a Hall sensor.
The stl files are here.
The code can be downloaded from github
https://github.com/randomtatbuilder/DotW-Clock
There is a youtube video showing the clock, together with assembly information
https://youtu.be/u2YcKe2Kwwc
One thing I forgot to include in the video is that the axle for the days cylinder can be lubricated with candle wax or some other dry lubricant. Once all the components are assembled, the end caps can be glued in place with a couple of drops of superglue to ensure they don't rotate.
Clock Operational Instructions
The clock has two modes of operation.
• A basic inbuilt timer that’s reasonably accurate.
• An internet time server synchronisation mechanism that is very accurate.
Setting the clock using the basic timer
Owing to the basic nature of the timing in the clock, setting of the clock should be done around 12 noon.
Unplug then insert the USB power (this resets the clock to 12 noon), and detach the clipped on base – you will see 2 buttons.
If today is a Sunday,
Press the “Sunday” button”, the display will slowly rotate until it finds it’s calibrated Sunday position (this also sets the clock to turn in 12 hours).
If today is not Sunday,
Press the “Sunday” button”, and the clock will align the day to Sunday, then repeatedly press the “Day Advance” button until the shown day is correct (this also sets the clock to turn in 12 hours).
Clip on the base and place the clock where you’re going to use it – don’t disconnect the power, otherwise the clock will not know when to turn and the above process will have to be repeated.
12 hours from doing this the clock will advance the day, reboot, then every 24 hours it will advance the day and reboot.
If the alignment starts to go wrong, just reset the clock as above at noon.
Setting the clock using the internet based timer
The clock generates a wifi access point that shows a web page. From eg a phone search for wifi signals and you should see an SSID of
DoW Clock Settings 192.168.4.1
Connect to that wifi, and then using a browser go to
http://192.168.4.1
The default password for the clock wifi is
saturday
You will see a web page that allows you to enter your Wifi SSID, Wifi password, and present timezone. Enter those details and press Save. The clock will then reboot, when it does so it will use the details provided to find the present time, then rotate the display to Sunday, and then advance the day to the correct day of the week. The clock can be unplugged and moved around, and then when plugged in again it will again connect to the wifi, rotate to Sunday, and then advance to the correct day.
If the clock cannot connect to the wifi, it will try 30 times to do so, and if it fails, it will again generate and access point where you can connect to it (as above), and enter the details again in case of a typing error – until working wifi details are entered, it will be working in basic mode.
If you wish to completely reset the wifi details, then pressing both buttons in the base until a complete rotation past Sunday is achieved (approx 60 seconds) then the Wifi SSID and password are deleted from the clock and replaced with an empty value. The clock should then be unplugged and plugged in again and the access point will be available.
When using the internet based timer mode the words in the clock will be realigned to the centre of the display window each Sunday, so the days should not drift out of the window over time, as they may do in the basic mode.
Disclaimer
If you build one, then you do so at your own risk.
| Base.stl | 31.1KB | |
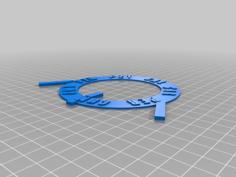
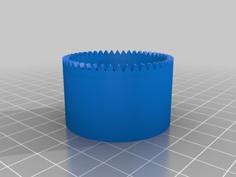
| Days.stl | 6.4MB | |
| End_Cap.stl | 140.7KB | |
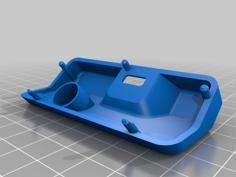
| Main_Body.stl | 1.4MB | |
| Motor_End_Cap.stl | 84.5KB |