EDIT: If you want a multi-material version of this, for 2+ material printers, I have an updated one over here that supports it: https://www.thingiverse.com/thing:2972895
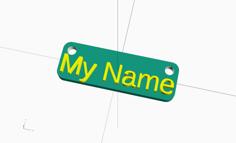
This customizer script generates luggage / bag tags, with various options for size, lips, text style, position, etc...
The settings should be fairly self-explanatory -- if not, please let me know and I'll improve the help text.
Tag Width/Height is the size of the resulting tag in millimeters. Tag Depth is how thick the base size you want the tag to be.
Corner Radius is just that -- the radius of the corners of the tag.
Typeface is the typeface to use for the text on the tag. The list contains all the current typefaces on fonts.google.com. Any of them should work, but, especially at smaller sizes, some typefaces may result in letters too thin for your printer. You'll need to create and slice to see, but I've found a lot of them at smaller sizes won't print with a .4mm nozzle.
The Tag Hole Position determines if there's a hole in the "inside" of the tag for a strap, or if it adds a "tongue" off the side for the hole.
The lip settings control the presence of, and size of, a raised lip on the top of the tag, creating a border.
You can choose the horizontal alignment (left/right) of the text on the tag.
You can choose to inset or raise the lettering into or above the surface of the tag.
Text Padding determines how much padding between the text and the edge of the tag or the lip of the tag.
Line spacing is the distance (in mm) between lines of text.
After those are set, there are up to four lines of text you can include. To leave a line out, set its size to zero and things will adjust accordingly. However, you can't leave a gap -- if you have a line set to zero, none of the following lines will be included. So if you want three lines, set the forth to zero, if you want two, set three and four and so forth.
In each line, you can set the text, the size (in mm), and how "deep" you want the lettering, in millimeters. This is how raised or lowered the text is depending on if you are raising or embossing the text with the setting above. The "Style" box allows you to pick alternate forms of the typeface you specified, if available (see fonts.google.com to determine if there are other styles available). For example, "Bold", or "Bold Oblique", etc...
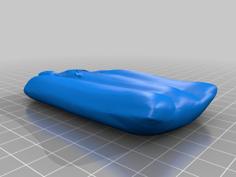
The depth settings for the lip, and each of the lines are separate, so you can use slicer capabilities (or tools like Prusa3d's Color Print utility) to change filament at different layers. In the sample image, the black was switched for green just as the first line was rendering, and the rest of the text was a layer higher, so it ended up a dark green. Another color change was set just above the top surface, so the lip could be turned black again.
Using various combinations of inset or raised levels for each component, multiple colors can be included on the tag.
This is a work-in-progress, so comments and feedback is appreciated!
Note, if you use the Customizer app to create your own version of this, make sure you don't mark it to publish if its got personal info on it!
| boaty-mcboatface-tag.stl | 1.4MB | |
| Tag_Generator.scad | 14.3KB | |
| tag_generator_20170428-21486-142mdsd-0.stl | 1.2MB | |
| tag_generator_20170428-25871-sd1j00-0.stl | 514.9KB |