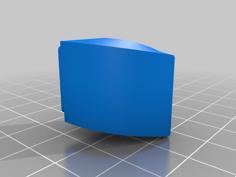
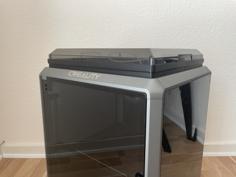
Creality K1 Half-Riser With Enlarged Speedbump 3D Printer Model
The file 'Creality K1 Half-Riser With Enlarged Speedbump 3D Printer Model' is (3MF,STL) file type, size is 4.2MB.
The file 'Creality K1 Half-Riser With Enlarged Speedbump 3D Printer Model' is (3MF,STL) file type, size is 4.2MB.
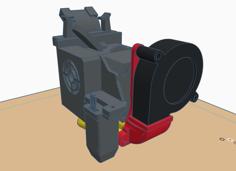
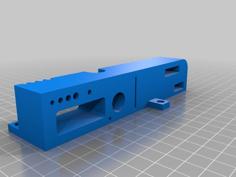
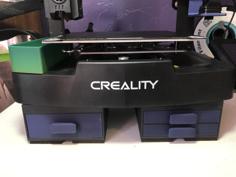
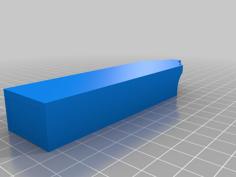
Introducing another riser for the Creality K1 Speedy.
I embarked on a comprehensive redesign of the classic speedbump, drawing initial inspiration from the original design by NoizeWorks (https://www.printables.com/model/536359).
Not only does it use half the filament and take half the time to print compared to the original model, but it can also be printed in a single batch on the K1 !
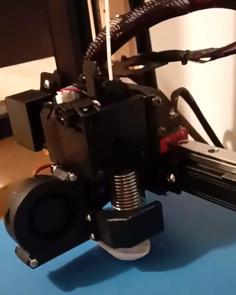
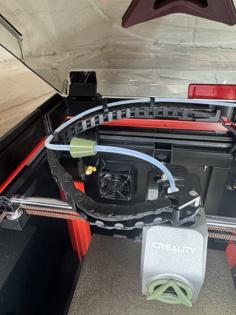
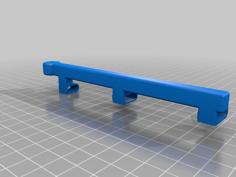
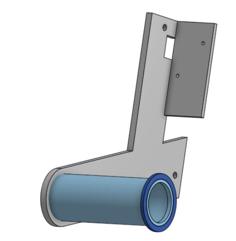
The enlarged room for the drag chain allows the reverse Bowden to also fit seamlessly in that space which was a requirement for my drag chain setup (see information below). While the tilted design may not be the most aesthetically pleasing, it serves its purpose perfectly, leaving ample space around the bed for the Bowden tube.
So even if it is HALF of everything, it should still give you the extra clearance needed EVERYWHERE !
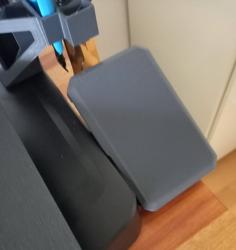
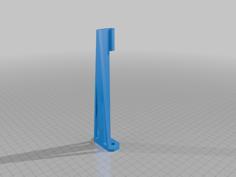
The model is already oriented and ready to print in one single go, only requiring some support for printing (recommended: tree, organic, 40°, on build plate only, 2mm expansion). Should come under the 7h mark in petg and consume less than 200gr.
The model is tall, the machine shaking should normally not be a problem but it is always a good idea to try reduce the shaking by mechanical means as well as control your jerk settings.
Instead of the side printing proposed, you might also print it if you prefer in the orientation it would be use thereafter. It would requires slightly more support material in this case.
I see that people made many different modifications to the original drag chain. While I also made some modifications to mine, I cannot guarantee this tilted design would accommodate all the fanciness around. In some cases, you might just be better with the origin speedbump riser.
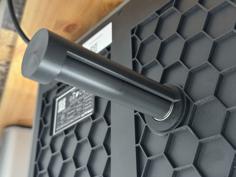
In case you are interested by my drag chain setup:
Took me about the time you saved in printing to design this riser, if you are happy buy me a beer (direct credit card link) or send some of the saved filament ^^
| Creality_K1_HalfRaiser_Complete.3MF | 1.7MB | |
| Creality_K1_HalfRaiser_Complete.STL | 7.5MB |