CPAP Blower System For 3D Printer 3D Printer Model
The file 'CPAP Blower System For 3D Printer 3D Printer Model' is (stl) file type, size is 398.6KB.
The file 'CPAP Blower System For 3D Printer 3D Printer Model' is (stl) file type, size is 398.6KB.
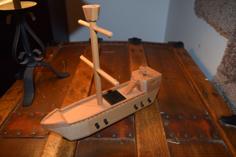
Questo è un sistema tipo CPAP pensato e installato sulla mia FLSUN SR. L'incremento di prestazioni in termini di raffreddamento è impressionante... anzi forse è troppo efficace.
L'occorrente per realizzare questo sistema è questo:
1- i modelli che ho pubblicato qui
2- un raccordo a Y come questo: https://www.thingiverse.com/thing:6737097
3- un tubo flessibile da 32 mm di diametro (io ho recuperato un tubo flessibile in dotazione a un aspirabriciole portatile come questo: https://amzn.to/4dxt37z
4- una pompa per gonfiabili come questa: https://amzn.to/3XheEGQ o questa: https://amzn.to/4cHH7tY
5- un piccolo circuito MOSFET per regolare la velocità della ventola: https://amzn.to/4cBh1sD
6- uno step down a DC DC da 12/24v a 5v tipo questo per USB: https://amzn.to/3MflJ4y o questo: https://amzn.to/3Axx11E
7- opzionale: dei condensatori elettrolitici per eliminare eventuali interferenze (io in casa avevo questi: https://amzn.to/4dCQxZg)
8- un saldatore a stagno e un po' di pazienza.
Una volta stampati i pezzi e reperito il materiale andremo a fare le seguenti operazioni:
0- smontate il vostro sistema di raffreddamento
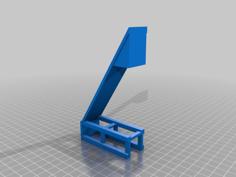
1- installare il ventilatore sulla SR usando il supporto quadrato come base per ancorare la pompa al soffitto della camera di stampa (ancoratela con delle fascette plastiche)
2- Installate il raccordo a Y sull'effector della SR verificando che non vi siano interferenze con il corpo estrusore o altro.
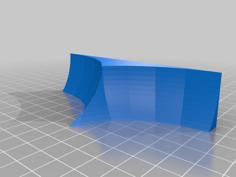
3- collegate le parti installando il tubo flessibile al raccordo a Y e alla pompa (mediante il raccordo a gomito 45°)
4- tagliate il cavo dell'alimentatore della pompa a circa 10/15 cm dallo spinotto finale e scopritene i cavi eliminando le guaine
5- saldate i componenti elettronici secondo lo schema qui pubblicato (io ho anche levato la presa USB dal convertitore e poi ho saldato i fili sulle piste centrali)
6- togliete alimentazione alla SR e procedete al collegamento all'uscita ventola della MB
7- verificate tutti i collegamenti e poi collegate il jack 12v alla pompa (io ho creato una piccola box a lato della SR ma potete benissimo installare tutti i componenti all'interno - dipende dalla lunghezza dei cavi)
8- alimentate ora nuovamente la SR e l'alimentatore della pompa
9- verificate il funzionamento del sistema
10- divertitevi a stampare
N.B.: nel mio caso, con cartuccia hotend di tipo standard come l'originale, la potenza del raffreddamento er a veramente troppo e mandava in crash klipper perchè raffreddava troppo l'hotend! Nel mio caso ho risolto settando il raffreddamento di base della mia SR con la ventola max 60% della velocità.
N.B.2: l'installazione dei condensatori è opzionale, ma nel mio caso questo sistema generava una interferenza che disturbava il segnale della webcam USB collegata alla MB. Installando i condensatori ho limitato i picchi di tensione che generavano il disturbo.
Here's the English translation:
This is a CPAP-like system designed and installed on my FLSUN SR. The performance increase in terms of cooling is impressive... perhaps even too effective.
The items needed to create this system are:
1- The models I've published here
2- A Y-connector like this: https://www.thingiverse.com/thing:6737097
3- A flexible tube with a 32 mm diameter (I repurposed a flexible tube from a portable handheld vacuum cleaner like this: https://amzn.to/4dxt37z)
4- An inflatable pump like this: https://amzn.to/3XheEGQ or this: https://amzn.to/4cHH7tY
5- A small MOSFET circuit to regulate fan speed: https://amzn.to/4cBh1sD
6- A DC-DC step-down converter from 12/24v to 5v for USB, like this: https://amzn.to/3MflJ4y or this: https://amzn.to/3Axx11E
7- Optional: electrolytic capacitors to eliminate potential interference (I had these at home: https://amzn.to/4dCQxZg)
8- A soldering iron and some patience.
Once you've printed the parts and gathered the materials, proceed with the following steps:
0- Disassemble your current cooling system
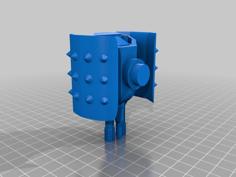
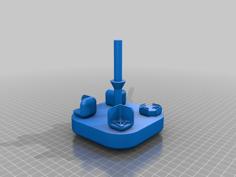
1- Install the fan on the SR using the square support as a base to anchor the pump to the ceiling of the print chamber (secure it with plastic ties)
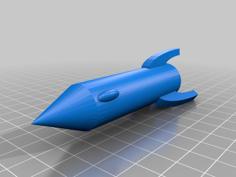
2- Install the Y-connector on the SR's effector, ensuring there's no interference with the extruder body or other components
3- Connect the parts by installing the flexible tube to the Y-connector and the pump (using the 45° elbow connector)
4- Cut the pump's power cable about 10/15 cm from the final plug and expose the wires by removing the sheaths
5- Solder the electronic components according to the diagram published here (I also removed the USB socket from the converter and then soldered the wires to the central tracks)
6- Disconnect power from the SR and proceed to connect to the fan output of the motherboard
7- Check all connections and then connect the 12v jack to the pump (I created a small box on the side of the SR, but you can easily install all components inside - it depends on the length of the cables)
8- Power up the SR and the pump's power supply again
9- Verify the system's operation
10- Enjoy printing
Note: In my case, with a standard hotend cartridge like the original, the cooling power was really too much and caused Klipper to crash because it was cooling the hotend too much! I solved this by setting the base cooling of my SR with the fan at a maximum of 60% speed.
Note 2: The installation of capacitors is optional, but in my case, this system was generating interference that disturbed the signal of the USB webcam connected to the motherboard. By installing the capacitors, I limited the voltage spikes that were causing the interference.
| FLSUN_SR_Cpap_Y_duct_v5.stl | 856.8KB | |
| raccordo_pompa_CPAP.stl | 234.0KB | |
| supporto_pompa_CPAP.stl | 104.4KB |