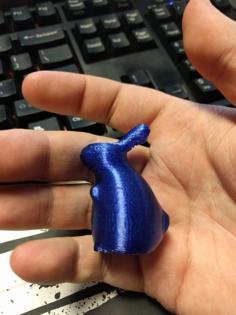
Bugs Bunny 3D Printer Model
The file 'Bugs Bunny 3D Printer Model' is (stl,txt) file type, size is 10.6 MB.
The file 'Bugs Bunny 3D Printer Model' is (stl,txt) file type, size is 10.6 MB.
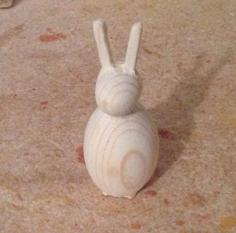
Bugs Bunny, a fictional cartoon character in the Warner Bros. Looney Tunes/Merrie Melodies series.
Bugs is an anthropomorphic gray and white rabbit who is famous for his flippant, insouciant personality. Due to Bugs' popularity during the golden age of American animation, he became not only an American cultural icon and the official mascot of Warner Bros. Entertainment, but also one of the most recognizable characters in the world.
Bugs' trademark phrase is: "Eh...What's up, doc?"
This model is designed to be paired with my Elmer Fudd model to complete the full iconic scene with Bugs' finger in Elmer's gun (or scythe).
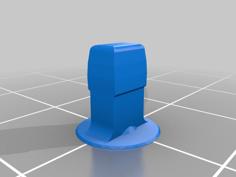
No supports are required. Two pieces contains built-in supports, optional parts without the built-in supports are also supplied if you want to use your slicer supports. If you have the proper filament colors, no painting is needed.
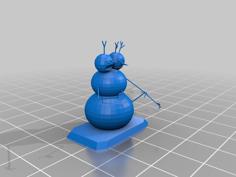
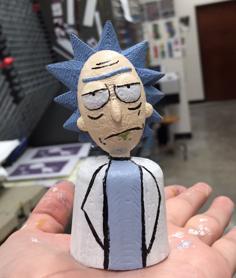
The assembled Bugs model is 134mm tall.
Enjoy!
...........................................................................................................
Print Instructions:
Supports: No
Resolution: .2mm
Infill: 10%
Notes:**
Refer to the notes below for a few helpful printing and assembly instructions.
...........................................................................................................
Building the model
Colors
Black: (Paramount3D PLA - Black)
whiskers_right
whiskers_left
eye_black_right
eye_black_left
hole_black
..
Light Pink: (eSun ABS - Pink)
ear_right
ear_left
nose
..
White: (Overture PLA - White)
eye_white_right
eye_white_left
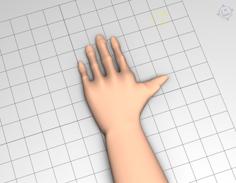
hand_right
hand_left
body_white
body_white_nosupports (optional part without built-in supports)
..
Gray: (Paramount3D PLA -Prototype Gray)
body_gray
body_gray_nosupports (optional part without built-in supports)
body_gray_extra
..
Brown: (Gizmo Dorks ABS - Brown)
hole_brown
..
Natural: (eSun ABS - Natural)
teeth
..
...........................................................................................................
Printing and assembly tips
Printing tips
1 - No supports are required. The body_gray and body_white parts are presented with built-in supports as well as optional pieces without supports if you want to use your slicer supports.
2 - There are some pieces that may need brims or rafts, use your discretion. When setting up my prints I prefer to be conservative, especially since the base of many parts are hidden when inserted into another part. For the smaller parts, a good first layer is helpful.
*I used brims on:
hand_right
hand_left
nose
teeth
eye_black_right
eye_black_left
3 - Bugs' nose is sometimes shown as black, red or pink. I went with the light pink for my print.
4 - The model is meant to be displayed with Bugs' finger in Elmer's gun, however he can also be displayed standalone pointing to a sign. I'm hoping some makers will produce one or more appropriate signs and post them as remixes.
..
Assembly tips:
1 - Take your time gluing the model together and enjoy the process.
2 - I used E6000 sticky craft glue to put this model together. The sticky glue allows more time to position the parts than a fast drying superglue. I have 'fat fingers' and a shaky hand, so the sticky glue works out best for me, especially with small pieces. Just remember to leave enough time for the glue to set before combining too many parts.
3 - The hole_black has some rotational leeway when fitting into the hole_brown. I suggest gluing in the Bugs figure (body_gray/body_white/body_gray_extra/hand_right already glued together) into the hole at the same time as you glue the hole_black and brown together.
4 - The holes for the whiskers are symmetrical but for some reason on my printer I get a slight bridging hang on the hole for the left whiskers. If you have any problem fitting the whiskers in, just clean out any loose filament from the holes.
5 - Refer to the assembly diagrams in the pictures section as well as the uploaded pictures for putting the model together. The model is meant to be glued.
Do not hesitate to ask questions, feedback is essential to making better models.
| body_gray.stl |
| body_gray_extra.stl |
| body_gray_nosupports.stl |
| body_white.stl |
| body_white_nosupports.stl |
| Bugs_Bunny.txt |
| ear_left.stl |
| ear_right.stl |
| eye_black_left.stl |
| eye_black_right.stl |
| eye_white_left.stl |
| eye_white_right.stl |
| hand_left.stl |
| hand_right.stl |
| hole_black.stl |
| hole_brown.stl |
| nose.stl |
| teeth.stl |
| whiskers_left.stl |
| whiskers_right.stl |