BIQU BTT H2 V2S Fan Duct Part Cooler Rev.2 3D Printer Model
The file 'BIQU BTT H2 V2S Fan Duct Part Cooler Rev.2 3D Printer Model' is (stl) file type, size is 2.5MB.
The file 'BIQU BTT H2 V2S Fan Duct Part Cooler Rev.2 3D Printer Model' is (stl) file type, size is 2.5MB.
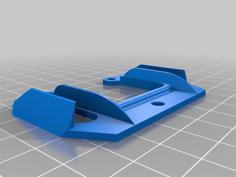
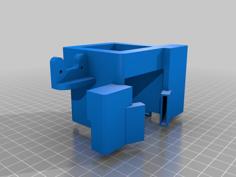
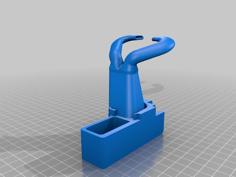
Fan Duct Part Cooler Revision 2
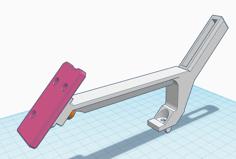
The second iteration of my H2 V2S part cooler is much more fluid thanks to the primary use of MeshMixer, in contrast to something more parametric. Both styles of modeling have their use cases, but when combined, you can make some truly amazing-looking 3D models that flow naturally and look much more organic.
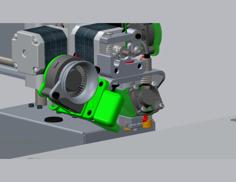
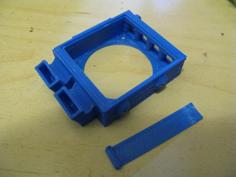
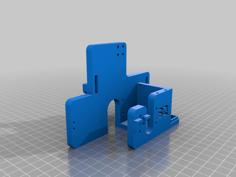
Figuring out the mounting location for the duct near the heat-break fan was a bit tricky, but the support is necessary (have you seen this thing?). I apologize, but I cannot recall if I used a longer screw or the same screw—I think I used a regular PC fan screw in a spare hole in the fan? Don't hold me to that. I lost a bunch of data in a freak accident while working on something unrelated.
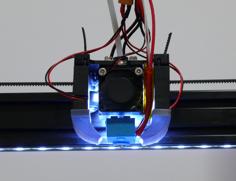
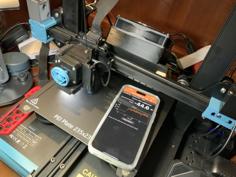
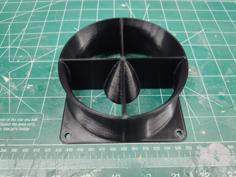
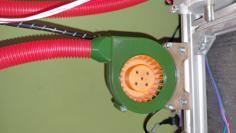
The use of larger blower fans, and double the amount, means the noise levels are perfectly acceptable in a quiet room with quiet conversation, even when running both at 100%. I have one of the common brands on Amazon, Winsinn or another. Blower fans don't get the same love as radials, so they all kind of end up sucking unless you spend way too much on fans (for this lowly pleb anyway).
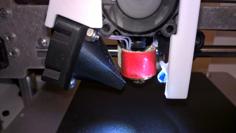
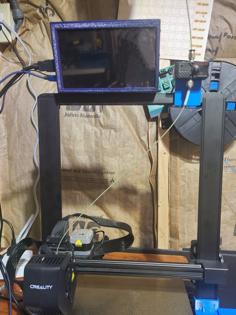
My current 3D printer is already pretty damn stealth (I made sure of that). These two fans are the only things I can hear from more than a few feet away when everything is running at 100%. That's mainly just the air being compressed down through the ducts and out, not actual fan noise made up of electric motor whine or the air being chopped at ludicrous speed—maybe plaid.
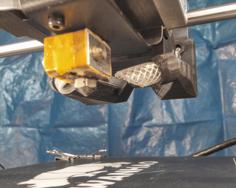
The unit hangs low, but honestly, I've only had issues when working with really bad filament that just doesn't want to stick. Even then, the duct has taken a beating and out-survived the heat break on my unit. The plastic came up, and I didn't notice until it was bad—took out my thermal sensor and heater, bummer. It was glow-in-the-dark PLA, the sucky kind that even a dryer can't fix.
Due to my data loss incident, these settings are from memory. Use them as a baseline and tweak if necessary, or use your best judgment and do your own thing. Trust me, you know your printer much better than I do. I've only owned three, and two of those I fully built myself, so I am not the best source for recommending general printer settings.
Important
This is a pretty kick-ass design! I love it and am much happier & prouder of how this model turned out compared to any of my more popular creations.
MeshMixer is especially a PITA to learn (and use when its crash happy), well that is, if you want to do cool stuff with it and actually get the program to do those things with some level of predictability and repeatability.
Figuring MM out along with the lack of accurate, advanced and detailed modeling tutorials was the main drive behind recording the process on a few things I've made.
I have MeshMixer, 3D Builder, and Tinkercad videos recorded, but editing and some narration are required before they’re ready to upload. It's definitely a time-consuming process, and I'm often juggling multiple large projects along with a personal IT consulting/engineering business, which means I have to prioritize everything to manage my time efficiently.
I will post to YouTube, along with exclusive content on Patreon. Some of this content will be decided by user polls, such as new 3D models, video content, etc. For the remaining content, I’ve got tons of videos recorded, with plans to set up a second workstation just for that, to make the process less involving each time.
These models take me a long time to make, which means I need to manually edit the videos down to a reasonable length, but they will still be detailed and in-depth. Long-videos + David’s craziness... this should be fun! Lemme read up on how not to get banned from YouTube first—I’m not sure if that would take out my Google account with it, and I happen to use that.
Note: I may move my preferred home base for 3D models from Thingiverse. I’m not sure where just yet, but I’ll make it easy to find once I decide. The ads are getting a little ridiculous on this platform. Did a bunch of apples take over, or did the current people just turn into apples? I digress.
| BIQU_BTT_H2_V2S_Fan_Duct_Rev.2.stl | 2.6MB | |
| dFhvvV8qiae.stl | 3.9MB |