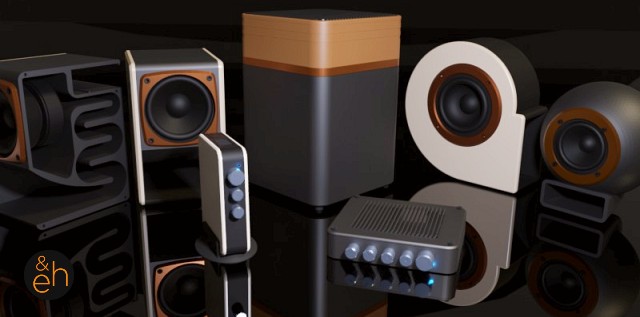
The full set of stereo components: https://www.thingiverse.com/guppyk/collections/my-stuff
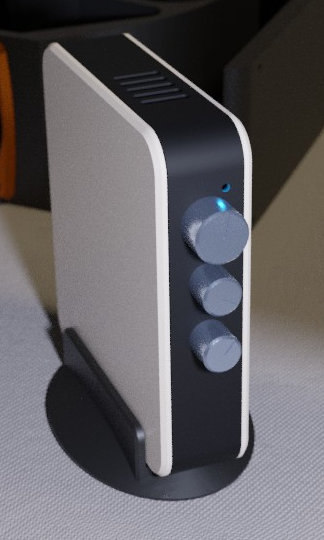
UPDATE 31Jan2021: The new 2.1 Bluetooth amplifier enclosure is online:
https://www.thingiverse.com/thing:4743037
UPDATE 19Feb20: The new isobaric subwoofer is now online:
https://www.thingiverse.com/thing:4765663
In my line of fully printable back-loaded horn speakers, this is (likely) going to be my last design (...just received some really interesting drivers for a DML system, so expect more experimental designs in the future xD ).
Strictly speaking this is not a back-loaded horn (at least not like V2.0). This one comes with a relatively (for a printed design) large main chamber (without corners or flat faces) and with a small horn attached to the back and opening up to the front.
Once again a complete redesign, looks super stylish, super cheap, no soldering, and is fully printable (and the entire body is still a single print which fits an 18x18 cm printer bed).
Here the differences/characteristics (as compared to V2.0/V3.0):
 | . | Amplifier This time there is no room for an internal amplifier board so these are strictly passive speakers. Just connect to your favorite amplifier. I have recently posted an enclosure based on this amplifier: 2x50W TPA3116D2 Bluetooth 5.0 Stereo Amplifier Board. Very happy with this board. It is using the same chip (TPA3116D2) as the amplifier I used in V2.0 but has a better designed board, no noise, it has treble and bass control, and great sound. All details at: https://www.thingiverse.com/thing:4713469 |
Originally these speakers were designed to serve as satellite speakers in our 2.1 system (with an old 20 cm woofer in a wooden box) so we are using it with an external 2.1 amplifier. I just completed the design for an enclosure for this TPA 3116D2 based board (very nice board): 2x50W+100W MP3 Bluetooth 2.1 Channel Amplifier Board (approx. US $ 20). It is in one of the photos above - give me a couple of days to publish.
Once again the concept remains the same. It is like kissing the frog. You kiss that 3" loudspeaker and hope it turns into a prince. And it does... (particularly in a 2.1 system, which helps overcome some of the inherent limitations of printed speakers with small full range drivers).
And here is what you will need:
If the diameter of the mounting holes (see diameters in the image above) of your driver is (slightly) different you can simply scale the entire model (all parts) in your favorite slicing app to make it fit.
PRINTING / ASSEMBLY. This should once again be a simple print. No supports or plate adhesion needed. Print in PLA (or ABS, PETG...) at 0.28 mm resolution and (around) 20% infill (I use lines). I once again printed the main body in this Carbon PLA (- not so much because it is stronger, rather because carbon gives this beautiful soft touch to the surface), and the speaker ring in silk bronze (and a few other silk colors). No gluing this time (well almost), the body is comprised of a single part. Mount 4 M3 nuts with a drop of (hot) glue to the inside of the mounting holes inside the enclosure (I have made a recess for these on the inside, so they should be easy to mount - this makes the driver easy to remove), insert the driver (this time from the outside) and attach the speaker ring and speaker with M3(with nut)-M4(without nut) screws. The feet (2 front, one back) are glued into the respective holes.
WIRING. Wiring is really simple. Attach the speaker cable to the driver and lead it out through the hole in the back. Connect to your favorite amplifier.
THEORY. Here a little theory for all those who missed V2.0: What is a back loaded horn speaker? Think of it as a reversed megaphone or gramophone. A (front) horn loudspeaker uses an acoustic horn to increase the overall efficiency of the driving element (i.e. the sound coming out at the front). A back loaded horn speaker does pretty much the same. However, here the horn is mounted at the back of the loudspeaker. So you get the direct output from the front of the driver PLUS the one from the horn at the back. Which frequencies are amplified and how well depends on the air chamber, throat (the narrow part), and on the length, design, and diameter of the horn. Particularly with small (and cheap) drivers this can very much improve the sound quality.
Enjoy!
UPDATE24Feb21: Upon request added a thicker ring (for drivers with thicker frames up to 3 mm)
| Backhorn_V4_Feet_Back.stl | 203.0KB | |
| Backhorn_V4_Feet_Front.stl | 18.0KB | |
| Backhorn_V4_Ring_Xthick.stl | 162.4KB | |
| Speaker_V4_body.stl | 3.6MB | |
| Speaker_V4_ring.stl | 113.9KB |