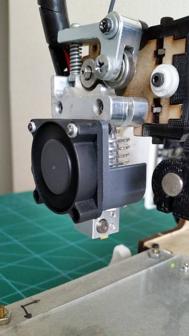
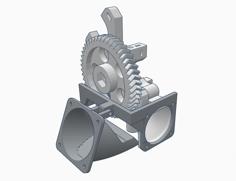
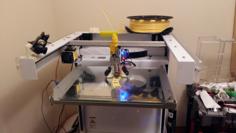
A fume extraction spacer for an AnyCubic Photon Mono X2.
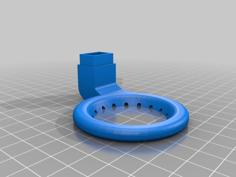
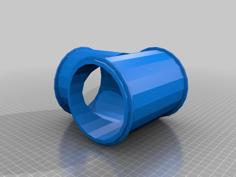
The rectangle design is designed to use this round to rectangular elbow.
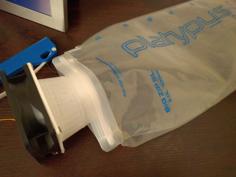
For the full fume extractor, I have this setup in this order:
The carbon and HEPA filter remove the smell and any particulates from inside the resin printer. Under heavy use I have been changing the carbon filter every 6 months and the HEPA filter every year. I based this on the recommended service intervals for carbon filters in kitchen extractor fans. You'll need a high static pressure fan to overcome the filters and the flap vent which is why I would recommend the Arctic P12 Maxs. They have a slightly higher static pressure and air flow, similar life spans, and are cheaper when compared to a medium range extractor fan used in bathrooms, which makes them ideal for fume extraction. Make sure all joined parts are appropriately sealed with a gasket!!
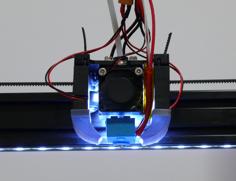
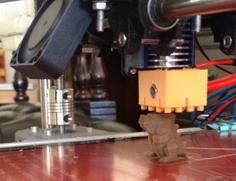
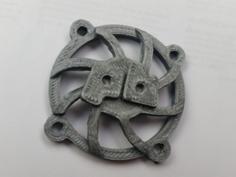
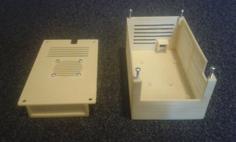
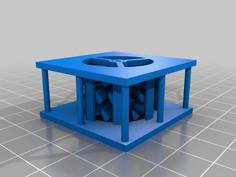
The 4 sections are held together with 4 m3x20mm bolts and 4 m3 nuts. Careful tightening them as overtightening them will flex the panels and create a counter intuitive gap between the panels. The UV box is snug on the spacer but it goes on with a little wiggle.
The front left section can be printed with or without a 30mm fan hole. I would recommend printing the section with the hole as the spacer makes quite a good seal on the printer which chokes the 120mm exhaust fan reducing the effectiveness of its extraction. You can either put a 30mm fan and cowl vent over the hole or just the cowl vent. Youll need 4 m3x20mm bolts and 4 m3 nuts to piece this section together.
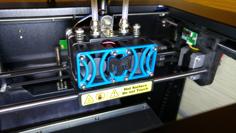
The back right section can be printed with or without an outcropping to help stabilise the elbow. I would recommend printing the outcropped section (v5.1) as the elbow wont fall out of the spacer. You'll need a drill to make 4 holes in the elbow, and 4 m3x20mm bolts and 4 m3 nuts to piece this section together.
The fan holes on the back right panel were cut using standard 40mm and 60mm dimensions, similar to work I have done with other fan mounted objects. I haven't tested whether a 40mm or 60mm fan fits to the panel so please print at your own risk!
V2: Redid measurements for front corners, raised joiners to clear resin vat
V3: Increased wall thickness to 4mm to allow more tolerance in the cover when its on the spacer
V4: Increased hole size for rectangular elbow
V5: Increased hole size tolerances (again) for rectangular elbow. Added a 40mm and 60mm fan version.
24/03/2024 V5.1: The seal around the spacer and on the lid meant air couldn't be easily pulled into the chamber which meant the outgasses werent being removed effectively. Ive added a 30mm fan hole to the front left which should allow air to move across the vat removing the outgasses. The elbow also fell out occasionally so Ive added an outcropping which you can use to bolt the elbow onto the spacer.
13/08/2024 V5.2: The bolt hole for part Back Right and Back Left caught on the arm slightly which when not under weight would case the front parts to lift. Moved the bolt hole so it will clear the arm.
| 120mmFanCutOut.dxf | 143.5KB | |
| 30mm_Fan_Cover.ipt | 569.5KB | |
| 30mm_Fan_Cover.stl | 230.4KB | |
| Back_Left_V5.2.stl | 12.0KB | |
| Back_Right_V5.2_-_110mm_x_54mm_Rectangle.stl | 18.9KB | |
| Back_Right_V5.2_-_40mm_Fan.stl | 23.1KB | |
| Back_Right_V5.2_-_60mm_Fan.stl | 25.4KB | |
| Front_Left_-_30mm_Fan_V5.1.stl | 36.2KB | |
| Front_Right_V5.stl | 12.2KB | |
| Main_Body_-_110mm_x_54mm_Rectangle.ipt | 837.5KB | |
| Main_Body_-_40mm_Fan.ipt | 730.0KB | |
| Main_Body_-_60mm_Fan.ipt | 749.5KB |