AMG GT3 Wheel Kit For Thrustmaster 3D Printer Model
The file 'AMG GT3 Wheel Kit For Thrustmaster 3D Printer Model' is (pdf,zip,stl) file type, size is 31.9 MB.
The file 'AMG GT3 Wheel Kit For Thrustmaster 3D Printer Model' is (pdf,zip,stl) file type, size is 31.9 MB.
This wheel is based on the AMG GT3 wheel and was designed to be fully 3D printed. It works with the Thrustmaster base on Xbox, PS4 and PC. There are other files that also need to be downloaded to complete this build but everything is linked in the PDF including instructions on how to put it together and parts you need to buy.
Parts in this kit:
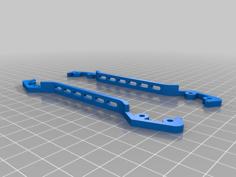
Left Panel
Right Panel
Full Wheel Plate
Back Casing
Left Handle Top
Left Handle Bottom
Right Handle Top
Right Handle Bottom
Emblem Plate
Button Guard
Button Casing
Button Casing Cap
Original Handles (Flat)
The slower you print the parts along with higher infill, the better strength your parts will have. Patience is key to get something right the first time instead of having to print it several times. The only part that will require support is the Button Casing Cap, everything else should print just fine without supports.
If you like this model or build this model, I would really appreciate it if you show your gratitude with a donation. It will help me to continue to release project files for free instead of requiring payment for downloads.
Don't forget to submit photos if you make it! Hope you enjoy racing with this wheel.
Update:
Included the SVG files for the button accents and joystick arrows. You can use a vinyl cutter to cut these out.
Update: January 26th, 2019
As per requests,
Update: January 29th, 2019
A new handle design has been included in the kit. These updated handles are curved and a lot more comfortable than the original flat handles.
Update: May 1st, 2021
This project is now two and a half years old as of May 2021 and since I no longer have a sim rig (sadly), I will be discontinuing support for this wheel.
Since there are still people out there who use this wheel and those who want to build the wheel in the future, I am providing final updates to the project to include changes I made throughout the years and solving issues that some users may have experienced.
Full_Plate.stlCircuit_Board_Mount.stlWheel_Plate.svgGerber_Files.zip.zip file and the only option you need to change on the website is the PCB Color to whichever you prefer. You can leave all other options to the default values. https://www.amazon.com/gp/product/B01DUC1O68/ref=ppx_yo_dt_b_search_asin_title?ie=UTF8&psc=1JoystickThresholds.h that contains the threshold values for the joystick. 9600. The program will then walk you through the steps of obtaining the best threshold values. Once completed, it will print the values to the serial monitor and you simply need to copy these values into the JoystickThresholds.h file. Once you've copied the values, upload the AMG_GT3_Wheel.ino sketch to the Arduino. | AMG_GT3_Wheel_Kit_Updates_2021.pdf |
| Arduino_Files.zip |
| Assembly_Manual.pdf |
| Back_Casing.stl |
| Button_Casing.stl |
| Button_Casing_Cap.stl |
| Button_Guard.stl |
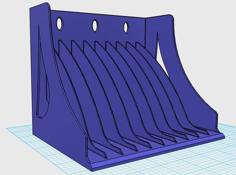
| Circuit_Board_Mount.stl |
| Circuit_Files.zip |
| Emblem_Plate.stl |
| Flat_Handles_OLD.zip |
| Full_Plate.stl |
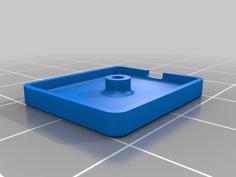
| Joystick_Cover.stl |
| Left_Handle_Bottom.stl |
| Left_Handle_Top.stl |
| Left_Panel.stl |
| Right_Handle_Bottom.stl |
| Right_Handle_Top.stl |
| Right_Panel.stl |
| SVG_Files.zip |