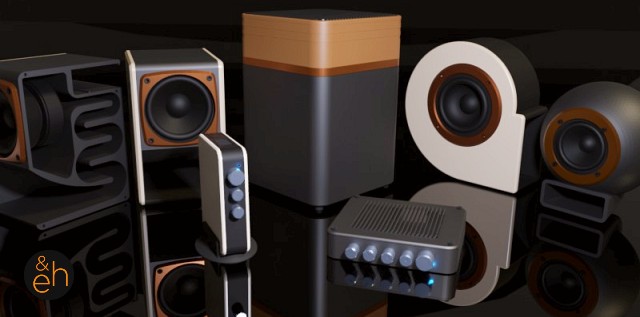
The full set of stereo components (and plenty of other stuff): https://www.thingiverse.com/guppyk2/collections/my-stuff
UPDATE 19Feb20: The new isobaric subwoofer is now online:
https://www.thingiverse.com/thing:4765663
This design is largely identical with the original design but with a few improvements/changes:
Ideally use in a 2.1 setup. Currently working on a fully printable subwoofer (UPDATE 10Feb21: Subwoofer is almost done, expect publication on 19 Feb), e.g. with https://www.thingiverse.com/thing:4743037
Remember, printed designs have a few inherent limitations. One is simply the size of what can be printed on a standard 3D printer (most back horn speakers you will find are rather room-filling, both in terms of sound as well as size), so even the 4" version is still very much a down scaled version. Second is the material. Printed surfaces are very reflective (so add some damping to the main chamber) and although at high infill (approx. 60%+) their properties are similar to MDF you may not want to print a large piece with 18 mm walls at 60%+ infill (so this design has 6 mm walls and I print at 20% infill). So yes, printed speaker enclosures are always a compromise. Then again it is possible to print such beautiful designs (like folded horns), that would otherwise be extremely hard to implement. So enjoy the beauty and sound of what you have printed... xD
Electronics are the same as in the 3" version. Still super cheap (but feel free to upgrade...), this time with a $ 15 full range driver, a $ 1 Bluetooth board and a $ 3.5 amplifier. Total cost for electronics should be around USD 20.
Here is what you will need:
Any combination will do (as long as the driver is 4" or smaller so it fits the enclosure - if you use a different driver you may have to slightly adapt the mounting holes or scale the model). This design and components are intended to be super economical. The better your components (particularly the driver), the better the sound. In other words, before you kiss the frog, make sure it has the heart of a prince. xD
Basically all electronic components are optional. You can just as well use V2.0 as passive speaker. Just connect to your favorite amplifier, preferably in a 2.1 setup.
PRINTING and ASSEMBLY. This should be a simple print. You will notice that the body has a 1 mm cover on one side. This is to give it more stability and make it easier to print and remove from the printer. No support or attachments needed. Print in PLA (or ABS, PETG...) at 0.28 mm resolution and 20%+ infill.
The side panels can either be printed or cut (15 x 20 cm) from 6-8 mm plywood (I used beech in the 3" version but printed the entire enclosure for the 4" version). Attach the front and speaker (mount the driver from the outside or inside - I have added 2 slightly different rings for this - outside makes it much easier to access the driver after gluing the side panels) with M3 screws and the back panel that covers the electronic compartment as well. Add some damping to the straight walls of the main chamber. Side panels (print one each of panel A and B) now have pins that will fit the holes in the body to make them easier to fit. Glue the side panels to the body (after testing your setup). Print and add the four feet (ideally in TPU but PLA will work).
WIRING. Please refer to the wiring diagram above. For the Bluetooth/active speaker you will need basic electronic and soldering skills! The passive version, however, should be really simple to connect. Make sure that you know what you are doing (particularly dealing with high voltage). All at your own risk and no warranty whatsoever!
This is for the list of supplies above and may be different if you use different components. Connect the output from the 12V power adapter to the POWER IN (marked VCC and GND) on the amplifier board PLUS to the little LM1117 board (VIN and GND). The 5V output (VOUT and GND) from the LM1117 board is connected to the power in on the BT board.
If you use this as a single MONO BT speaker, bridge the L and R output coming from the BT board (this is important, it will give you a mono signal, instead of half stereo!). Now you connect the bridged L/R and GND from the BT board to line in (IN-L OR IN-R and GND) of the amplifier (if you are using a stereo amplifier, connect to either the left OR right channel). Finally connect the output from the amplifier (L+ and L- OR R+ and R-) to the + and - on the speaker. Sounds complicated but is actually pretty straightforward when you look at the wiring diagram. Try all this before mounting in the enclosure (this really helps with troubleshooting).
If you are using this as a stereo BT receiver, do NOT bridge L and R and connect your second (passive) speaker to the second channel.
ENJOY!
| Speaker_Backhorn_V4_Feet.stl | 13.8KB | |
| Speaker_Back_V2_4inch_PAM8403.stl | 103.2KB | |
| Speaker_Back_V2_4inch_passive.stl | 77.4KB | |
| Speaker_Body_V2_4inch.stl | 944.1KB | |
| Speaker_Ring_V2_4inch.stl | 295.8KB | |
| Speaker_Ring_V2_4inch_frontmount.stl | 312.4KB | |
| Speaker_SidePanel_PartA_V2_4inch.stl | 865.6KB | |
| Speaker_SidePanel_PartB_V2_4inch.stl | 170.8KB | |
| Speaker_Side_Bottom_Wood.dxf | 13.2KB | |
| Speaker_Side_Top_Wood.dxf | 13.0KB |